15 Renter-Friendly Decor Ideas That Won’t Cost You a Security Deposit
Renting used to mean living with beige walls, ugly builder-grade light fixtures, and mismatched cabinet hardware you had no permission to touch. That’s changed. The renter-decor world has quietly built a huge toolkit of reversible upgrades—peel-and-stick everything, tension rods, command strips, magnetic anything—that let you completely transform a space and put every last piece back exactly the way it was on move-out day.
The rule for renter decor is simple: nothing you do should leave a mark that a Magic Eraser and a scrap of matching paint can’t fix in under ten minutes. Every idea below passes that test. Some are tiny weekend projects. A few are full-day room refreshes. All of them are things you can genuinely undo when the lease ends, without losing a dollar of your deposit.
The ideas are grouped loosely from smallest to largest: quick swaps first, then wall and window treatments, then the bigger kitchen and bathroom transformations that make the most dramatic difference. Start wherever you like, but pick just one idea to try first—rentals get overwhelming when you try to change everything in a single weekend.
1. Swap the light bulbs before you do anything else
The single fastest, cheapest way to make any rental feel like a real home is to change every light bulb in the apartment to 2700K warm white. Builder-standard bulbs are almost always 3500-4000K, which reads as fluorescent-office lighting and makes even a beautifully styled room feel clinical. Twenty dollars of Philips or GE warm-white LEDs will do more for the mood of your apartment than a hundred dollars of throw pillows.
Buy the bulbs before you move in a single piece of furniture. Walk around, count every socket, and buy one warm-white LED per socket plus two spares. Store the original bulbs in a labeled shoebox in your closet; they go back into the sockets on your last day.
Look for the 2700K or soft-white marking on the box, and ideally the color rendering index of 90 or above. High-CRI bulbs make skin tones look natural, food look appetizing, and your décor colors read the way they were meant to.
Add a smart bulb or two to the fixtures you use most—bedside lamp, living-room floor lamp, reading corner. Hue, Wiz, and Kasa all offer bulbs that dim from bright warm white down to a candle-warm 1800K glow, letting you shift a room from focused morning work to quiet Sunday evening with one tap.
2. Use tension rods to skip drilling window treatments
Nothing screams rental louder than the plastic mini-blinds every landlord installs, and nothing is easier to hide than a full-length linen curtain hung on a tension rod. Buy a rod that fits the inside width of your window frame, extend it, and mount it inside the recess—no screws, no anchors, no permanent marks.
For living rooms and bedrooms, use inside-mount tension rods that sit flush inside the frame. The look is much cleaner than a rod screwed above the frame, and it visually raises the ceiling because the eye reads the whole wall as one uninterrupted vertical plane.
Pick curtains that are longer than your window—by at least six inches, ideally ten. Cream, oatmeal, warm gray, and sage all read as designed without competing with the rest of the room. Skip pure white; it picks up any yellow tone from your rental’s off-white walls.
For bathrooms, tension rods double as inside-shower rods and outside-window rods. Hang a short café curtain on a tension rod across the bottom half of a window that faces a neighbor’s wall; you get privacy where you need it and natural light coming through the top.
3. Peel-and-stick a single accent wall
Wallpapering an entire room in a rental is usually more effort than it’s worth, but a single accent wall—typically behind the bed, sofa, or dining table—is a two-hour project that transforms the room. Peel-and-stick wallpaper from brands like Chasing Paper, Tempaper, and Rebel Walls has come a long way; the print quality is genuinely good and the paper truly does peel off in one piece.
Measure the wall carefully before ordering. Most peel-and-stick paper comes in 24 or 28-inch rolls, so plan how many panels you’ll need and add ten to fifteen percent for pattern-matching waste. Prep matters: wipe the wall with a slightly damp cloth, let it dry, and fill any nail holes with matching spackle.
Work from the top down, one panel at a time. Peel off the first eighteen inches of backing, press the top of the panel to the wall, and slowly peel the rest as you smooth downward with a plastic squeegee. If a seam misaligns, gently lift and re-set—the paper is genuinely repositionable for the first several minutes.
Pick a pattern that’s calm enough to live with for a couple of years. Small-scale botanicals, subtle grasscloth textures, and hand-drawn florals in soft warm colorways all age well. Skip anything too high-contrast or trendy; you’ll get sick of a bold graphic pattern faster than you think.
4. Hide the ugly rental carpet under a large area rug
Almost every apartment carpet is some shade of noncommittal beige, gray, or off-white, and almost none of it flatters furniture. The fix is a single oversized area rug in a color and texture you actually like, sized so it visually covers most of the room. In a living room, at least the front legs of every seating piece should sit on it; in a bedroom, extend the rug two to three feet past the bed on both sides.
Layering a large jute or wool rug over wall-to-wall carpet bothers some renters at first—it feels like too much. It isn’t. The layered look is a staple of designer-styled rooms and works exactly because rental carpet is such a bland backdrop.
For bedrooms with white or beige carpet, a cream wool rug with a subtle pattern warms the whole room. For living rooms, jute in a soft honey-brown or a low-pile wool in a warm neutral both work beautifully. Skip pure white; rental carpet sheds fibers that show against light rugs.
Anchor the rug with a rug pad, even over carpet. A thin felt-and-rubber pad keeps the rug from sliding and helps the layered rug lay flat rather than curling. On move-out the rug rolls up, the pad goes to the trash, and the flattened carpet underneath springs back quickly.
5. Hang art with removable strips, not nails
The single question every renter asks first is how do I hang things without holes. Command Picture Hanging Strips—the interlocking Velcro-style ones, not the round hooks—are the answer for everything up to sixteen pounds. Two pairs of large strips confidently hold a decent-sized framed print; four pairs hold a heavy gallery frame.
Prep the wall properly and the strips will hold. Wipe with rubbing alcohol (not a household cleaner, which leaves residue), let it dry, then press each strip firmly for thirty seconds. Wait an hour before hanging anything—that first hour is when the adhesive really cures.
For a gallery wall, lay everything out on the floor first, take a phone photo, and rough-plan the spacing. Cut kraft-paper templates the size of each frame, mark them with an H at the hanger point, and blue-tape them to the wall to preview the arrangement before you commit.
For anything heavier than sixteen pounds—an oversized mirror, a chunky wooden shelf, a canvas—switch to J-hooks that use tiny brad nails smaller than a straight pin. Those leave holes small enough to fill with a fingertip of spackle at move-out, and no landlord will notice.
6. Cover ugly kitchen cabinets with removable contact paper
If you’ve been given oak-orange 1990s cabinets or scuffed white laminate, contact paper is the fastest possible transformation—half a day’s work for a completely different-looking kitchen. Modern brands like d-c-fix and RoomMates make contact papers that legitimately look like real oak, walnut, or matte black.
Remove the cabinet doors and drawer fronts before you start. This is the single most important step—trying to apply contact paper on hanging doors leads to bubbles and uneven edges. Take pictures of which door came from which opening, label the hinges with painter’s tape, and lay everything flat.
Cut each piece two inches larger than the door on every side. Apply the paper starting from the top edge, peeling the backing in stages and using a plastic smoother to press out bubbles. Wrap the paper around the sides of the door by an inch, trim with a fresh utility blade, and use a pin to release any small bubbles that survive.
Swap the hardware while the doors are off—a two-minute per door change that finishes the transformation. Cheap brushed brass or matte black knobs will make the cabinets look genuinely refinished. Save the original hardware in a labeled ziplock; on move-out you swap them back in five minutes and the contact paper peels off with a hair dryer on low heat.
7. Replace the shower curtain and bathroom hardware
A rental bathroom transforms more from a shower curtain change than from almost any other single swap. Ditch the plastic vinyl liner, buy a heavy cotton or linen shower curtain in a warm neutral, and add a clear PEVA liner behind it. Brass or matte-black shower curtain rings finish the look. Fifteen minutes, huge visual impact.
For the towel bar, toilet paper holder, and hooks, unscrew the builder hardware, bag it in your closet, and install your own in the same holes. Amazon has brass and matte-black bathroom hardware sets for thirty to fifty dollars that look boutique-hotel. On move-out you swap the originals back in ten minutes.
A single small piece of framed art or a small plant on the vanity transforms the bathroom further. Bathrooms are usually the smallest room and the easiest to fully redecorate, but they get ignored because nobody spends time there. Twenty minutes and eighty dollars in a rental bathroom returns more visual improvement per dollar than any other room.
If your bathroom mirror is builder-basic and mounted with adhesive strips rather than screws (many are), hang a decorative round mirror over it using command strips. Don’t try to remove the original mirror—just cover it. A rattan or brass-framed 24-inch round mirror over a boring rectangular mirror completely changes the room.
8. Use freestanding bookshelves as room dividers
Studio and open-plan renters often need to visually separate spaces without building walls. An open-backed bookshelf—the kind with shelves you can see through from both sides—is the perfect solution. It divides the room visually, gives you storage, and lets light continue to flow so the space still feels open.
IKEA’s Kallax and Vittsjo lines, as well as tall open shelves from Target and West Elm, all work well. Look for units at least five feet tall—anything shorter reads as furniture rather than architecture. Position the shelf perpendicular to the longest wall, three or four feet in from the corner, to create a small bedroom nook behind it.
Style the shelves from both sides. Because the shelf is a divider you’ll see it from two angles. Alternate stacked books with a small plant, a woven basket, a piece of framed art propped rather than hung, a small ceramic vessel, a candle. The rule is one styled object per two horizontal linear feet, with each object varying in shape and material.
For extra stability in a rental where you can’t anchor to a stud, place the bottom two shelves with the heaviest items—stacked books, a small crate of records. The weight down low keeps the whole shelf steady. Never put breakables on the top shelf of a freestanding divider.
9. Layer lamps instead of relying on the ceiling fixture
Rental ceiling fixtures are almost universally bad. Boob lights in the bedroom, harsh flush-mounts in the living room, single dangling bulbs in the dining area—the fastest way to fix bad ceiling lighting is to stop using it. Add three plug-in lamps at three different heights in each main room.
The formula that always works: one tall floor lamp in a back corner, one table lamp on a side table at seated eye level, one small lamp at desk or credenza height on the opposite side. Three points of light at three heights read as intentional; a single overhead source reads as institutional. This is why hotel rooms feel more inviting than most rentals.
Buy lamps in a mix of materials to add warmth: one with a brass or matte-black metal base, one with a warm wood or ceramic base, one with a woven-rattan or textured base. Keep the lampshades in a consistent tone—cream, oatmeal, warm white—so the overall glow reads as unified. Skip pure-white shades; they read cold when the bulb is on.
For rooms with truly awful ceiling fixtures, use a plug-in pendant that hangs from a swag hook on the ceiling. Swag hooks require one small screw which counts as a nail-hole level of damage most landlords accept. Cord swag pendants from Anthropologie, Etsy, and West Elm replace the visual weight of an ugly ceiling fixture without touching the wiring.
10. Add plants where the walls are the most bare
Live plants are the single most underused rental decor tool. A room with one large floor plant reads as cared for and personal; a room without any greenery reads as temporary no matter how much furniture is in it. If you have any natural light, one floor plant per major room is a rule worth following.
Scale matters more than variety. One large plant in a room does more visual work than three small plants. A five-foot fiddle-leaf fig, monstera, or bird of paradise anchors a corner, softens the boxy geometry of a builder-grade room, and adds an organic curve to counter the straight lines. Big plants are surprisingly cheap at IKEA, Home Depot, and Lowe’s garden sections.
Put every plant in a decorative basket or planter, not the plastic pot from the store. A woven seagrass, rattan, or ceramic planter transforms a plant from garden-center inventory into an intentional piece of decor. Buy planters two to three inches wider than the plastic nursery pot, drop the plant in still in its plastic pot with drainage, and add a small saucer under.
If you’re nervous about killing plants, start with a pothos, a snake plant, and a ZZ plant—these three tolerate low light, forget-to-water schedules, and dramatic temperature swings from most rental HVAC. Once you’ve kept those alive for six months, add a rubber tree or a monstera.
11. Use decorative bins to hide rental storage sins
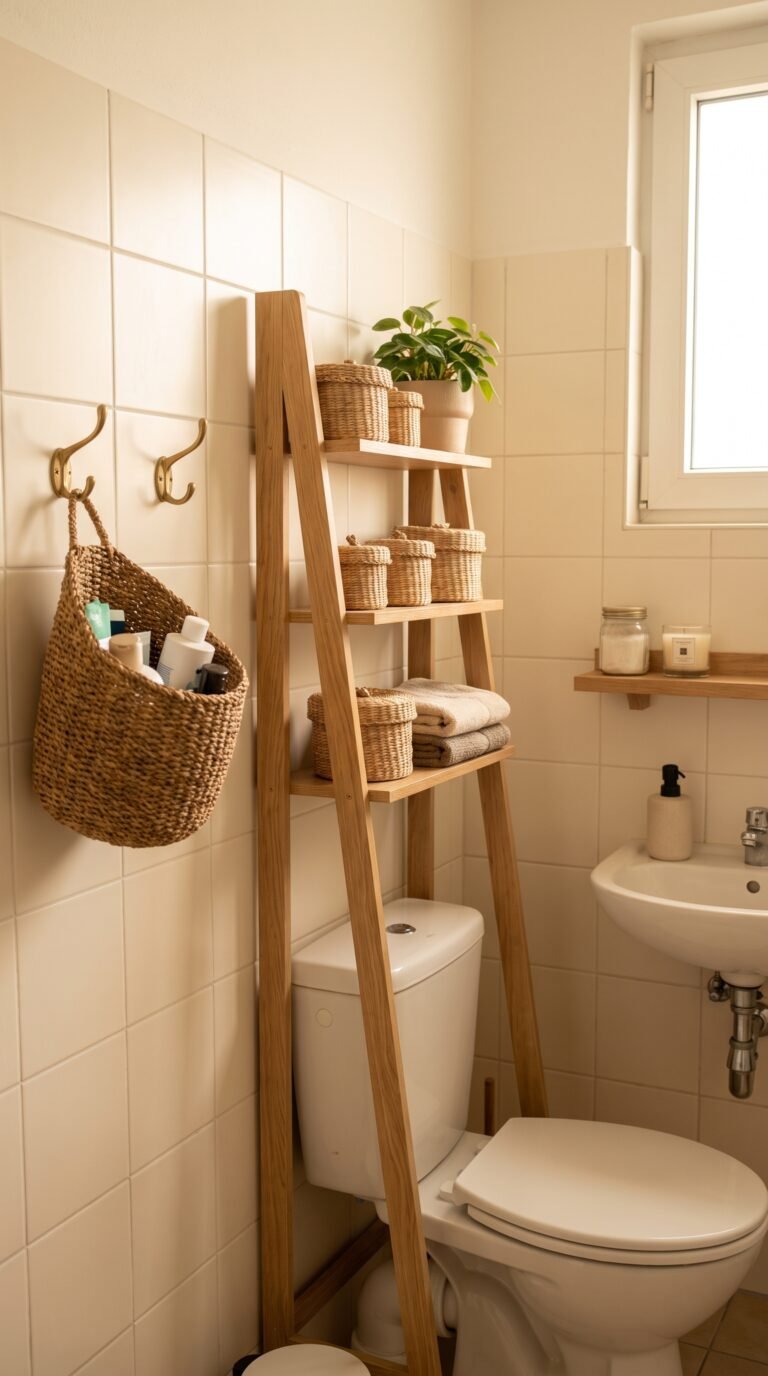
Rentals rarely have enough closed storage—single tiny closets, no linen cupboards, half-depth pantries. The workaround is to use decorative bins and baskets that visually read as intentional decor while doing the actual job of hiding your clutter. Woven seagrass, rattan, cotton canvas, and warm-wood boxes all work; matte-black wire and clear plastic do not.
Buy in the same material and finish family for the whole apartment so the storage reads as coordinated. Fifteen seagrass baskets in different sizes across the whole apartment look purposeful; three seagrass, four fabric, and two plastic look like a rummage sale. Target, IKEA, HomeGoods, and West Elm all carry consistent lines.
For open shelving, put paper towels, cleaning supplies, and mail into fabric or seagrass bins so the shelves stay visually clean. For under-bed storage, use flat canvas bins with lids—the lids matter because the bin will show from bedroom-standing-height. For entryway storage, a large woven basket next to the door catches shoes and packages without any of it being visible.
Label bins only if you truly need to. Handwritten labels on rustic tags read as personal; plastic label-maker tape reads as commercial. If you do label, use kraft-paper hangtags tied with twine, handwritten in a marker for a look that matches most warm neutral rentals.
12. Frame unframed art on picture ledges
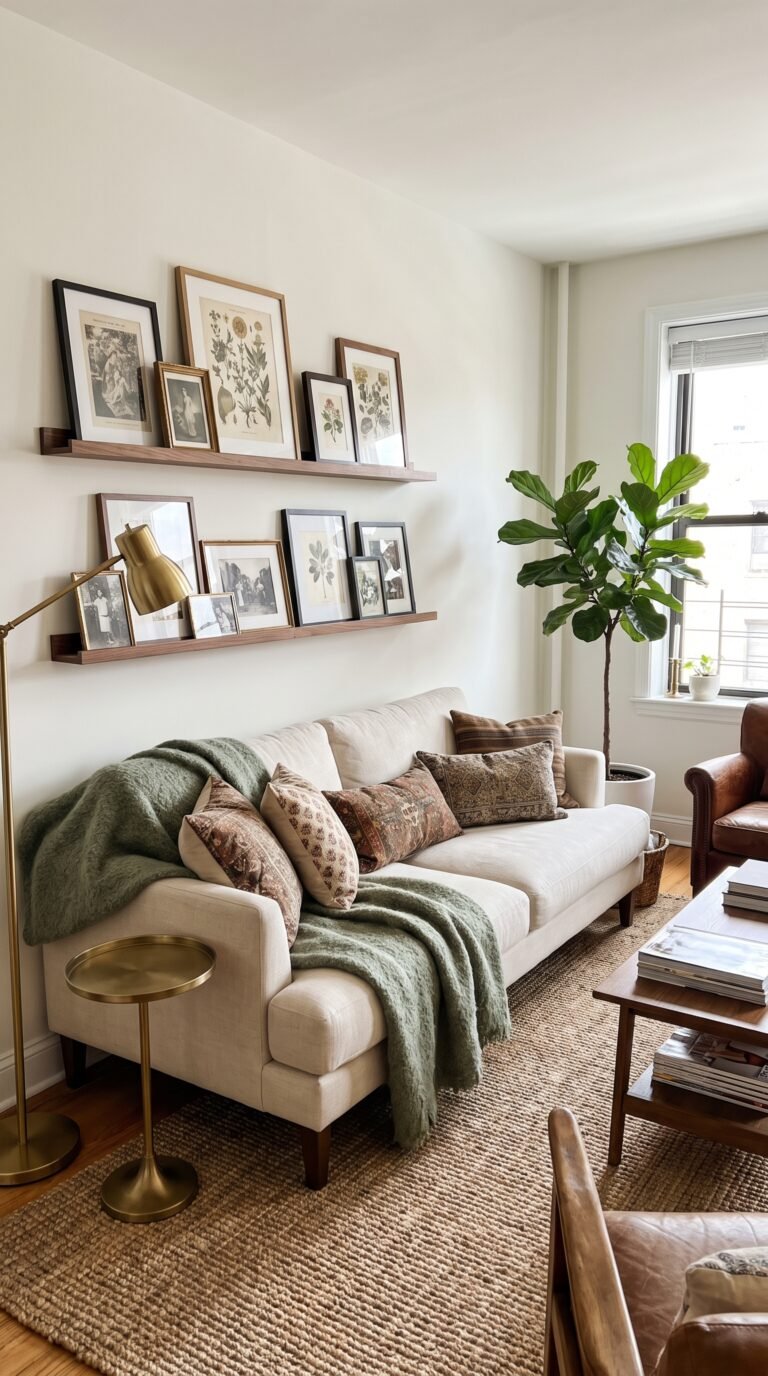
Picture ledges are the renter’s secret weapon for art walls. A single ledge, mounted with two tiny screws or heavy-duty command hooks, holds five or six pieces of art you can layer, overlap, and swap out any time. When you move, the ledge comes off, you patch two nail holes with a fingertip of spackle, and every piece of art comes with you undamaged.
IKEA’s Mosslanda ledges are the classic choice—cheap, come in white or black, and mount with a single screw at each end. Hang them above a sofa, above a bed, along a hallway, or above a dining table. A single ledge is a small commitment; three ledges stacked one above the other create a gallery wall effect that costs almost nothing and is fully reversible.
Style the ledge with layered art of different sizes. Place a large piece in the back leaning against the wall, a medium piece in front of it slightly offset, and a small piece leaning against the medium one. Add a small object—a plant, a candle, a ceramic vessel—at one end to break up the flat line of frames.
Fill your ledges slowly. The temptation is to buy ten framed prints in one afternoon; the result always looks generic. Instead, buy one piece a month—from local artists, thrift stores, Etsy sellers, or your own printed phone photos in cheap frames. A ledge that fills up over a year tells the story of your life in the apartment.
13. Add a peel-and-stick tile backsplash in the kitchen
Rental kitchen backsplashes are either nonexistent (raw painted wall behind the stove) or unfortunately styled (mid-2000s glass mosaic). Peel-and-stick tile has genuinely improved in the last few years, and cream zellige-look, warm subway tile, and terracotta hexagon options all read as real from more than a foot away. The whole project is a quiet weekend afternoon.
Measure the backsplash area carefully—height from counter to upper cabinet, width of the run, cutouts for outlets. Buy fifteen to twenty percent more tile than you calculate. Wipe the wall with degreaser, let it dry, and use painter’s tape to mark a level starting line so your first row is straight.
Work from the center outward or from one edge, depending on the pattern. Cut tiles with a sharp utility blade against a metal ruler on a cutting mat. For outlet cutouts, remove the outlet cover first, cut around the outlet, then reinstall the cover over the tile edge for a clean finish.
On move-out, the tiles come off with a hair dryer on low heat—warm the tile for thirty seconds, peel from a corner, and it releases with the adhesive still on the back. Any residual adhesive comes off with Goo Gone. Photograph the wall before and after installation and keep the photos in your lease folder in case you need them.
14. Refresh cabinet hardware with reversible swaps
Nothing dates a rental kitchen or bathroom faster than the standard oval brushed-nickel knobs every developer buys in bulk. Swapping to brass, matte black, or oil-rubbed bronze knobs and pulls is a screwdriver-only project. Twenty knobs at three dollars each is sixty dollars for a totally different kitchen. Save the originals in a labeled ziplock; on move-out you unscrew yours and screw the originals back in.
Measure the existing hardware’s screw-hole spacing before you buy. Cabinet pulls come in standard center-to-center measurements—3 inch, 3.75, 5, 6.25. If your existing pulls have a specific spacing and you don’t want to redrill, buy replacement pulls at the exact same measurement. For knobs, spacing doesn’t matter—a knob uses a single hole.
Mix metals sparingly and intentionally. Brass knobs on cabinets with matte-black faucet feels curated; brass knobs with brushed-nickel faucet, chrome light fixture, and oil-rubbed-bronze hinges feels chaotic. Pick two metals maximum—one primary, one accent—and let everything else be neutral wood, ceramic, or glass.
For a cheap and impressive upgrade, buy new cabinet knobs from Amazon, unscrew the old ones in an afternoon, and see if a kitchen you’ve been staring at for a year suddenly feels new. This is the highest-ROI rental upgrade in terms of visual change per dollar per hour spent.
15. Layer textiles to warm up a cold rental palette
Rentals almost always come in cool neutral colors—white walls, gray or beige carpet, off-white cabinets. The fastest way to warm a rental palette without painting is layered textiles: a throw over the sofa arm, three pillows in warm tones on the bed, a jute rug on the floor, cotton curtains at the window. Texture and color arrive together, no permission required.
Pick a warm palette and repeat it across the room in three or four textile touchpoints. Cream, terracotta, sage green, warm ivory, and walnut brown all layer well and warm cool spaces. Avoid mixing cool tones (blue-grays, cool taupes) with warm tones in the same room; the eye reads it as unresolved.
For sofas that came with the rental, a large cream throw draped diagonally over one arm plus two or three pillows in mixed textures completely resets the sofa’s visual weight. A boucle pillow, a linen pillow, a nubby wool pillow, and a leather or velvet pillow together create depth even if the sofa itself is bland gray or brown microfiber.
For beds, three types of texture work every time: a linen or cotton duvet, a chunky knit or wool throw folded at the foot, and pillows in mixed weaves. Skip pure polyester bedding—it looks flat and shiny in real light. Cotton, linen, and wool photograph beautifully and feel much better against skin.
You can transform almost any rental without touching a wall, drilling into a stud, or agreeing to any change your landlord would notice on move-out. The trick is that these ideas compound. A single peel-and-stick backsplash by itself feels small. A warm-bulb switch plus a tension-rod curtain plus a new shower curtain plus a large area rug and a floor plant, together, feel like a completely different apartment—and you can undo every single one of them in a single day when you move.
Start with just one idea this week. The warm bulb swap is our vote for the highest-impact, lowest-effort place to begin—it changes the entire feel of every room in the apartment in under an hour and costs less than dinner out. From there, work through the list at your own pace. Rentals should feel like home. All the tools to make that happen exist, and none of them require permission.