
25 Rental Kitchen Makeover Ideas That Need Zero Paint
Twenty-five real, tested, landlord-approved ways to make a rental kitchen actually feel like yours — with peel-and-stick everything, warm brass hardware, olive branches on the counter, and lighting that finally reads home instead of hospital. Every idea below is reversible, every one has a 4–6 mil peel-and-stick or adhesive version, and the whole list adds up to a kitchen you will not want to leave.
Rentals do not have to look rental. The reason most of them do is that the small handful of things you can change — the bulbs, the pulls, the hardware, the little bit of visible open storage — get skipped because they feel too small to matter. Together they matter more than paint would.
Here are twenty-five specific, cheap, damage-free upgrades that transform a rental kitchen. Every single one comes off cleanly on move-out day. Start with the ones that require zero installation (bulbs, textiles, styling) and work your way up to the peel-and-stick projects as you get more confident.
1. Cover ugly cabinets with oak contact paper
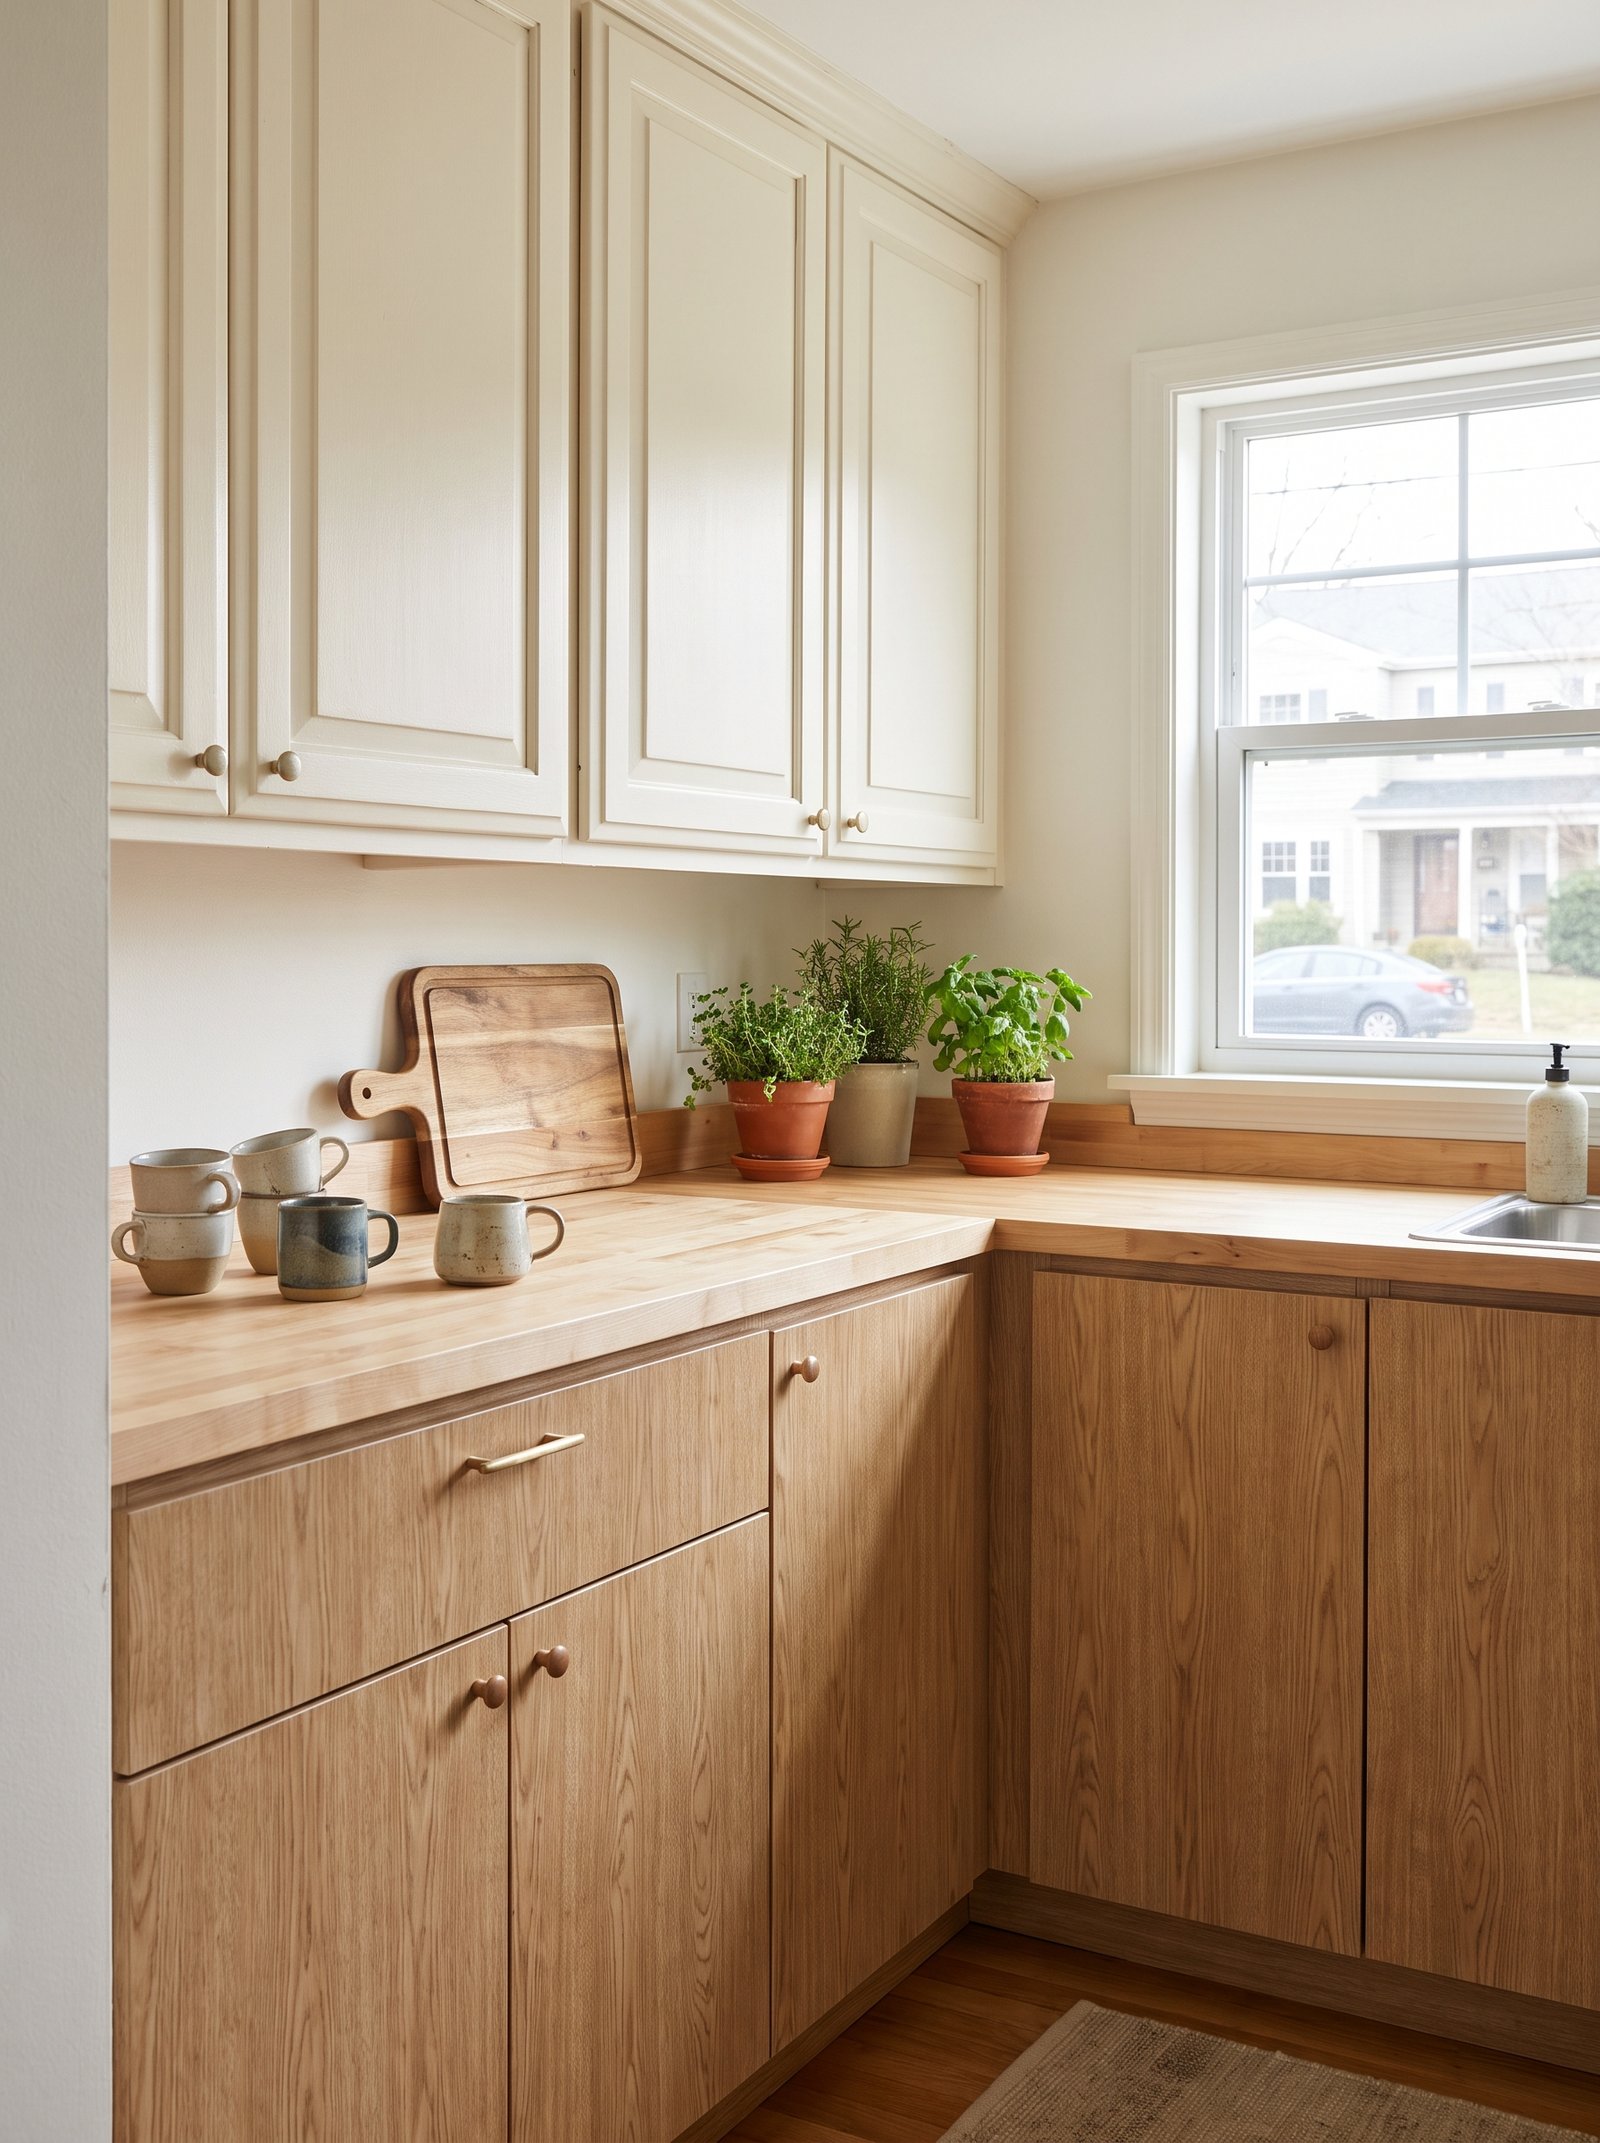
The single loudest thing in most rental kitchens is the cabinets. Builder-grade orange oak or that yellow-90s laminate reads dated the second you walk in, and there is nothing you can do about the color if the landlord will not approve paint. Warm oak contact paper — the good, matte, thick kind, not the shiny stuff from the dollar aisle — solves it in an afternoon and comes off cleanly on move-out day.
Look for a peel-and-stick vinyl that is at least 4 mil thick, has a matte or brushed finish, and mimics rift-sawn white oak or European oak rather than the yellowy honey-oak tones. Brands like d-c-fix, RoomMates, and Con-Tact all make believable versions in the $12–$25 per roll range, and one roll usually covers three to four standard base cabinet doors.
The trick is preparation, not application. Wipe every door with a degreaser (Krud Kutter works), let them dry fully, then remove the doors from the hinges so you can lay them flat on a table. Working flat instead of vertical is the single change that separates a professional finish from a bubbly, peeling mess.
Cut the contact paper an inch larger than the door on every side, peel about four inches of the backing, line up the top edge, and press down with a plastic squeegee or an old credit card as you slowly pull the rest of the backing free. Wrap the excess around the edges and trim with a fresh utility blade for a hospital-corner finish. Reattach the doors and stand back — the cabinets look like they were refaced.
On move-out day, warm the vinyl with a hair dryer for about thirty seconds per section and it peels off in long, clean strips. No sticky residue, no chipped paint, no deposit lost.
2. Swap ugly hardware for stick-on brass pulls
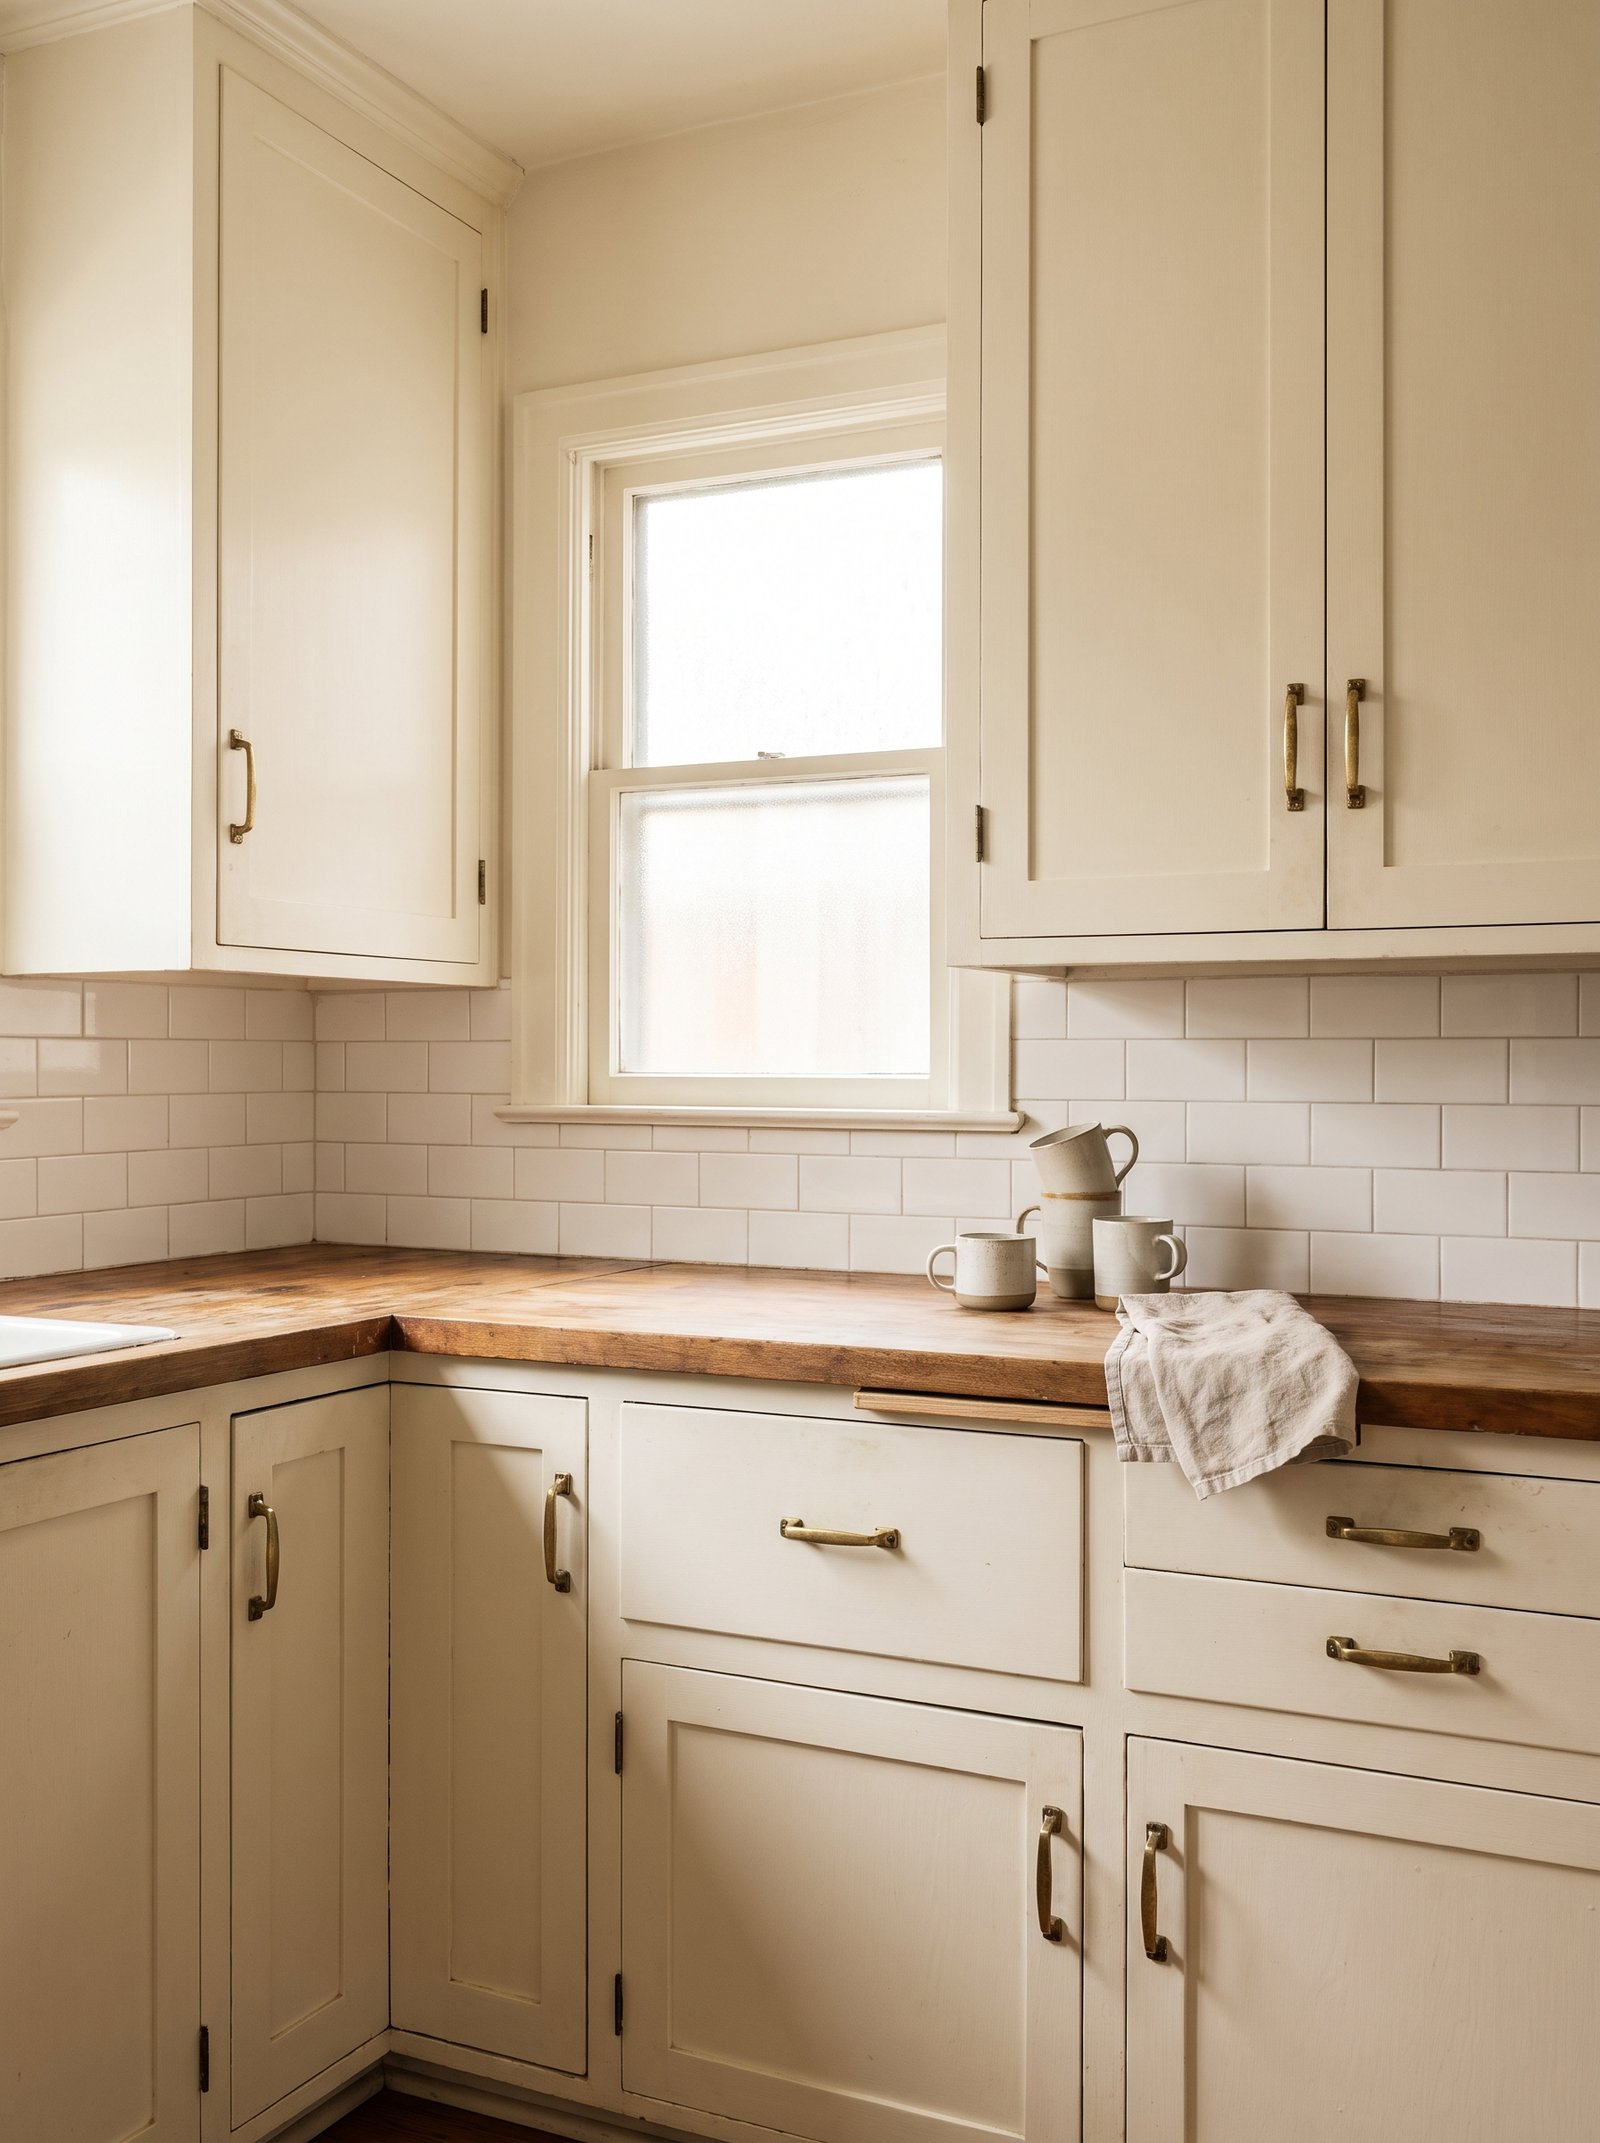
The plastic or brushed-nickel knobs that came with your rental are doing more damage than you realize. Hardware is the jewelry of a kitchen, and cheap hardware pulls the whole room down no matter how nicely you style the counter. The good news: you do not have to drill a single hole to change it.
Adhesive cabinet pulls exist now, they are much better than the ones you remember, and the aged-brass finishes look nearly indistinguishable from the real thing. Look for pulls with a proper metal body and a 3M VHB adhesive backing, not the flimsy plastic imitations. Brands like AmazerBath, Southern Grace Interiors, and Hickory Hardware all sell peel-and-stick options now.
Before applying, clean each door with rubbing alcohol and let it dry completely for at least ten minutes. Any residue at all will ruin the bond within a week. Use a small ruler to mark the exact position with a pencil, press the pull firmly for a full thirty seconds, then leave it undisturbed for twenty-four hours before you tug on it.
For upper cabinets, use a knob rather than a pull — the sideways force on a pull is what kills adhesive over time. For drawers and lowers, longer pulls actually hold better because the load is spread over a larger contact area. Aged brass, unlacquered brass, and dark bronze all age beautifully next to warm oak contact paper.
If you rent long-term, expect to replace the adhesive strips every two years or so. It is a five-minute annual job and it is worth it — the difference between plastic knobs and real brass hardware is the difference between “rental” and “home.”
3. Add a peel-and-stick zellige backsplash
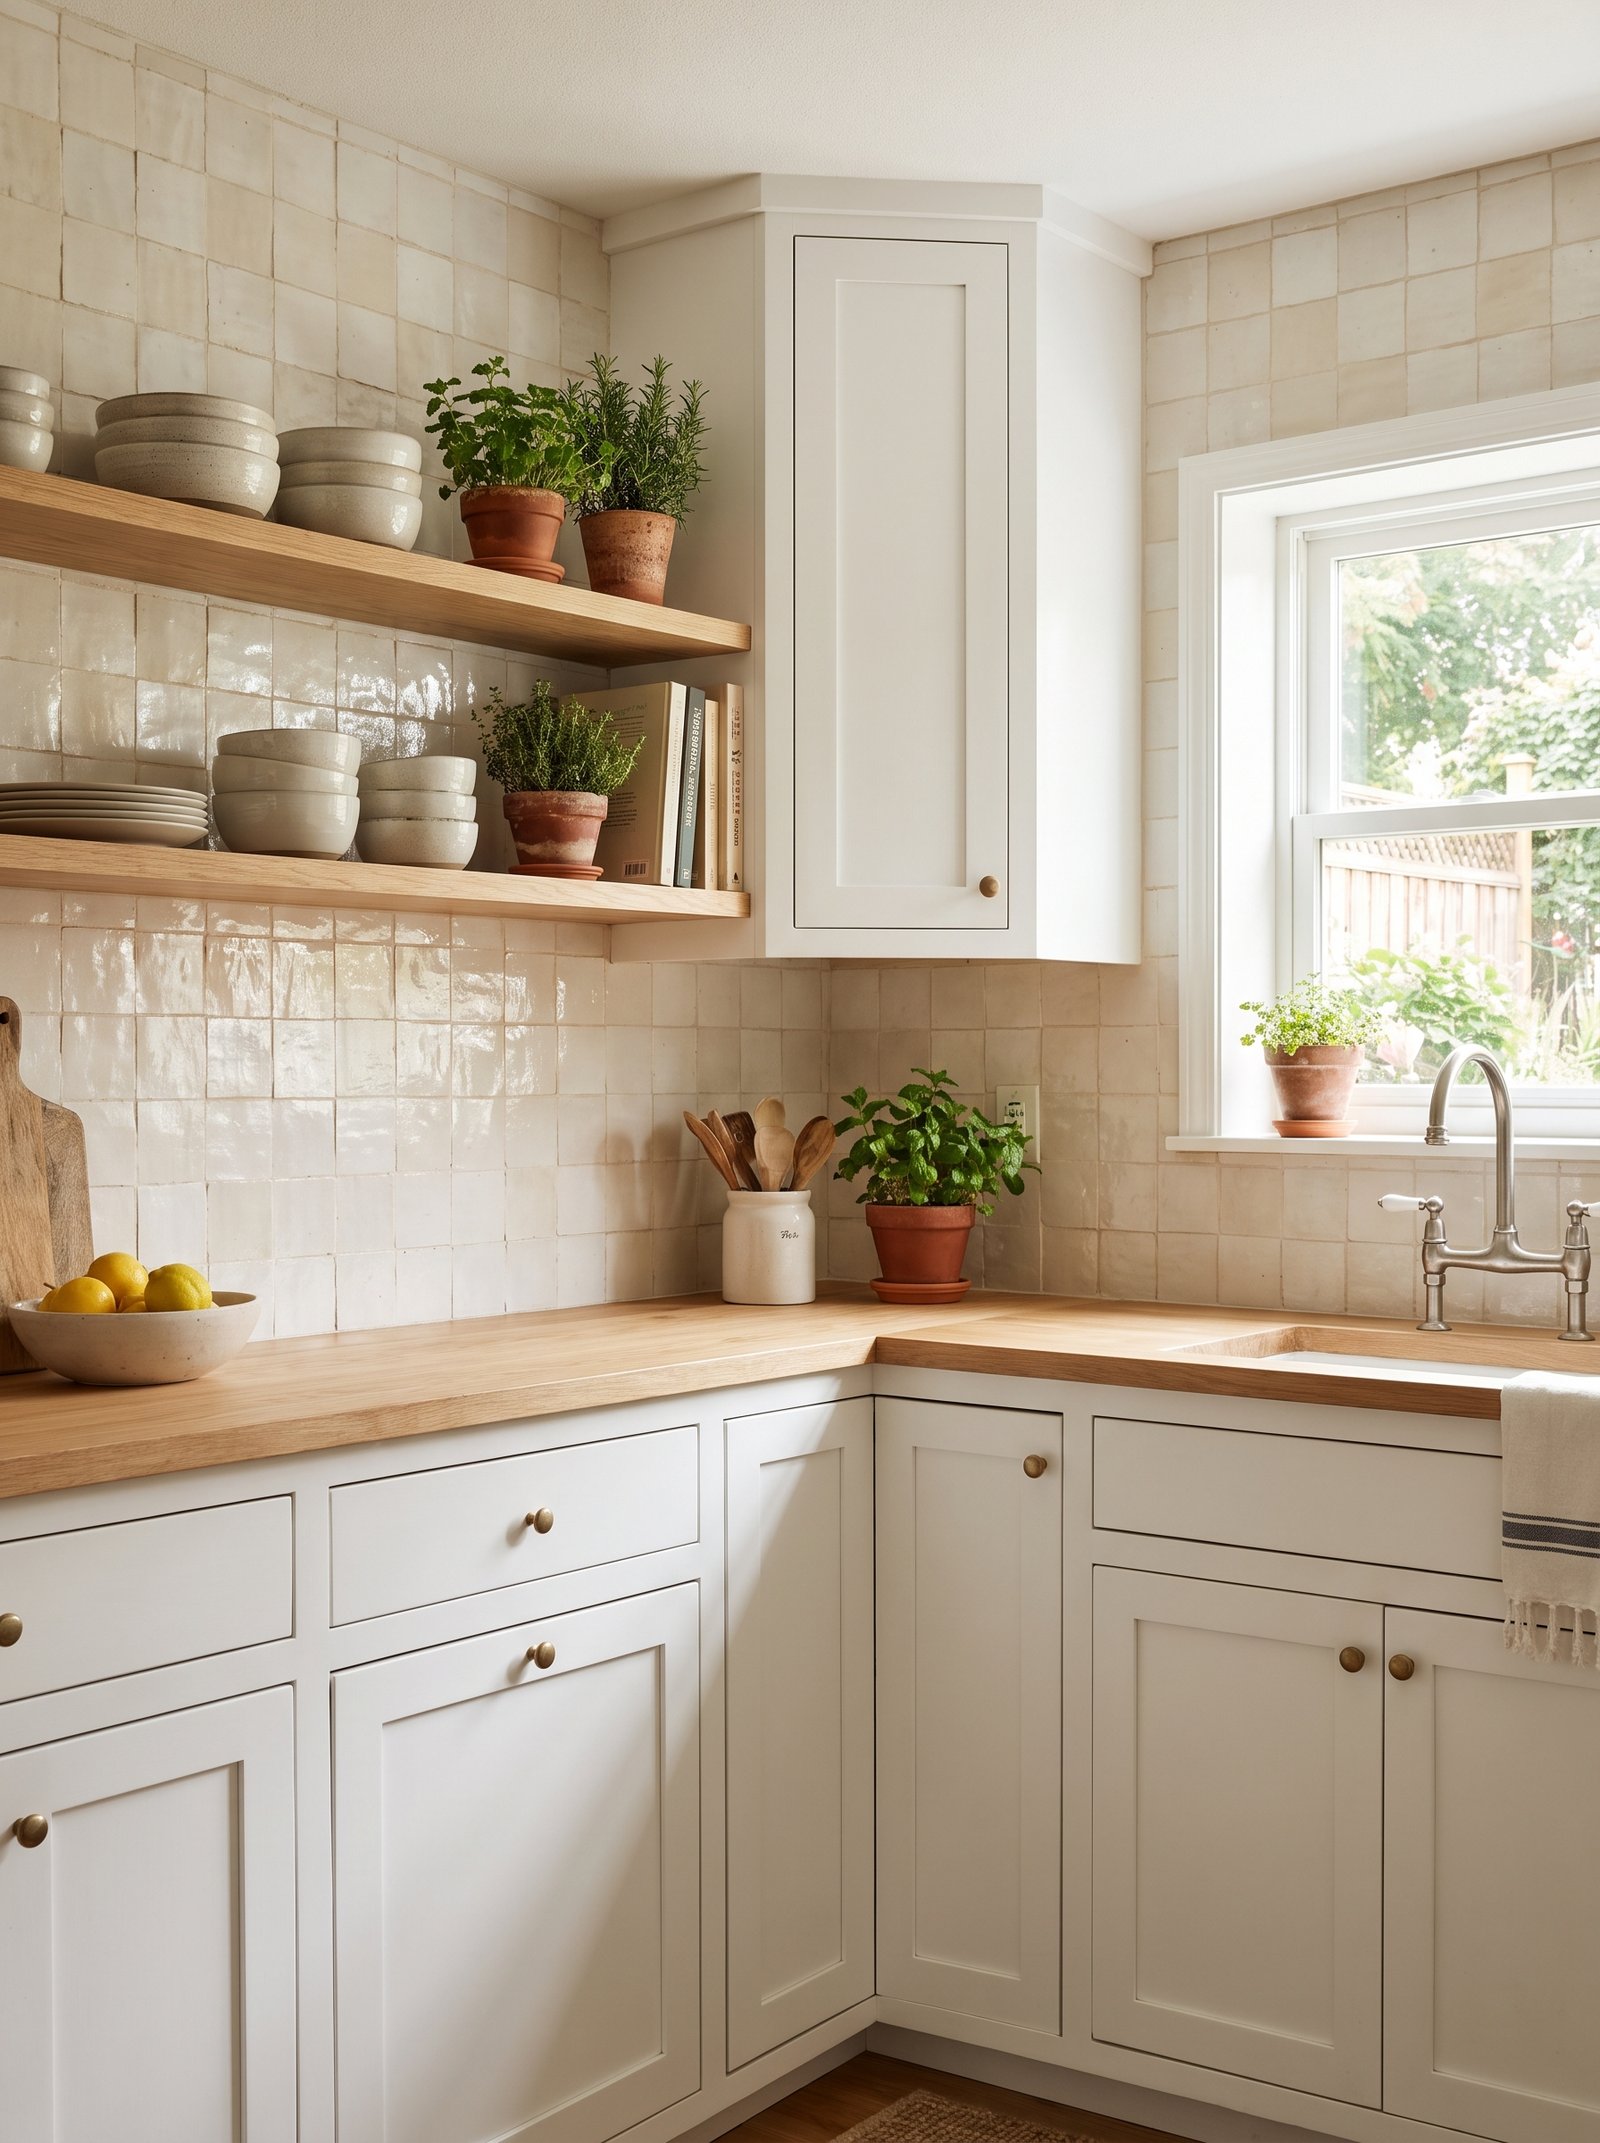
A busy, dated backsplash — think 90s tan tumbled stone or that mottled brown mosaic — is the second-worst offender in a rental kitchen after the cabinets. And unlike cabinets, backsplash is right in your face every time you cook. Peel-and-stick tile is the single fastest fix in this entire guide.
Zellige, the handmade Moroccan clay tile, is having a decade-long moment for good reason — it catches light like nothing else. The good peel-and-stick versions capture the same variation and matte glaze surprisingly well. Look for gel-based (not just printed) 3D tiles from brands like Smart Tiles, Art3D, or InHome. A twelve-inch square sheet runs $8–$14 and you need roughly one sheet per square foot.
Measure your backsplash area carefully — height from counter to bottom of upper cabinets, plus width — and add 15% for cuts and mistakes. Clean the existing surface with a degreaser, let it dry, and mark a level horizontal line to align the first row. That first row is everything; if the first row is off, everything above it will look drunk.
Cut around outlets with a sharp utility knife (turn the breaker off, remove the outlet cover, cut, then put the cover back over the tile). The cover plate hides your cut edge. Around the range and sink, run a thin bead of clear silicone along the seam once you are done — it prevents water and grease from getting behind the tiles.
When you move out, warm each sheet with a hair dryer and peel from a corner. The gel adhesive comes off cleanly if it has not been applied over glossy paint. In white/cream/warm-terracotta zellige tones, your rental kitchen suddenly reads Mediterranean instead of contractor-grade.
4. Install a tension shelf between the cabinets
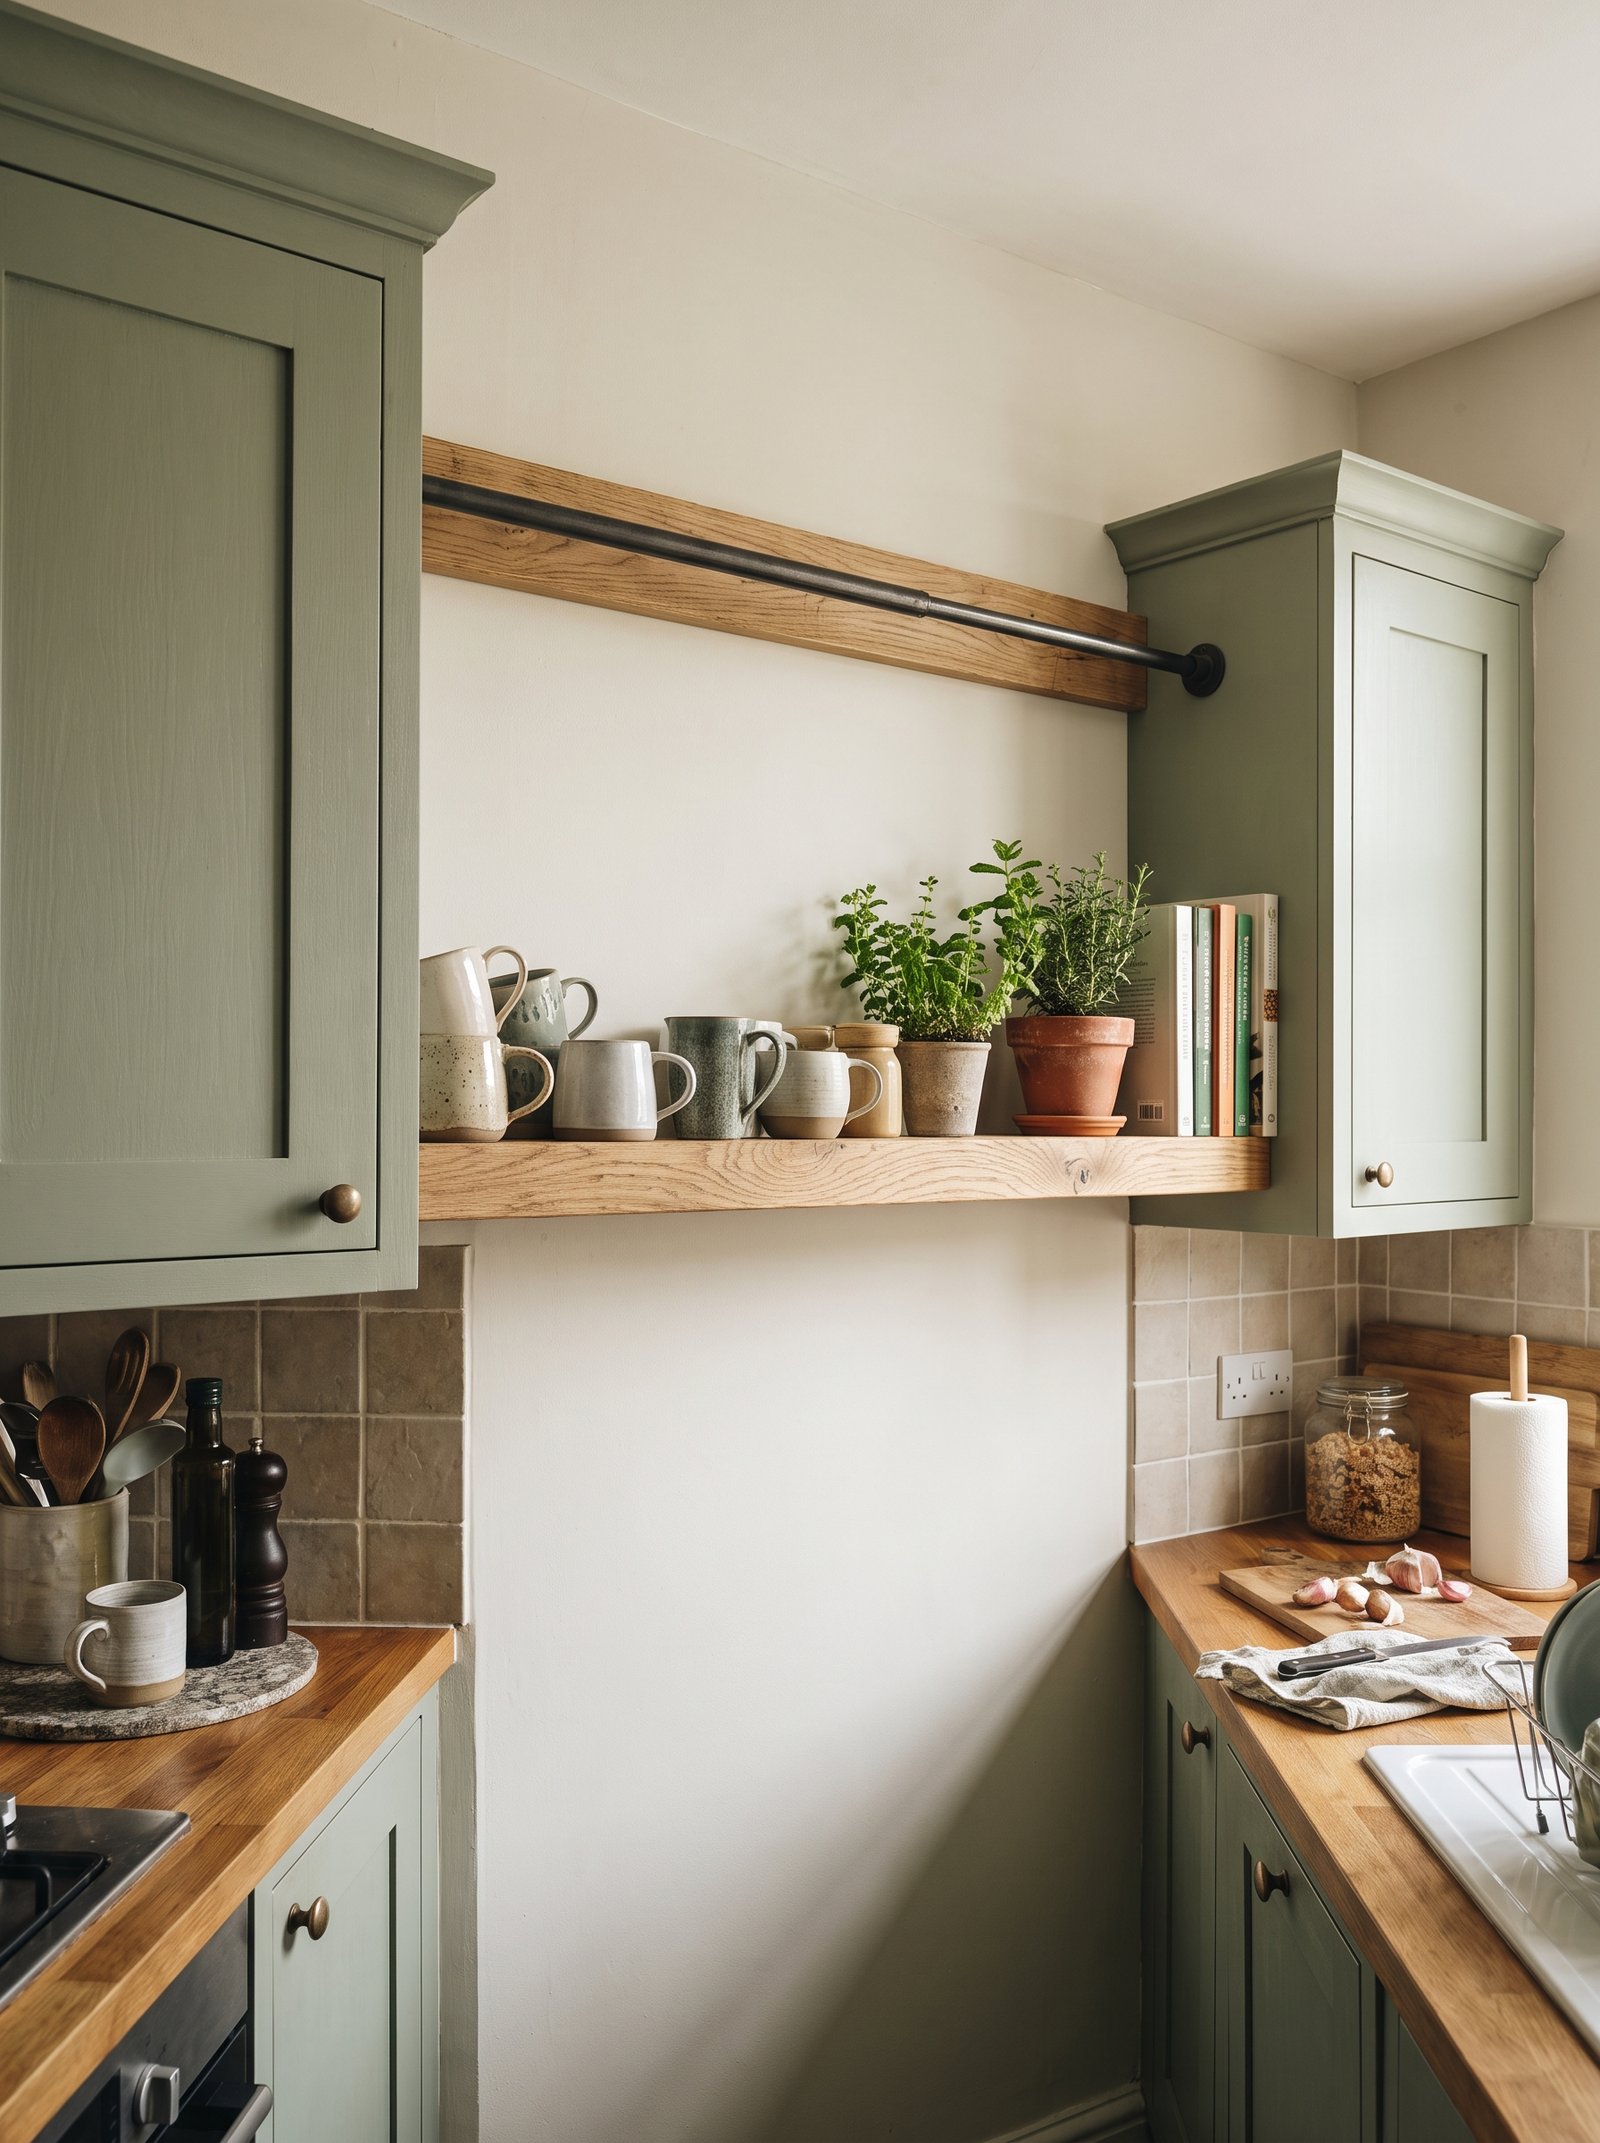
The dead vertical space between the top of your upper cabinets and the ceiling — or the gap between two banks of cabinets over the sink — is prime real estate in a rental kitchen. A tension-rod shelf costs less than $40 and installs in under five minutes with no tools.
A tension shelf uses spring-loaded pressure to lock a shelf between two vertical surfaces (cabinet sides, walls, whatever). The good ones from IKEA (MULIG), Umbra, and Mainstays hold 20–30 pounds each and come in widths that adjust from about 16 to 42 inches. Get one that adjusts, not a fixed size — rental cabinet gaps are never standard.
Above the sink is the classic spot: a shelf held between the two flanking cabinets, at eye level, styled with three or four things you actually reach for daily. Small oil bottle, salt cellar, wooden spoon crock, one plant. Do not overload it. Two or three items looks intentional; six items looks like a junk drawer that grew legs.
Another underused spot: between the fridge and the wall, if you have that awkward six-inch gap most rentals include. A vertical tension pole with hooks turns it into a broom-and-mop closet without touching the wall. The Umbra Cubiko or a simple tension rod with S-hooks both work.
When you move, unscrew the tension outward and it falls into your hand. No holes, no marks, no explaining to the landlord.
5. Replace cabinet doors with linen curtains

This one is not for everyone, but it is the single most editorial change you can make to a rental kitchen. Remove the doors from your lower cabinets (or one bank of them), store them somewhere safe, and hang a simple linen or cotton curtain in their place with a spring tension rod inside the frame.
Choose oatmeal, cream, natural flax, or a very quiet ticking stripe. Solid colors read cleaner than patterns in a small kitchen. A finished curtain from IKEA (AINA in natural), West Elm, or an Etsy linen seller will run $30–$70 per pair. Length: floor to just under the counter lip, hemmed clean.
This works especially well for the cabinet under the sink, where the doors always stick, and for a lower bank next to the fridge that holds tupperware and pots. Suddenly instead of MDF slabs staring at you, there is soft, breathing linen — the same trick you see in every French country kitchen on Pinterest.
Practical note: store the removed doors in a closet or under a bed, wrapped in a moving blanket, with the screws taped to each door. Take a photo of which door came from which cabinet. On move-out day you spend ten minutes screwing them back and the landlord is none the wiser.
One caveat — do not do this for the cabinet under a rangehood or right next to the stove, because grease will soak into the linen fast. Everywhere else, it is genuinely transformative.
6. Use adhesive brass hooks for mugs

Command hooks in brass finish — not the standard chrome or clear plastic — are quietly one of the most useful rental tools in existence. Under an open shelf, along the side of a fridge, on the inside of a cabinet door, they turn dead surfaces into working storage without a single hole.
For mugs, mount three or four brass hooks in a line under the front edge of a shelf or upper cabinet. Space them about three-and-a-half inches apart so the mug handles do not fight each other. Choose mugs that look intentional together — matching cream ceramics, or a curated set of stoneware — because they become part of the visible styling.
The Command brass hooks (they are technically “vinyl bronze” but read as aged brass) hold up to five pounds each with the right adhesive strip. That is more than enough for a coffee mug, a set of measuring cups, or even a small enameled pan.
Application matters: clean the surface with rubbing alcohol, wait ten minutes, press the hook for thirty seconds, then wait a full hour before you hang anything. If you skip the alcohol prep, expect the hook to fall in a week.
Beyond mugs, use them for pot lids on a pantry door, tea towels next to the stove, or a wooden cutting board leaning against the backsplash. Multiply this trick across your kitchen and you free up an entire shelf of cabinet storage without any construction.
7. Add warm LED under-cabinet lighting

Rental kitchen ceiling light is almost always one flat, cool-white 4000K bulb in a boob-light fixture, and it makes even a nice kitchen look like a break room. Adding warm, stick-on under-cabinet LED strips is the single biggest atmosphere upgrade you can make for under $30, and it requires zero wiring.
Look for battery-powered or USB-rechargeable LED strips (Litom, Mr Beams, and Vansky all make good ones) with a color temperature of 2700K to 3000K — warm white, not daylight. Motion-activated versions turn on when you walk up to the counter and off when you leave, so you never have to reach for a switch with wet hands.
Peel the adhesive backing, press the strip along the underside front edge of your upper cabinets, and route the wire toward the outlet or battery pack. Hide the wire with a piece of the same contact paper you used on the cabinets and it disappears completely.
The visual difference is dramatic. Suddenly your counters are lit like a magazine photo, the backsplash catches golden light, and the ceiling fixture becomes optional at night. For evening entertaining, turn off the overhead and leave only the under-cabinet lights on — the whole kitchen glows like a wine bar.
For an even bigger upgrade, put the same warm LED strips inside a glass-front cabinet, behind the fridge (uplighting the top), or under a floating shelf. The kitchen goes from utilitarian box to lived-in space with no permission and no landlord conversation.
8. Cover the countertops with marble contact paper
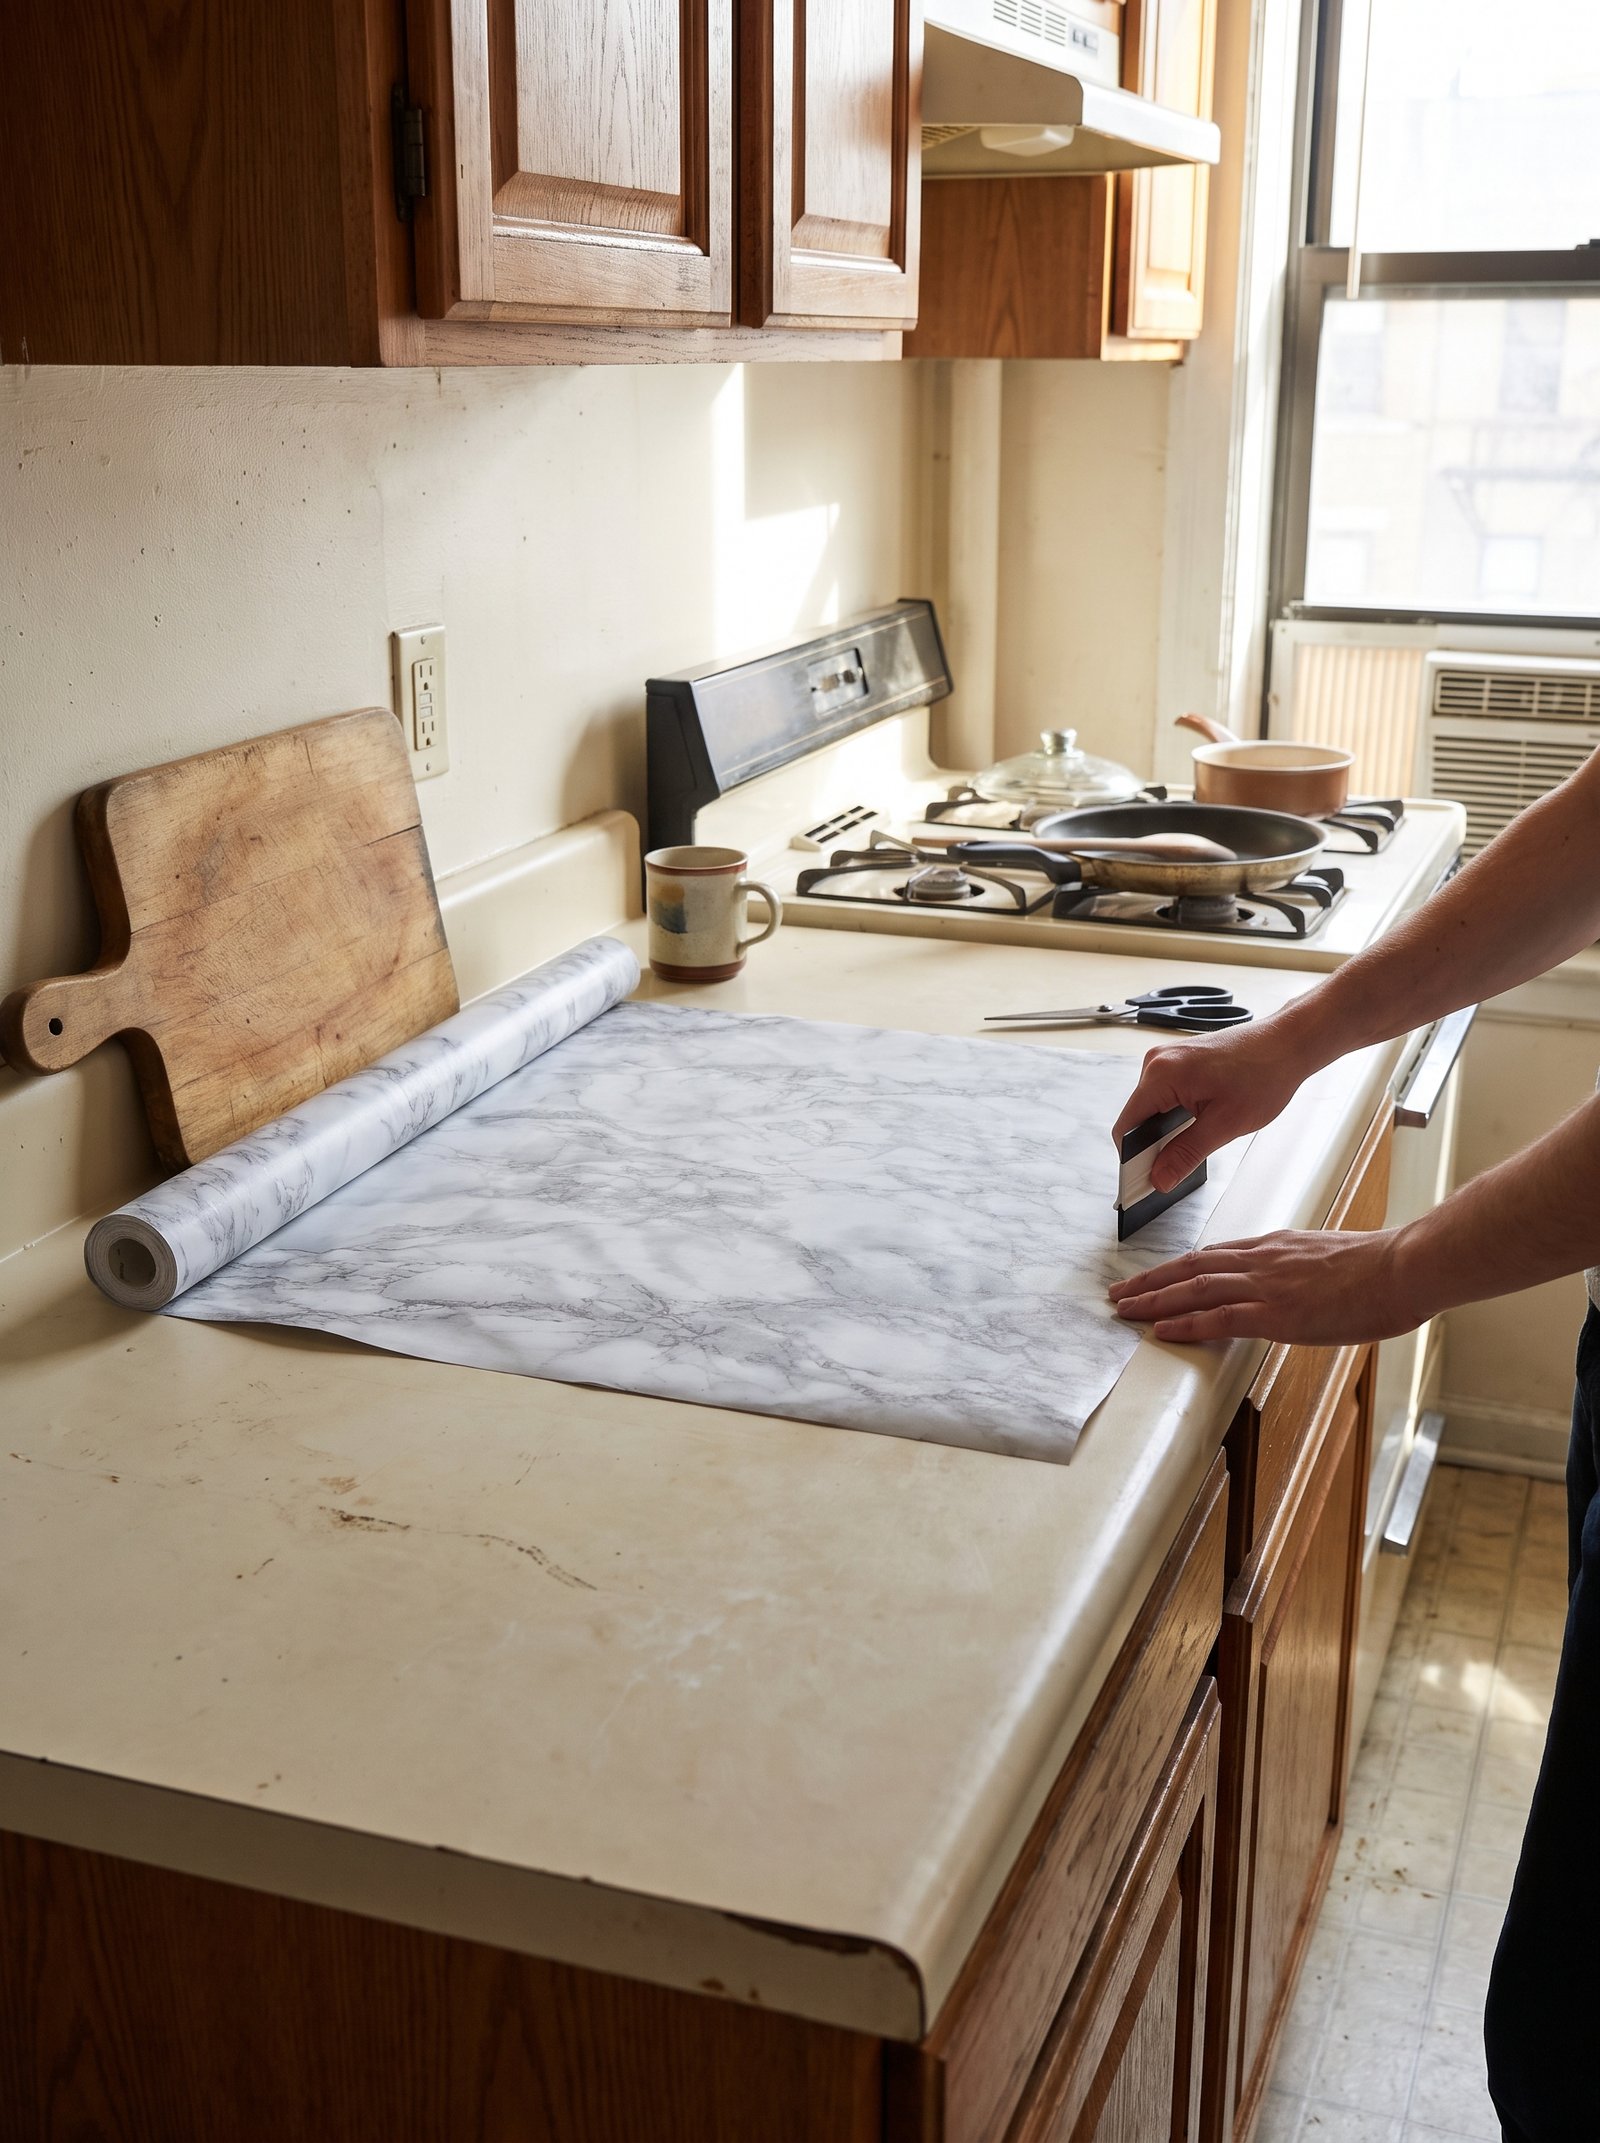
This one is polarizing but it works. If your rental counters are that speckled builder-grade tan Formica, or the mottled green from 1993, marble-look contact paper transforms them for about $40 in materials and half a Saturday.
Buy the thickest, most matte contact paper you can find — 4 mil minimum, matte finish only, real 3D texture if possible. The glossy versions crease and look plastic. Brands like FunStick, RoomMates, and Livelynine make marble prints that photograph shockingly well. One 24″×80″ roll typically covers a small U-shaped kitchen.
Prep is everything. Clean the counters with a degreaser, sand any rough or peeling edges with 220 grit, wipe clean again with rubbing alcohol, and let dry for an hour. Measure and cut the contact paper with an inch of overhang all around. Peel back the top four inches of backing, align to the back edge, and slowly work down with a plastic smoothing tool, pulling more backing as you go.
Trim the edges flush with a sharp fresh utility knife. Where the counter meets the wall, run a very thin bead of clear silicone caulk to seal — this is what makes it last a year instead of a month. Do not use it under a hot pot or a rolling pin (use a board), and it will genuinely survive daily use.
The visual jump from beige Formica to warm creamy marble is enormous — and on move-out, warm each panel with a hair dryer and peel it off in strips. The counter underneath is exactly as it was.
9. Add a rolling wood cart for extra counter

Almost every rental kitchen is short on counter space. Rather than resenting it, add a rolling wood cart on wheels — it acts as a mobile island, extra prep surface, and coffee station all in one, and you take it with you when you move.
Look for a solid wood or butcher-block top on locking casters. IKEA’s FÖRHÖJA (small) and IKEA’s original KITCHEN CART both hit the $70–$130 range and last for years. Crate & Barrel and Serena & Lily sell more editorial versions in the $300–$600 range if you can stretch.
The magic is placement. During cooking, roll it over next to the stove for prep. When guests come, roll it to the dining room to act as a bar cart. In the morning, park it near the outlet with your coffee machine, mugs, and grinder on top. It is three pieces of furniture in one.
Style the top like it is furniture, not storage — a wooden cutting board leaning against the wall, a ceramic pitcher of wooden spoons, a small stone bowl for salt. Below, use the shelves for pots and pans, cookbooks, or big serving platters that never fit in cabinets.
When you move to your next place, the cart goes with you and instantly fits any kitchen. It is the single most portable and versatile purchase in this whole list, and it appreciates in usefulness the longer you own it.
10. Hide old floor tile with a runner rug

That mustard-yellow linoleum or the tan grout-lined tile is not going anywhere as a renter. But you can hide 60 to 80% of it with a well-placed runner or two, and the visual difference is a whole kitchen.
For safety and longevity, use a low-profile natural fiber or flat-weave cotton rug with a non-slip pad underneath. Jute, sisal, and flat-weave cotton dhurries hide dirt, feel good underfoot, and are washable or shakeable. Avoid deep-pile wool near the stove or sink — it soaks up grease and water and never recovers.
A runner in front of the sink is the classic move. Add a second one along the length of your main galley path or in front of the stove if space allows. Two runners feel intentional; one runner feels forgotten.
For color, stay in the warm cream/oatmeal/soft-terracotta family so the rugs blend with the rest of your styling. Bold black-and-white stripes work if the kitchen is otherwise very quiet. Busy patterns fight everything else and make a small kitchen feel smaller.
Shake them out weekly and machine-wash the cotton ones every month or two. When you move, they roll up and come with you — no residue, no damage, no lost deposit.
11. Use frosted window film for privacy

If your rental kitchen has a window facing a neighbor, an alley, or a fire escape, you either keep the ugly landlord blinds down all day or lose all your natural light. Frosted window film solves this in ten minutes for about $15, adds daylight, and comes off cleanly.
Look for static-cling (not adhesive) film in a plain frost, subtle rain-glass, or fluted-glass pattern. Static-cling versions from Rabbitgoo, Coavas, and BDF are removable with zero residue. A single 17″×78″ roll covers most standard kitchen windows.
Application: spray the window generously with soapy water (a few drops of dish soap in a spray bottle), peel the film backing, press onto the wet glass, and squeegee out bubbles from the center outward. The soapy water lets you slide the film into perfect position before it grips.
The result: full daylight, full privacy, and the window itself now looks like a design choice rather than a landlord failure. Fluted glass patterns in particular read as intentional and expensive — the same look used in high-end European kitchens.
On move-out, lift a corner and peel off in one sheet. The glass is exactly as it was. No landlord will ever know.
12. Style with a branch of olive or eucalyptus

Nothing softens a rental kitchen faster than a single branch of greenery in a heavy ceramic vase. It is the smallest, cheapest change in this guide, and it has an outsized effect on how the room reads.
Fresh olive branches, eucalyptus, or bay leaves cost $6–$12 at Trader Joe’s or a farmers market, and they last 4 to 8 weeks. Dried pampas grass, wheat, or preserved olive branches from a florist last a full year and require zero maintenance. Do both — one seasonal fresh branch, one long-term dried piece — for range.
Choose one heavy, matte-glaze vessel. Stoneware in cream, sand, or terracotta. Never a delicate clear glass vase in a working kitchen — it looks precious and it breaks. Big Sur ceramics, East Fork, and IKEA’s SINNERLIG line all sell heavy stoneware in the $20–$60 range that reads editorial.
Place the branch on the counter next to the stove, on the rolling cart, on the open shelf, or in the corner farthest from where you actually cook. The branch is a visual anchor — it draws the eye and softens all the hard surfaces around it.
Change the branch with the seasons. Olive in summer, eucalyptus in fall, dried wheat in winter, cherry blossoms in spring. Four small purchases across a year for what is essentially a permanent piece of styling.
13. Ditch paper towels for linen dish towels
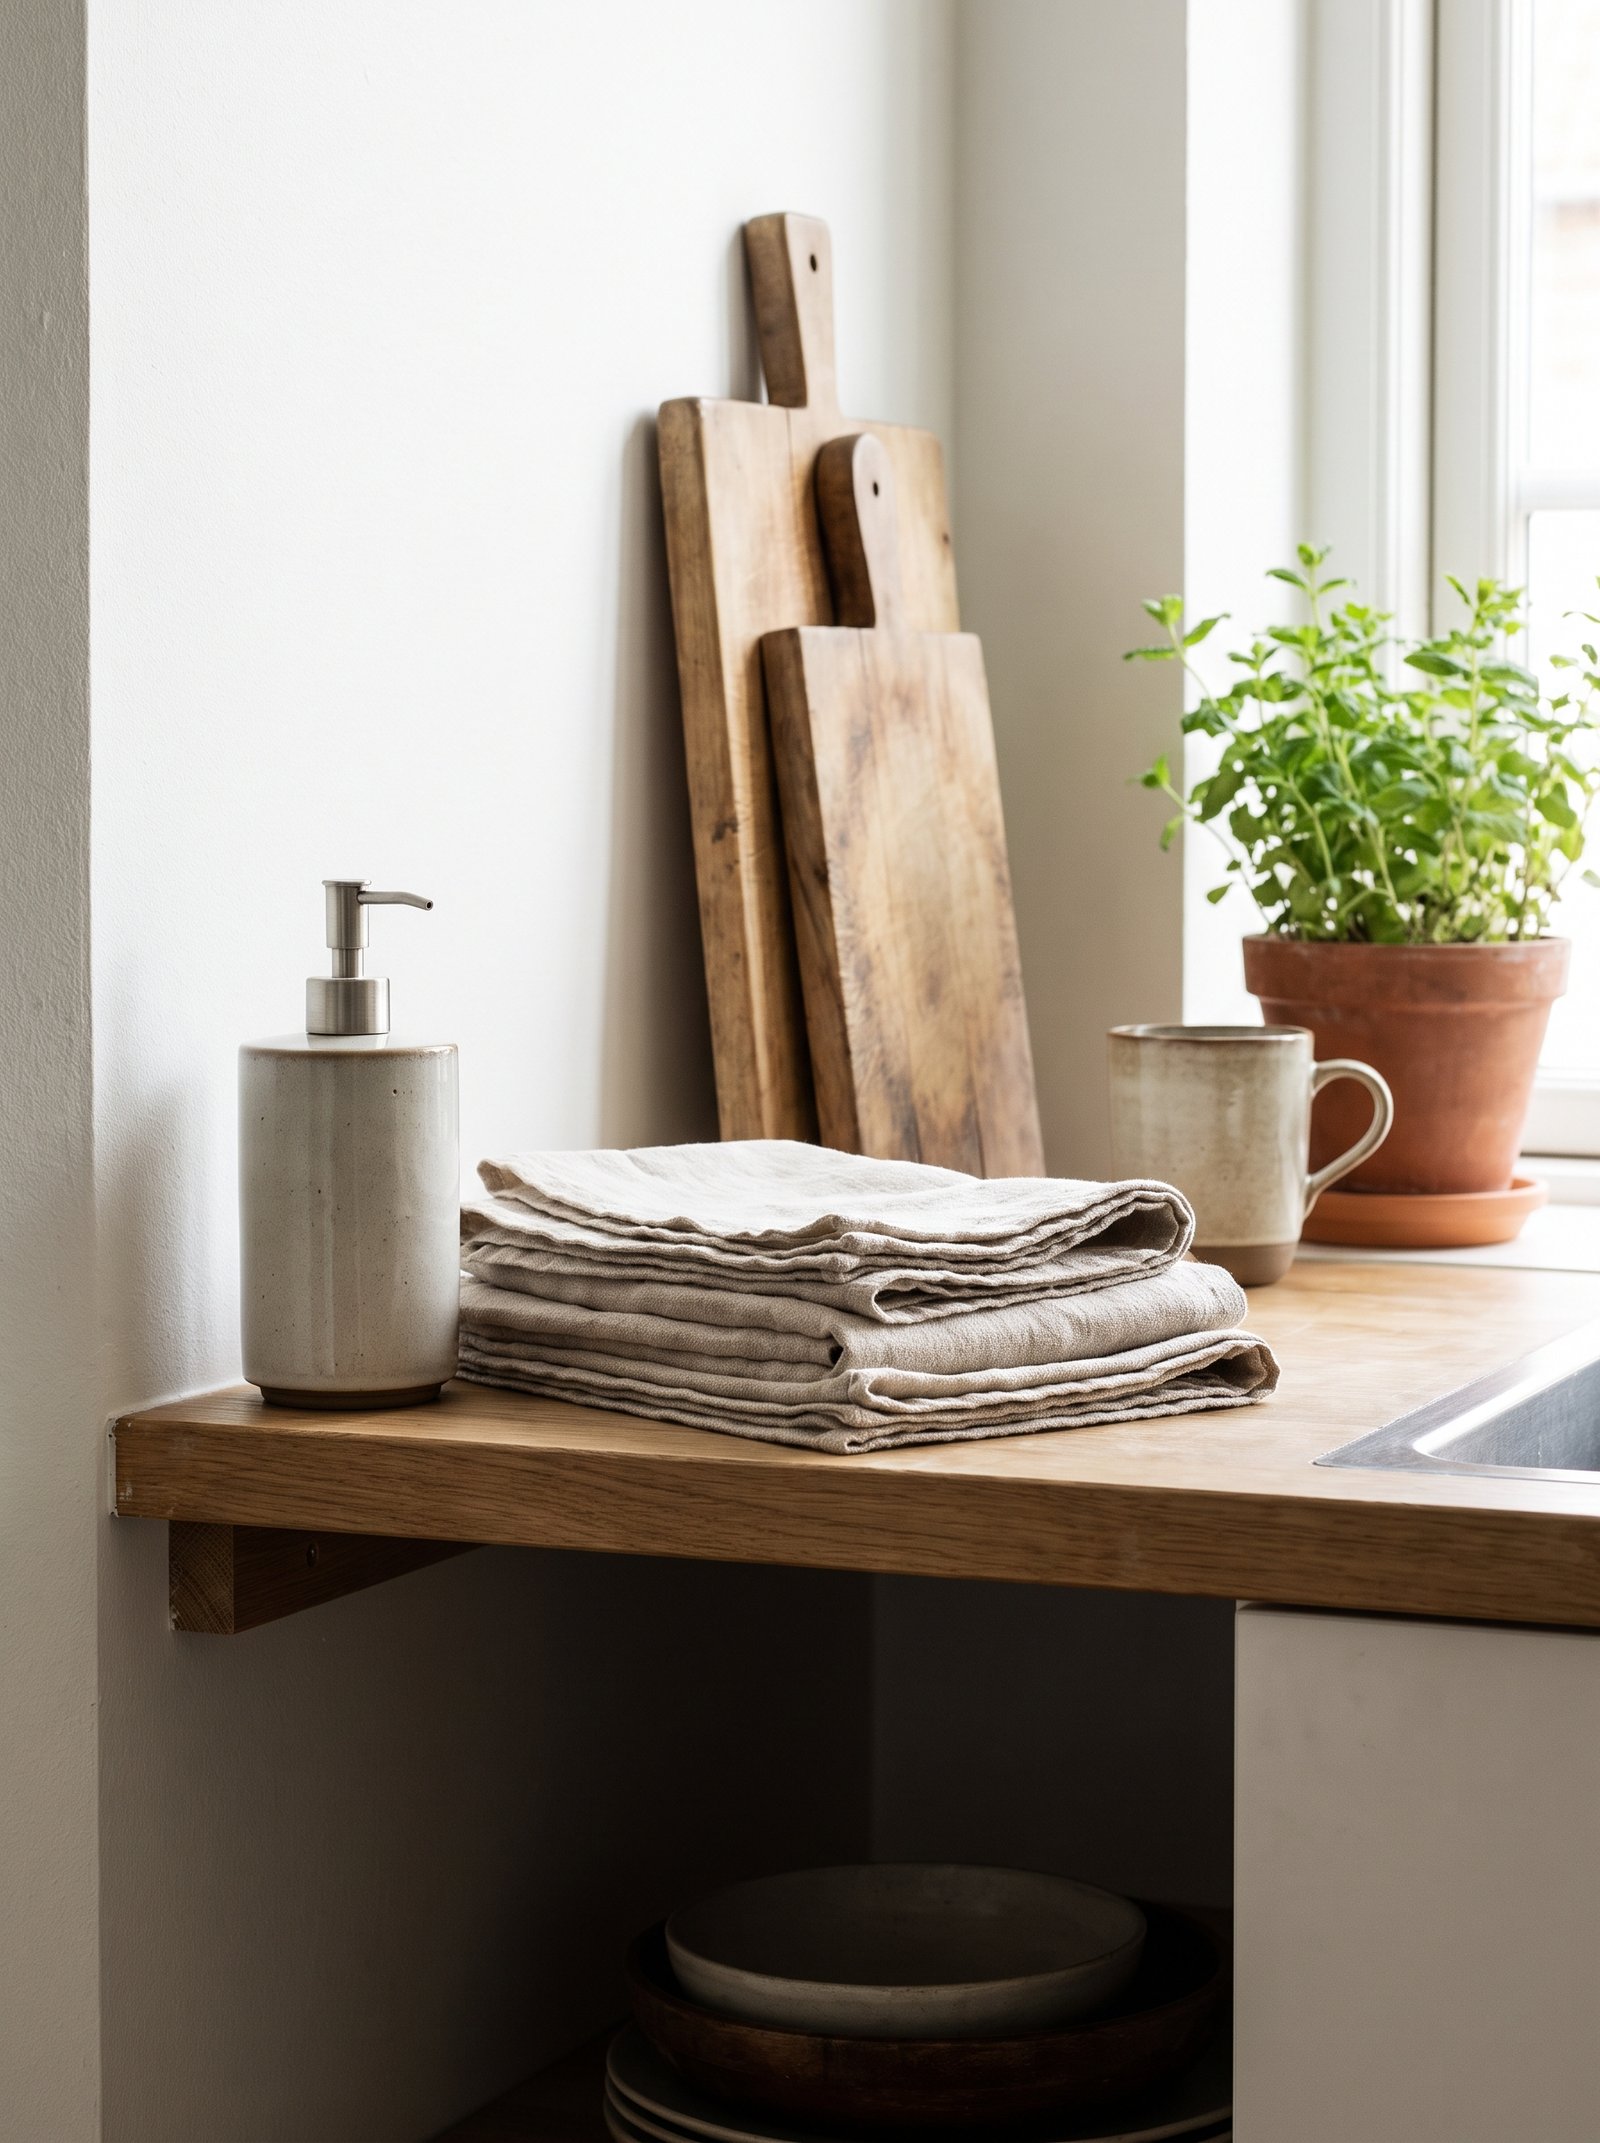
Paper towels are one of the loudest, most disposable-looking objects in any kitchen. Switching to linen or cotton dish towels — and displaying them like decor — is free once you buy them, and it upgrades the room every single day.
Buy six to eight matching linen dish towels in oatmeal, cream, or a very quiet ticking stripe. IKEA’s VÅRDANDE and TEKLA linen towels are both excellent starter picks, or spend a bit more at Coyuchi, Hawkins New York, or a local weaver. Avoid printed novelty prints — solids age much better.
Store two folded on the counter next to the stove, one draped through the oven handle, and the rest folded in a drawer for rotation. The folded stack on the counter is styling, not just utility.
Wash them weekly on hot with your kitchen towels — no bleach, which yellows linen — and line dry when possible. They soften over years and only look better with age. A good linen towel lasts a decade.
The paper towel roll goes in a lower cabinet for messes that truly need paper. You will use maybe one roll a month instead of one a week, and the counter suddenly reads clean and intentional instead of cluttered.
14. Lean bamboo boards against the backsplash

Wooden cutting boards leaned against the backsplash is the single most photographed styling trick in modern kitchen design. It solves storage, adds warmth, and makes a kitchen look effortlessly lived-in.
Build a small collection over time — three to five boards of varying sizes and woods. A big rectangular olive-wood cheese board, a round bamboo one, a small acacia one for daily use. Buy them from Etsy, Boos, or thrift stores rather than matching a set from Amazon; the mismatched grain and shapes are the whole point.
Lean them at a slight angle against the backsplash, tallest at the back, layered down to the smallest in front. Never stack them flat on the counter — that reads storage. Leaning them reads styling.
They double as trivets, serving boards for cheese and bread, and prep surfaces when you have guests. Oil them once a month with mineral oil or beeswax to keep the wood from drying out. A well-oiled board only looks better with age; a neglected one splits and warps.
This one trick — a small collection of wood boards leaning together — accounts for half of the warmth in every editorial kitchen photograph you have ever saved on Pinterest.
15. Swap plastic bins for wicker

Every rental kitchen accumulates plastic — Tupperware bins, dish racks, storage caddies, the little plastic tray next to the sink. Swapping them for wicker, rattan, or seagrass equivalents costs a bit more but permanently upgrades how the kitchen photographs and how it feels.
Start with the visible offenders: the plastic dish rack, the sink caddy, the fruit bowl, and any storage bins on open shelves. Replace each with a natural fiber equivalent. IKEA’s FRÄJEN and BULLIG bins, Target’s Threshold line, and vintage baskets from thrift stores all work.
Woven natural fibers add texture and warmth that plastic never will, and they photograph beautifully in any light. A single wicker bin holding onions and potatoes reads farmhouse; the same bin in plastic reads storage aisle.
For anything wet — dish rack, sink caddy — get a bamboo or teak version that is coated to resist water. Bamboo dish racks like the Yamazaki Tosca dry as fast as plastic ones and cost about the same, but they look like furniture instead of appliance.
Over six months, the whole kitchen shifts from utility-first to home-first without you doing anything dramatic. It is the slow, cumulative version of a design upgrade.
16. Decant flour and sugar into glass jars

The paper bag of flour, the plastic sugar bag, the cereal boxes with logos screaming from the shelf — all of them work against a calm kitchen. Decanting the six or eight things you use most into matching glass or ceramic jars quiets the whole room.
Buy a set of matching wide-mouth glass jars with airtight lids — Weck, Ball, or IKEA’s KORKEN all work — in three sizes. Start with the essentials: flour, sugar, brown sugar, rice, oats, pasta, coffee beans, tea. Even four decanted jars on an open shelf change how the shelf reads.
Label the jars with a small chalkboard tag, a printed label, or a simple grease-pencil mark on the underside so you know what is in each. Do not use big preprinted labels that shout across the room — the point is quiet.
Store the jars on an open shelf, on the counter next to the coffee station, or lined up on a floating shelf if you have one. They act as functional storage and styling at the same time — you reach for the flour twice a week and it never leaves the shelf.
The airtight seal also keeps things fresher longer than the original bag. Flour lasts six months instead of three, coffee stays fresh two weeks instead of five days, and the whole pantry starts reading like a small European café.
17. Install a magnetic knife strip
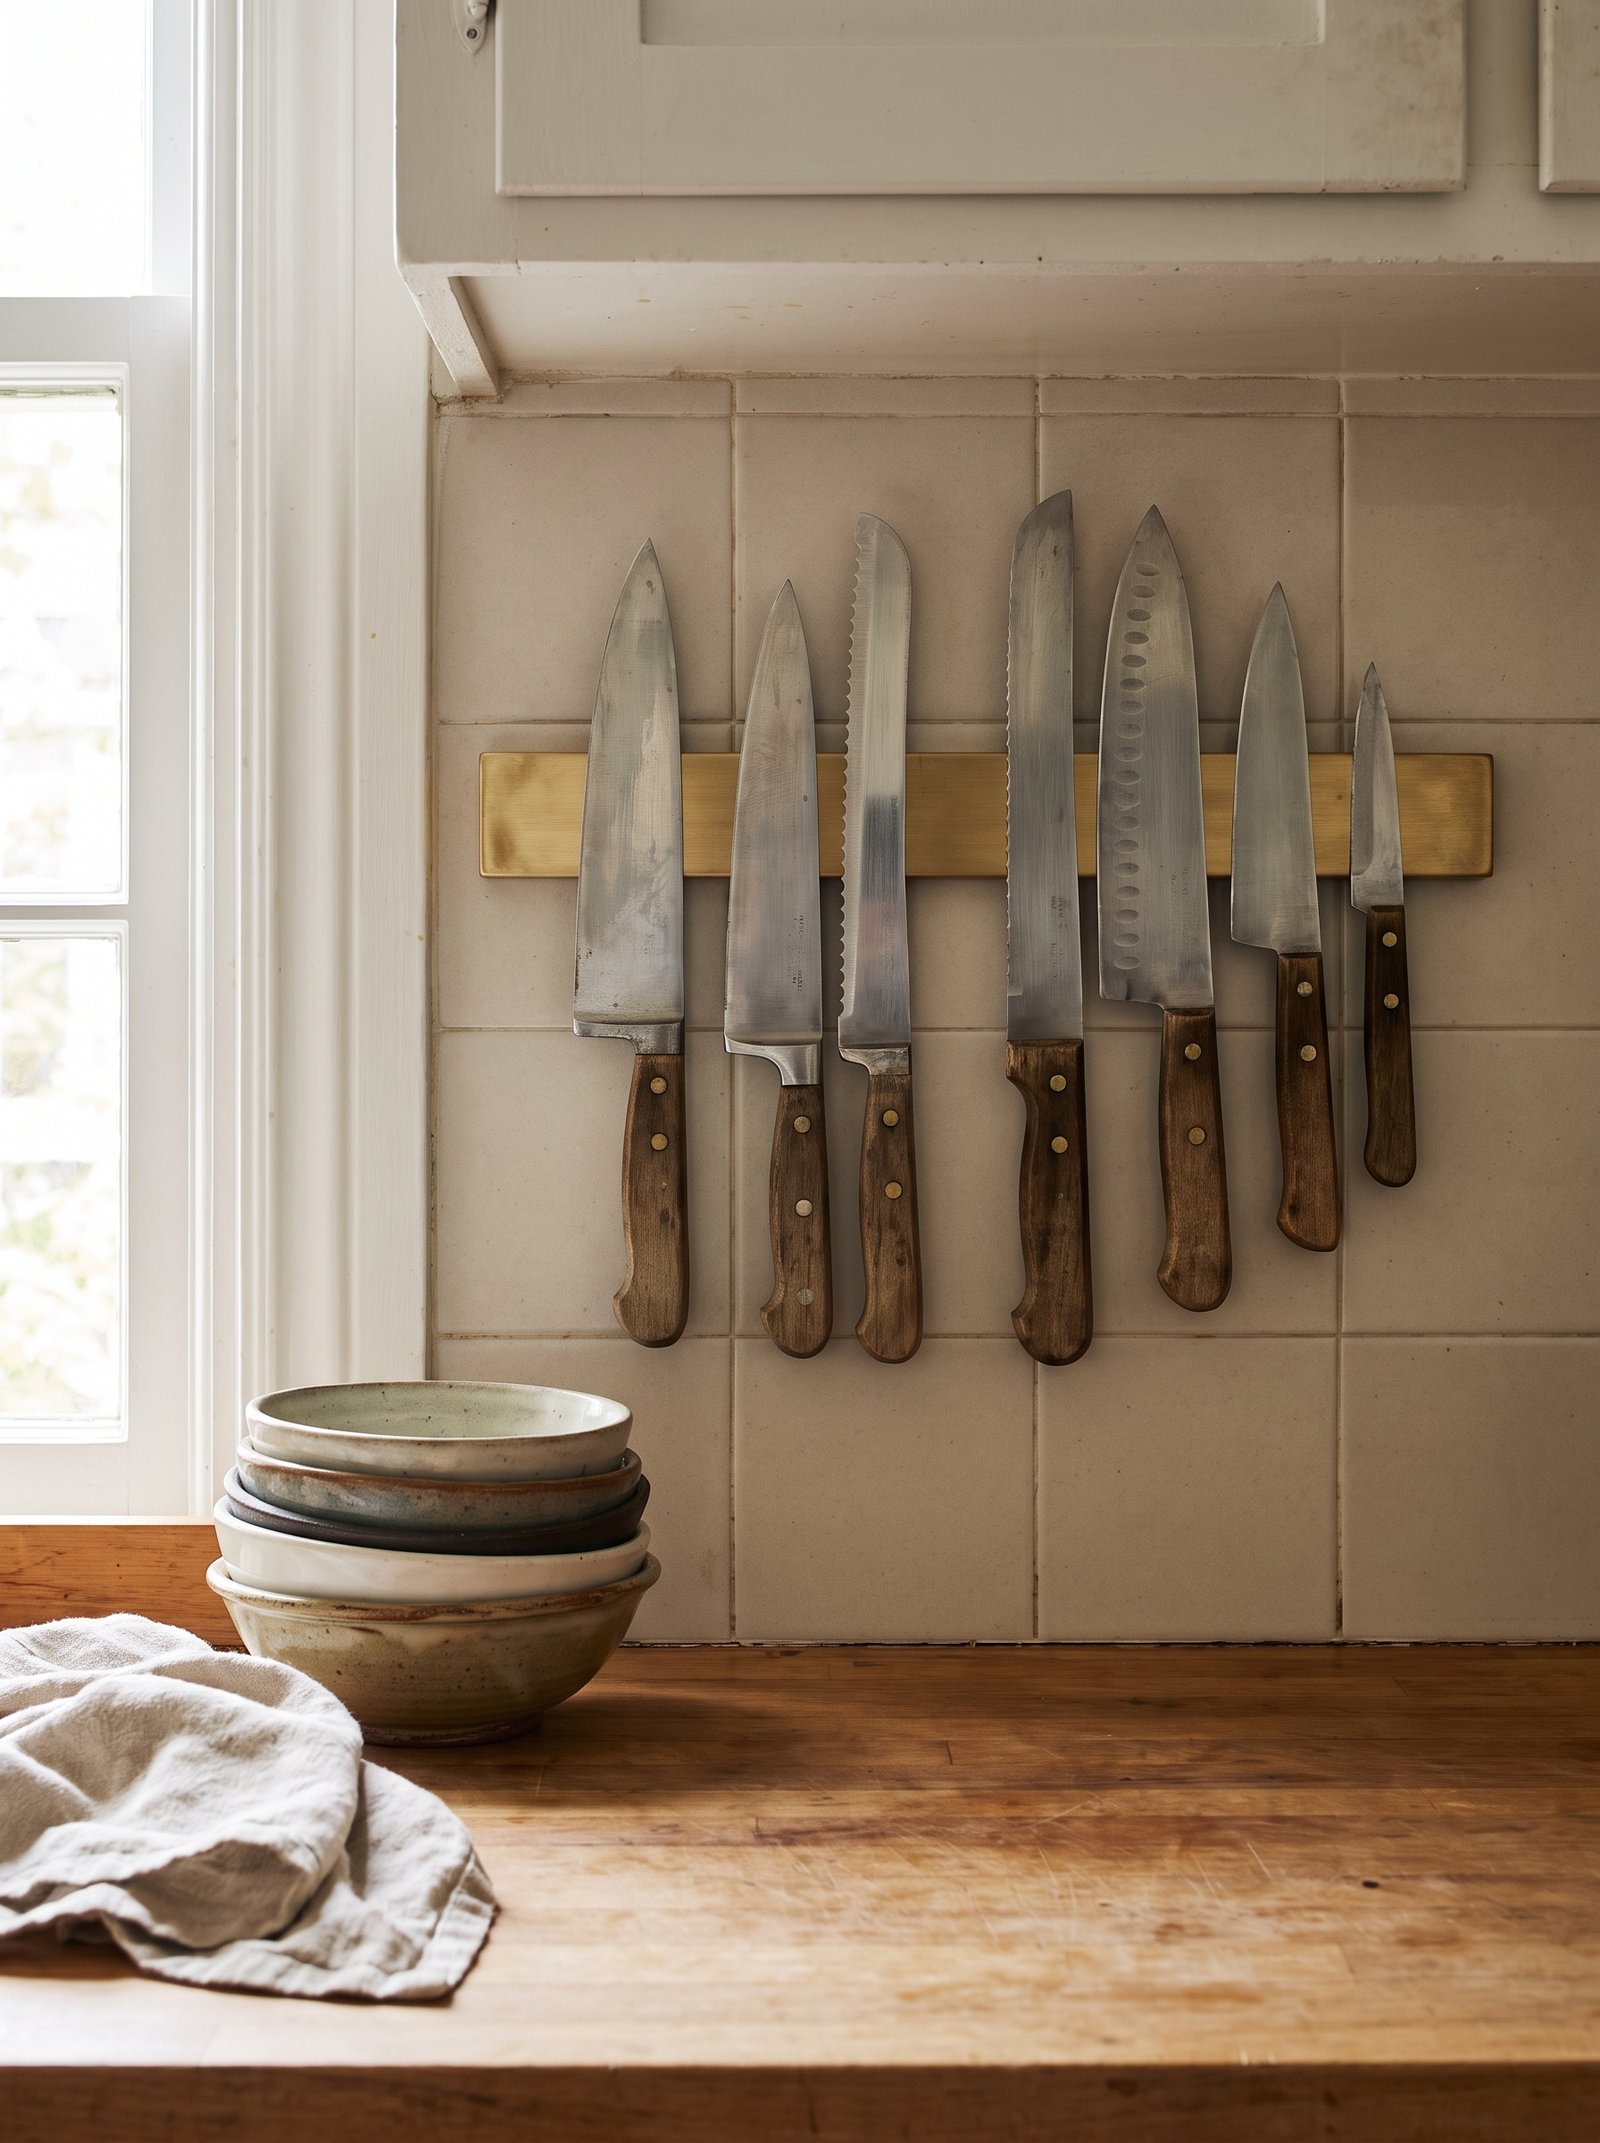
The plastic knife block on the counter is another one of those items that quietly ages the whole kitchen. A wall-mounted magnetic knife strip in wood or brass takes ten seconds to reach for a knife, frees up counter space, and looks like a chef’s kitchen.
For rentals, use a magnetic strip with 3M VHB adhesive backing rather than screws. Brands like Modern Ambition and BergHoff make adhesive versions in brass, walnut, and matte black. Get one at least 12 inches long so you can fit your daily knives plus a pair of shears.
Mount it on a wall next to the stove or under a floating shelf, at chest height, away from the sink (moisture rusts the blades over time). Clean the wall with alcohol, press for thirty seconds, wait an hour before adding knives. The adhesive holds four to six knives easily.
Style it with your four most-used knives, evenly spaced. Do not overload it with every knife you own — three or four knives read chef, seven or eight read hardware store.
On move-out, warm the adhesive with a hair dryer and peel off. Some strips leave a faint outline on painted walls; a magic eraser handles it in about a minute.
18. Swap every bulb for 2700K warm white

The most transformative rental fix in this entire list costs about $15 and takes ten minutes: replace every single bulb in your kitchen with a 2700K warm-white LED, and never let a 4000K or 5000K “daylight” bulb into the room again.
The color temperature of your lighting sets the entire mood of the space. 4000K reads office. 5000K reads morgue. 2700K reads home — it is the warm, golden light of an incandescent bulb, the same tone as sunset. Every editorial kitchen photograph you have ever loved was lit with 2700K to 3000K bulbs.
Check every fixture: the overhead can lights, the under-cabinet strips (see idea 7), the range hood, the little bulb inside the microwave, even the fridge if it takes a replaceable one. Buy a multi-pack of 2700K LEDs from Philips, Cree, or GE — the “Warm Glow” or “Soft White” versions.
The visual jump is immediate and shocking. The white walls suddenly look like cream. The oak reads warmer. Skin tones in the mirror over the sink stop looking sick. The whole kitchen goes from clinical to inviting in one bulb swap.
When you move, take the warm bulbs with you and put the ugly cold ones back in for the landlord. You never re-experience the color of cold light in your own home again, in any rental, forever. It is the single highest-leverage habit change on this list.
19. Add a bistro rug under the sink

A small woven bistro rug in front of the sink is a specific styling move — not a hallway runner, not a big area rug, but a compact 2×3 or 2.5×4 flatweave in a slightly more decorative pattern than the rest of your kitchen textiles.
A subtle blue-and-cream stripe, a soft muted floral, or a persian-style flat weave in warm tones adds one small point of pattern in an otherwise quiet room. It is what stops a cream-and-oak kitchen from reading flat.
Look for washable, low-pile options — Ruggable, Lorena Canals, and Chris Loves Julia for Loloi all make washable bistro rugs designed exactly for this use. Prices run $40–$150, and they survive spills, drips, and daily foot traffic.
Anchor it directly in front of the sink where you stand most, with a non-slip pad underneath (mandatory near water). It cushions your feet during dish washing and long cooking sessions, and it becomes the single visual center of the working part of the kitchen.
Wash it every month or so with your linens. The blue and cream palette pairs particularly well with warm oak and cream cabinets — the tiny hit of cool color is what keeps the whole kitchen from turning into one warm beige blur.
20. Camouflage the fridge with washi tape
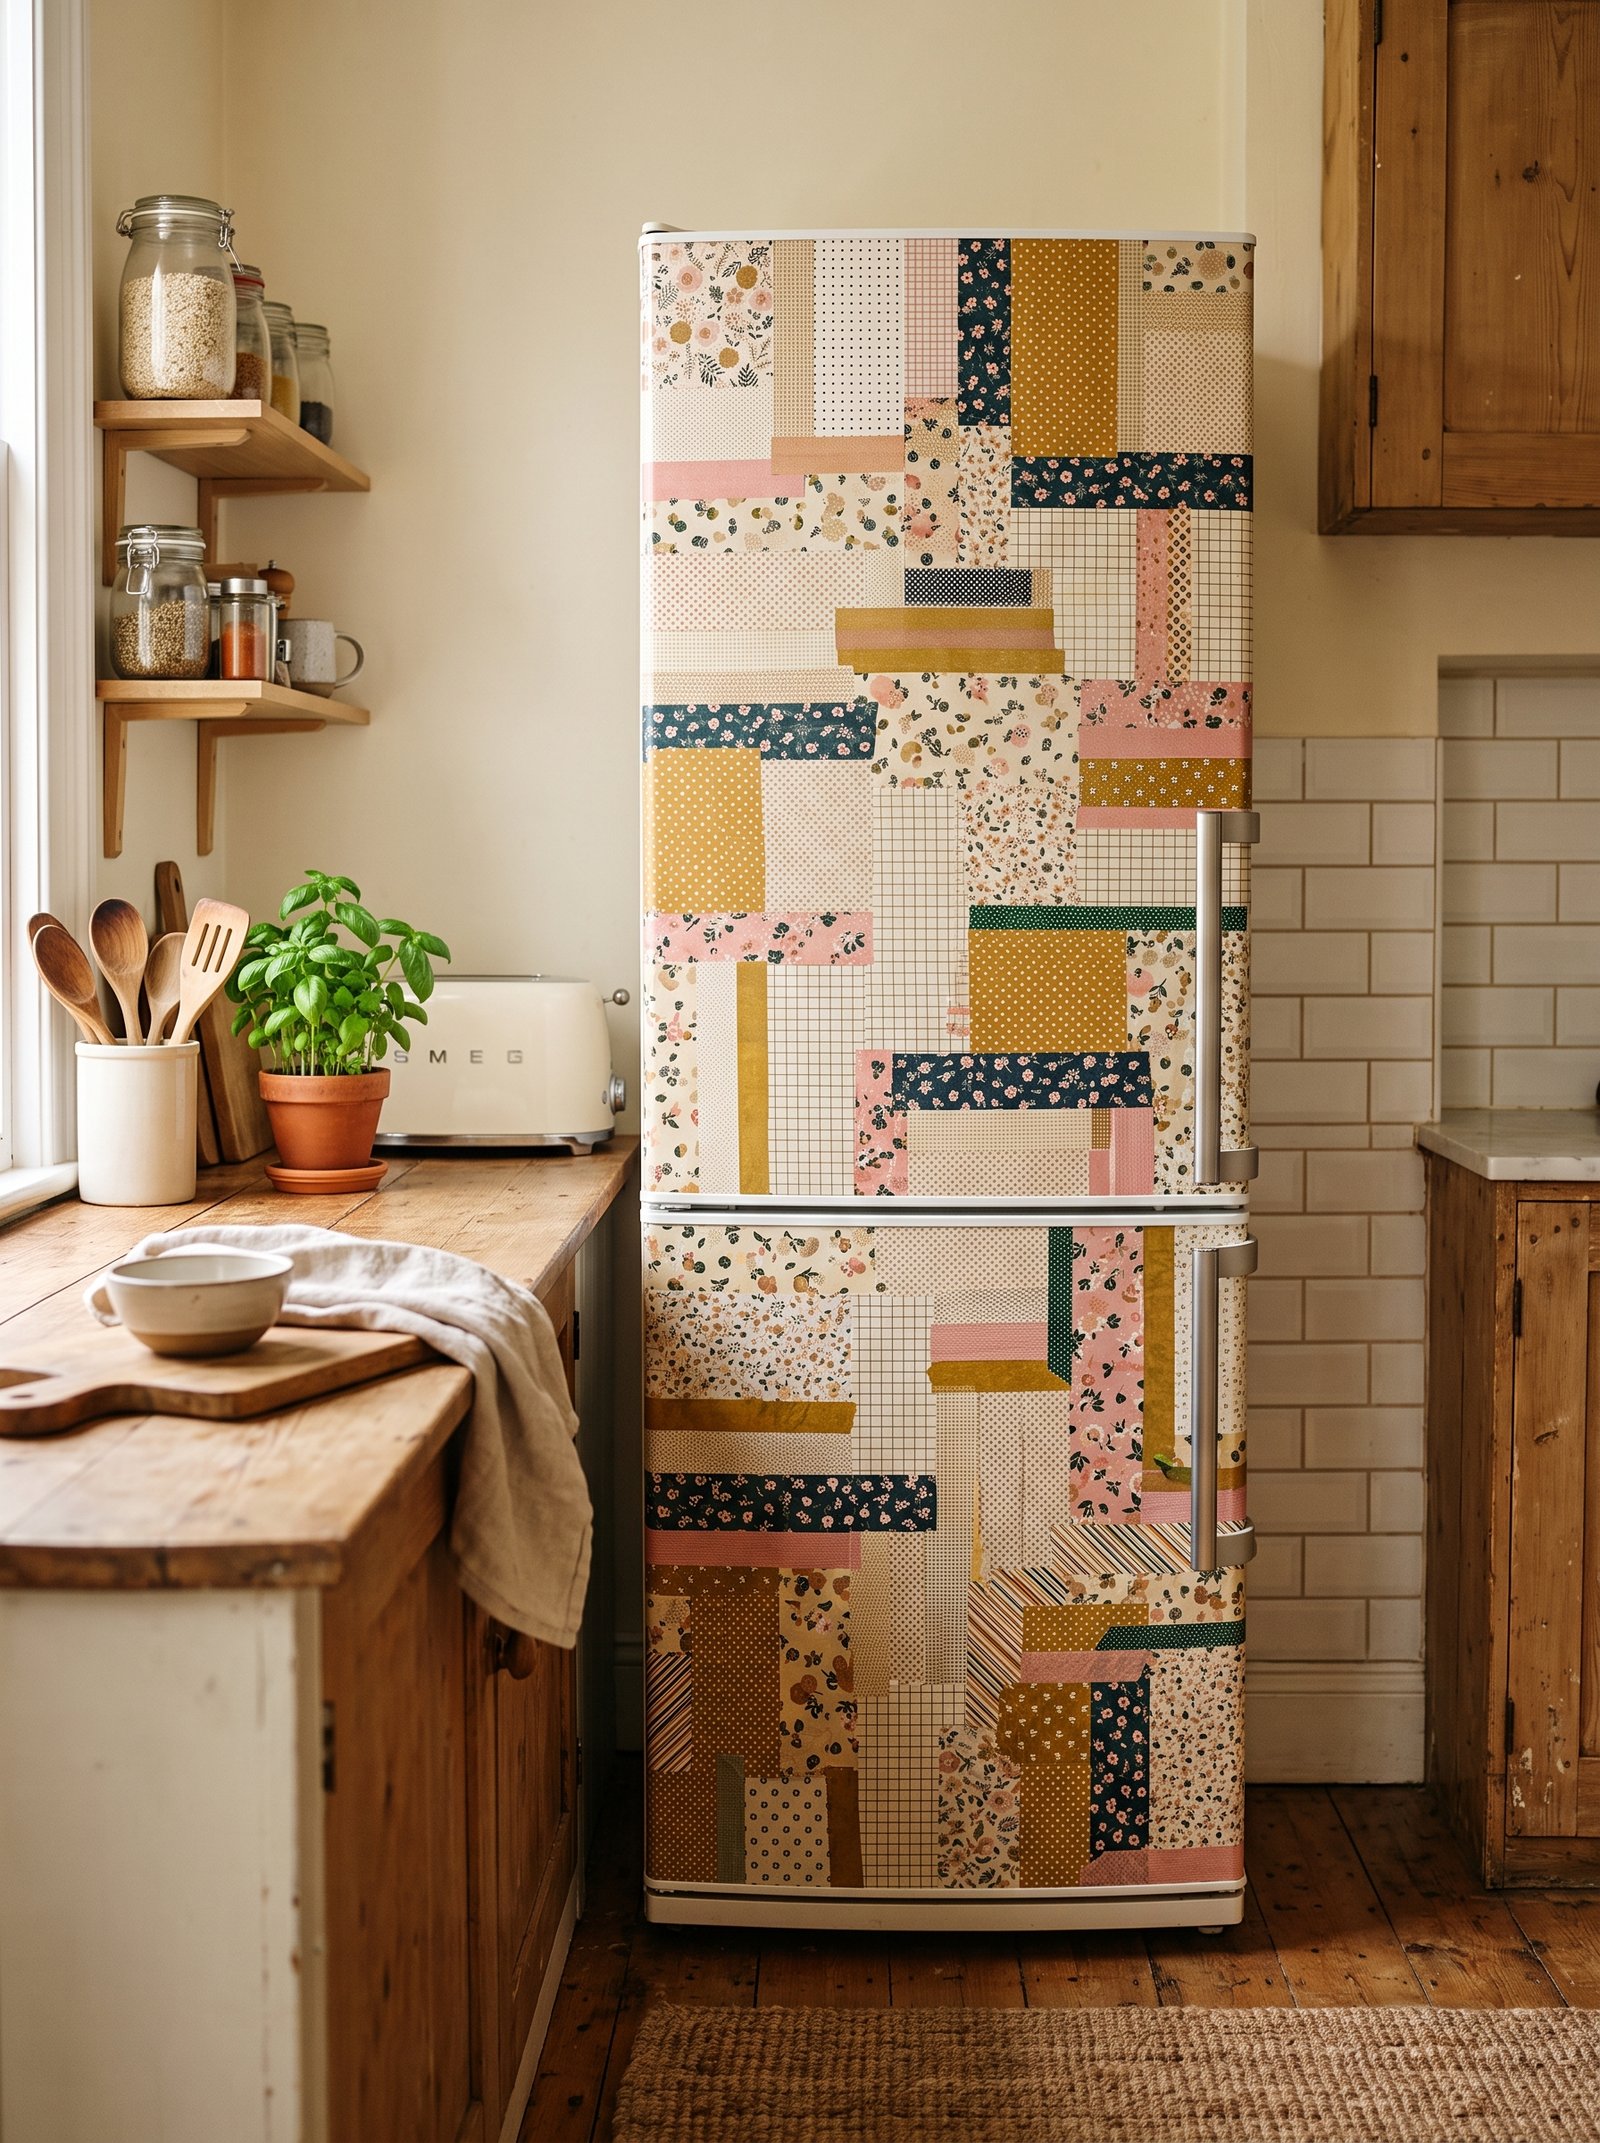
The blocky white or stainless-steel fridge is one of the biggest, boxiest, hardest-to-hide objects in any small rental kitchen. You cannot paint it and you cannot replace it — but you can quiet it dramatically with a strip of warm-toned washi tape or removable trim.
Wide washi tape (2-inch or 3-inch) in a warm neutral — cream, oatmeal, terracotta, brushed brass metallic — applied around the edges of the fridge door softens the harsh rectangular outline and ties the appliance into the rest of the kitchen palette.
Alternatively, use a removable vinyl fridge wrap in a matte oatmeal, warm cream, or oak-look finish. Brands like FIRE-Vinyl and RoomMates make full front-panel wraps in the $30–$80 range that go on with soapy water like large decals and come off cleanly.
Whichever route you take, resist the urge to over-decorate the fridge front with a hundred magnets, notes, photos, and takeout menus. Two or three magnetic clips holding one grocery list plus one meaningful photograph is the maximum. A calm fridge front is worth more than any single decor upgrade in this list.
The visual effect is that the fridge stops being an appliance and starts being part of the room. Not invisible — just quiet enough that your eye moves past it to the styled counter and the greenery.
21. Style one open shelf beautifully
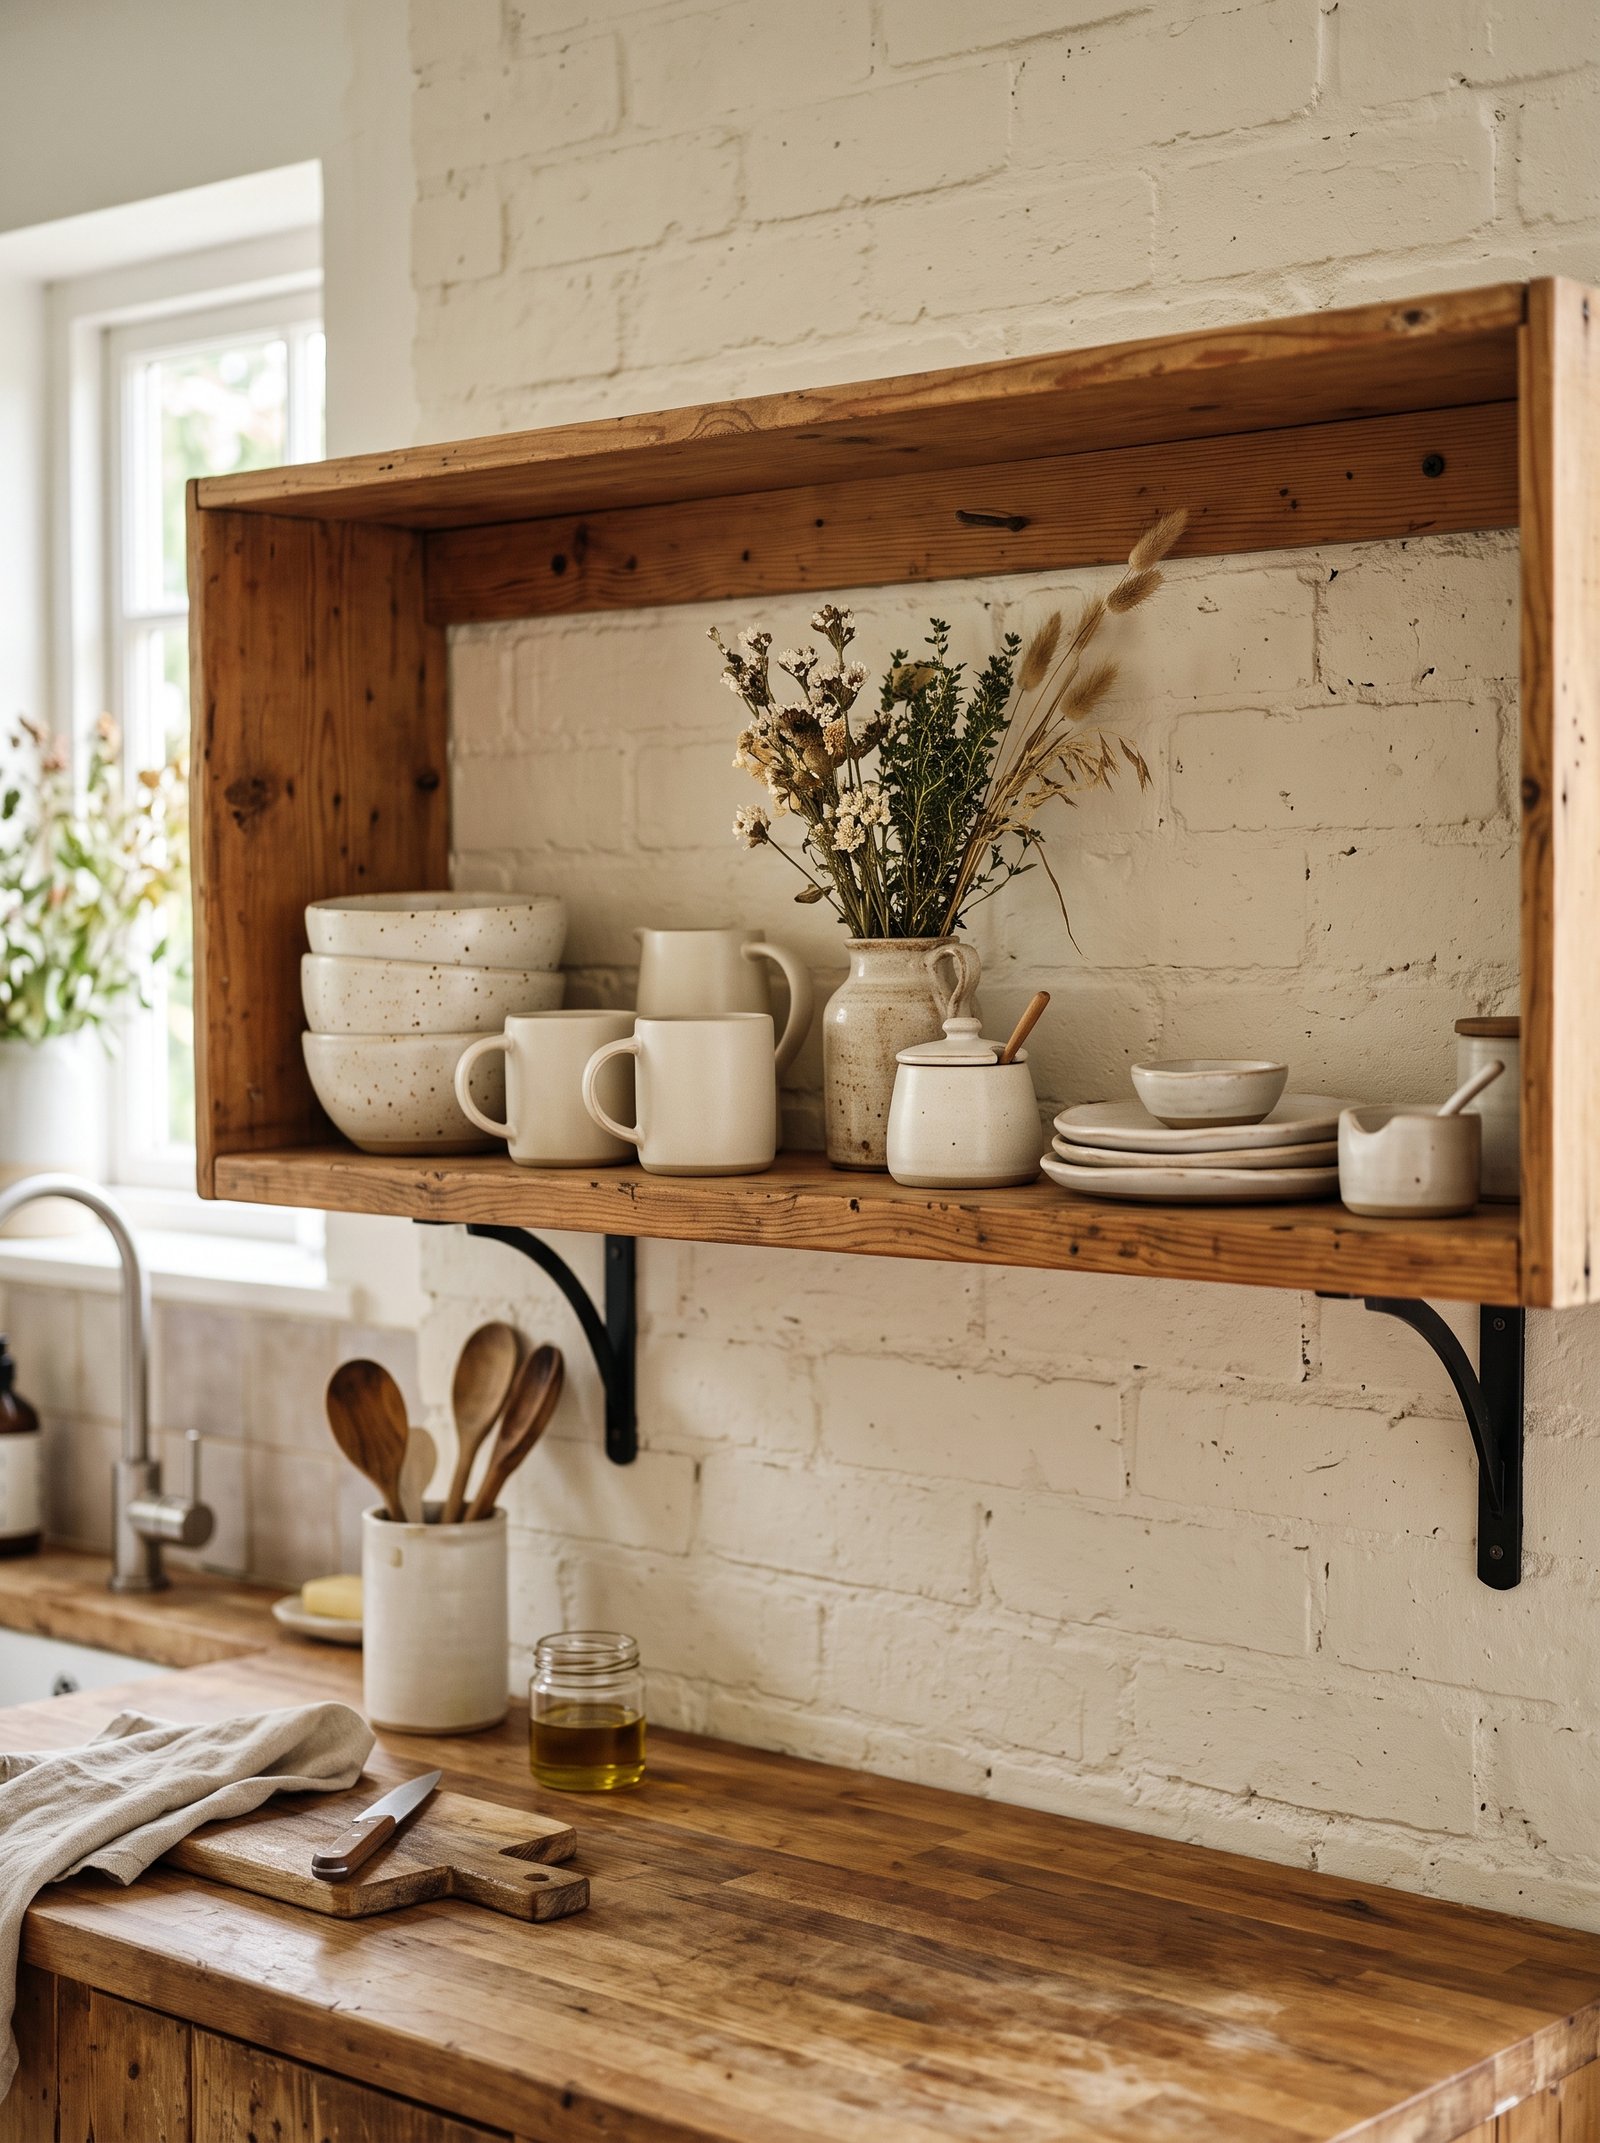
You do not need to open up all your cabinets to get the airy open-shelf look. Style one shelf — the top shelf of a bookcase, an open pantry shelf, or a floating shelf you install with 3M Command strips — and it does the work of ten.
The rule of open shelving is: not everything, not perfect, and always in threes. Group three to five items per section. A stack of two ceramic bowls, a small pitcher, one wooden object, one plant. Odd numbers read intentional; even numbers read symmetrical and can feel stiff in a small kitchen.
Use only items you actually use daily: your everyday plates, favorite mugs, most-reached-for glassware. Open shelving is only sustainable if it is functional; otherwise it becomes a dust-collecting art project you resent after two weeks.
Vary height and material: a tall vase or pitcher, a stack of horizontal plates, one small round object. This variation is what gives the shelf visual rhythm. Everything at the same height reads flat.
One well-styled open shelf near the coffee station or above the stove tells guests “this person cares about their home” more clearly than any single expensive piece of furniture ever will. It is the highest-leverage 20 minutes of styling in the entire kitchen.
22. Grow herbs on the windowsill
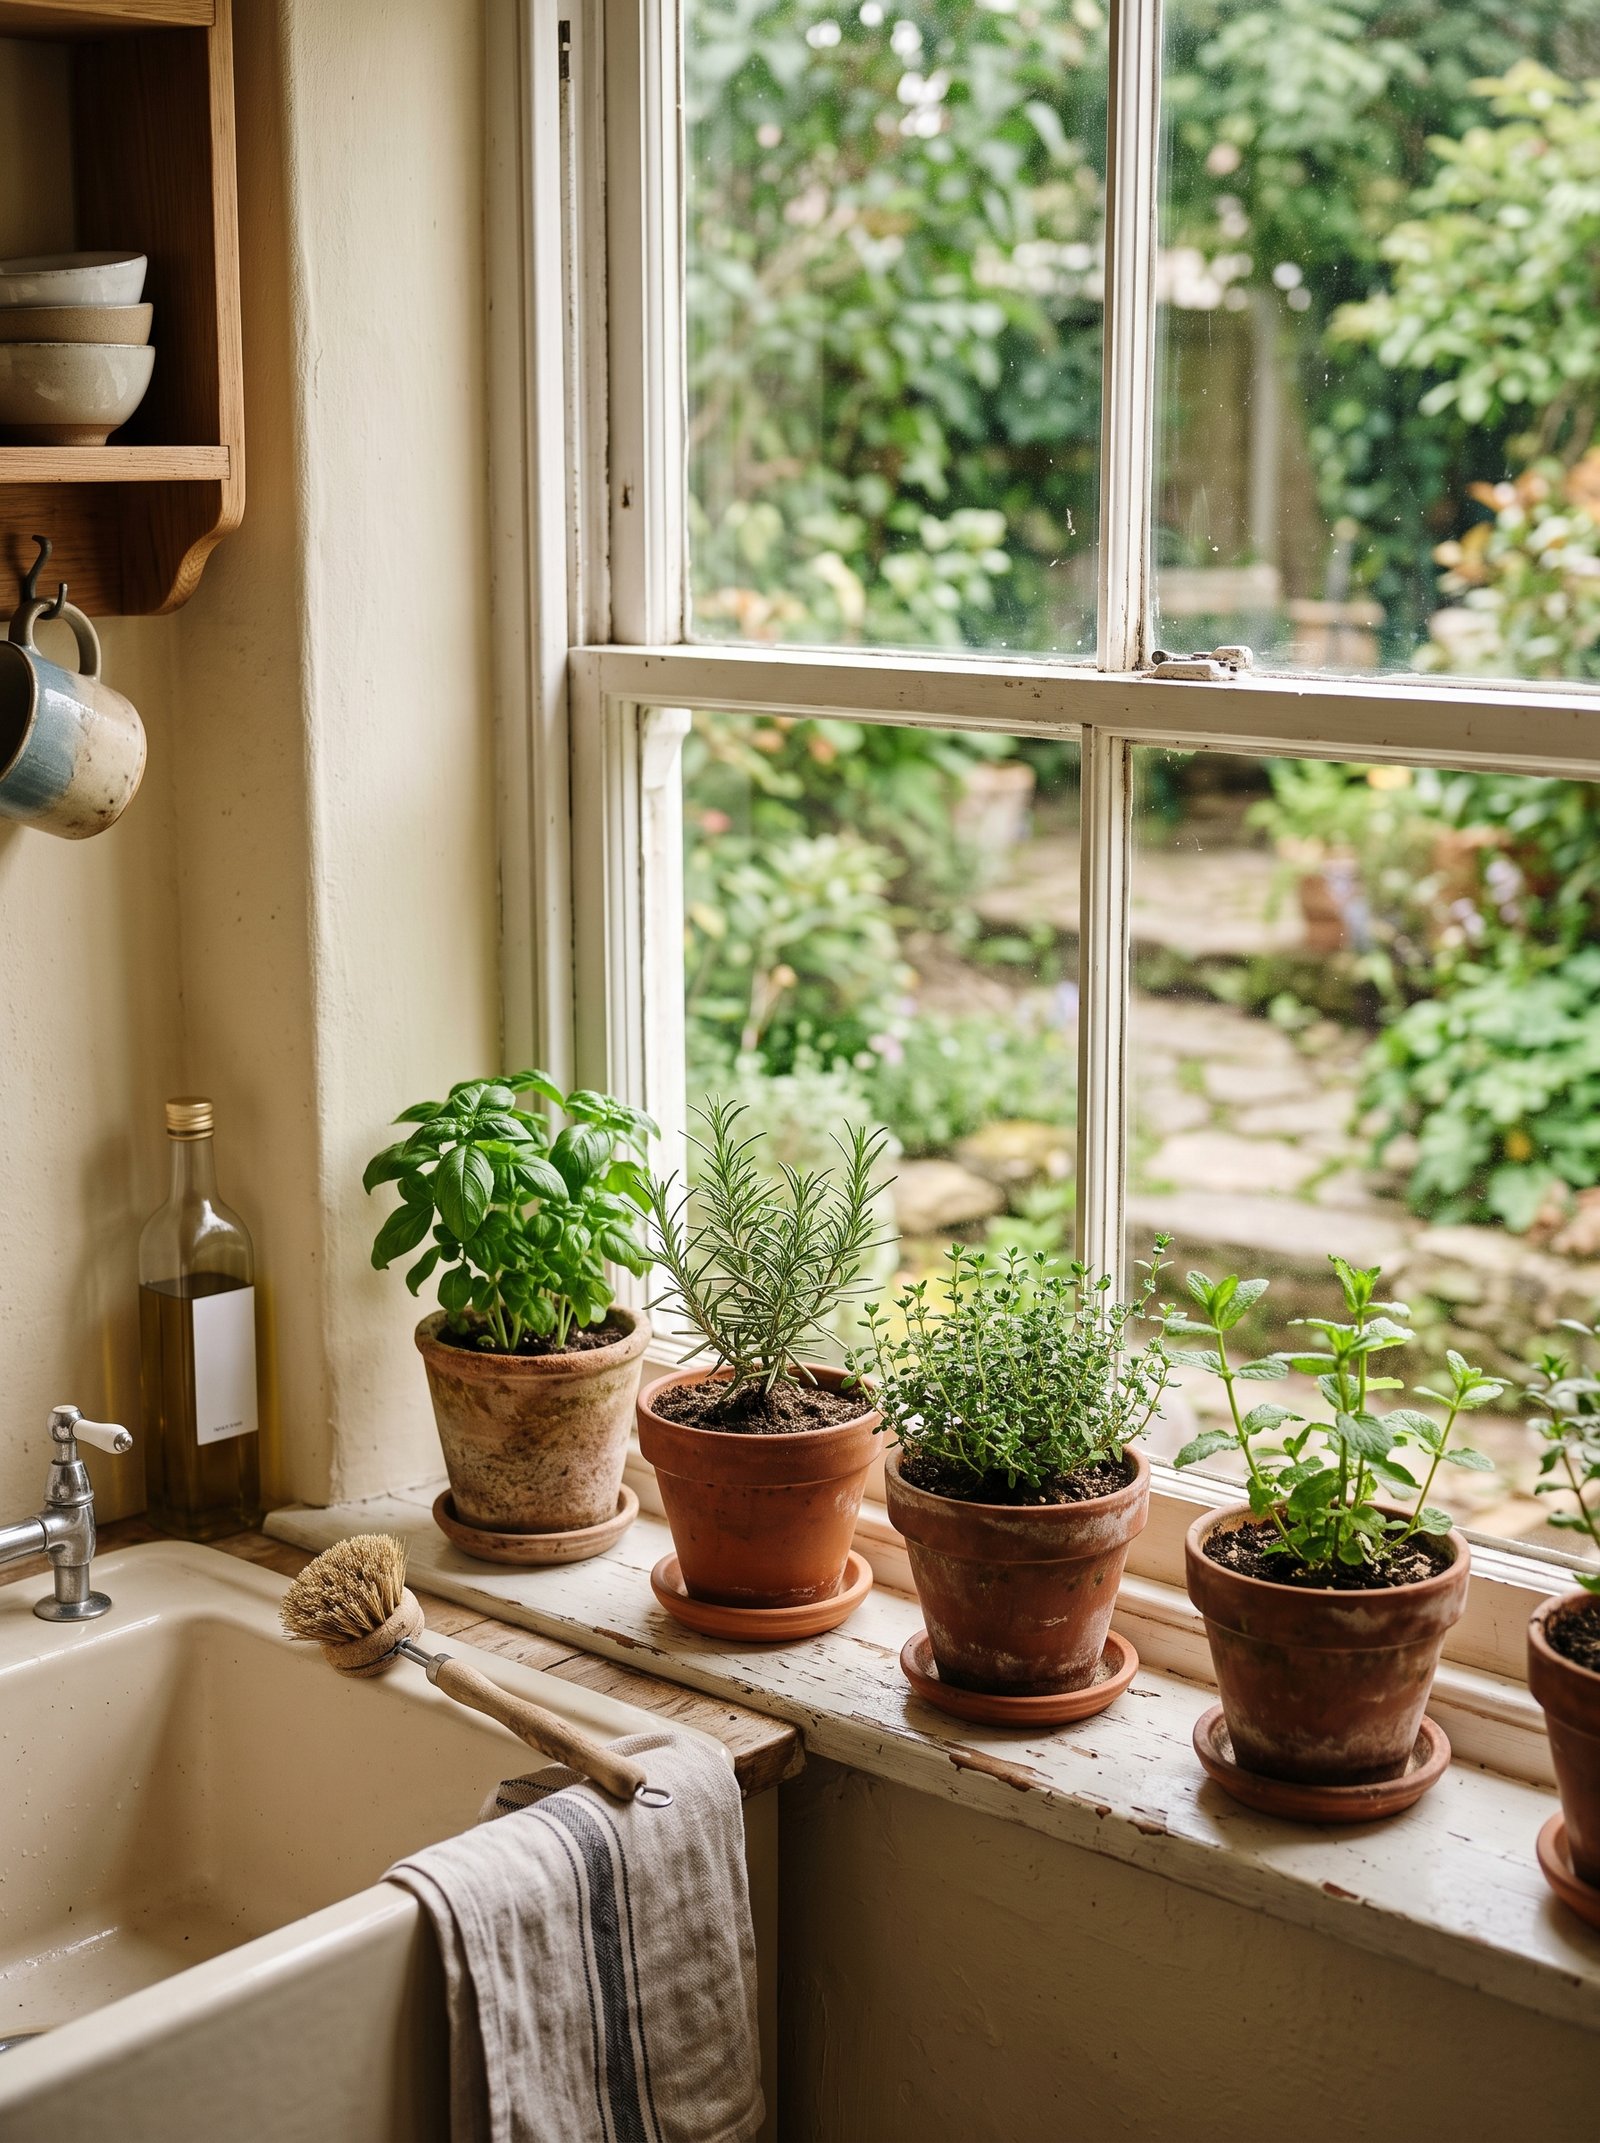
Even in a rental with no yard, three small pots of herbs on the kitchen windowsill add life, smell, and function that nothing artificial can replicate. Basil, mint, chives, and parsley all thrive in a south- or east-facing window with only occasional watering.
Buy them already started at the grocery store rather than starting from seed — a live basil plant from Trader Joe’s for $3 is a month of pesto and photograph-ready windowsill styling in one purchase. Rosemary and thyme are the most rental-forgiving; both survive weeks of benign neglect.
Repot into small terracotta or cream stoneware pots (drop the plastic grocery-store pots inside a nicer vessel — you never see the plastic). Three matching pots in a row read intentional; three mismatched pots read college dorm.
Watering: press a finger an inch into the soil; if it is dry, water; if it is damp, wait. Kitchen herbs die from overwatering far more often than under. Once a week is usually enough.
Snip leaves for cooking straight from the plant — the reason to have them is the daily interaction. A windowsill of living herbs is the difference between a kitchen you cook in and a kitchen you inhabit.
23. Lean a large board against the backsplash
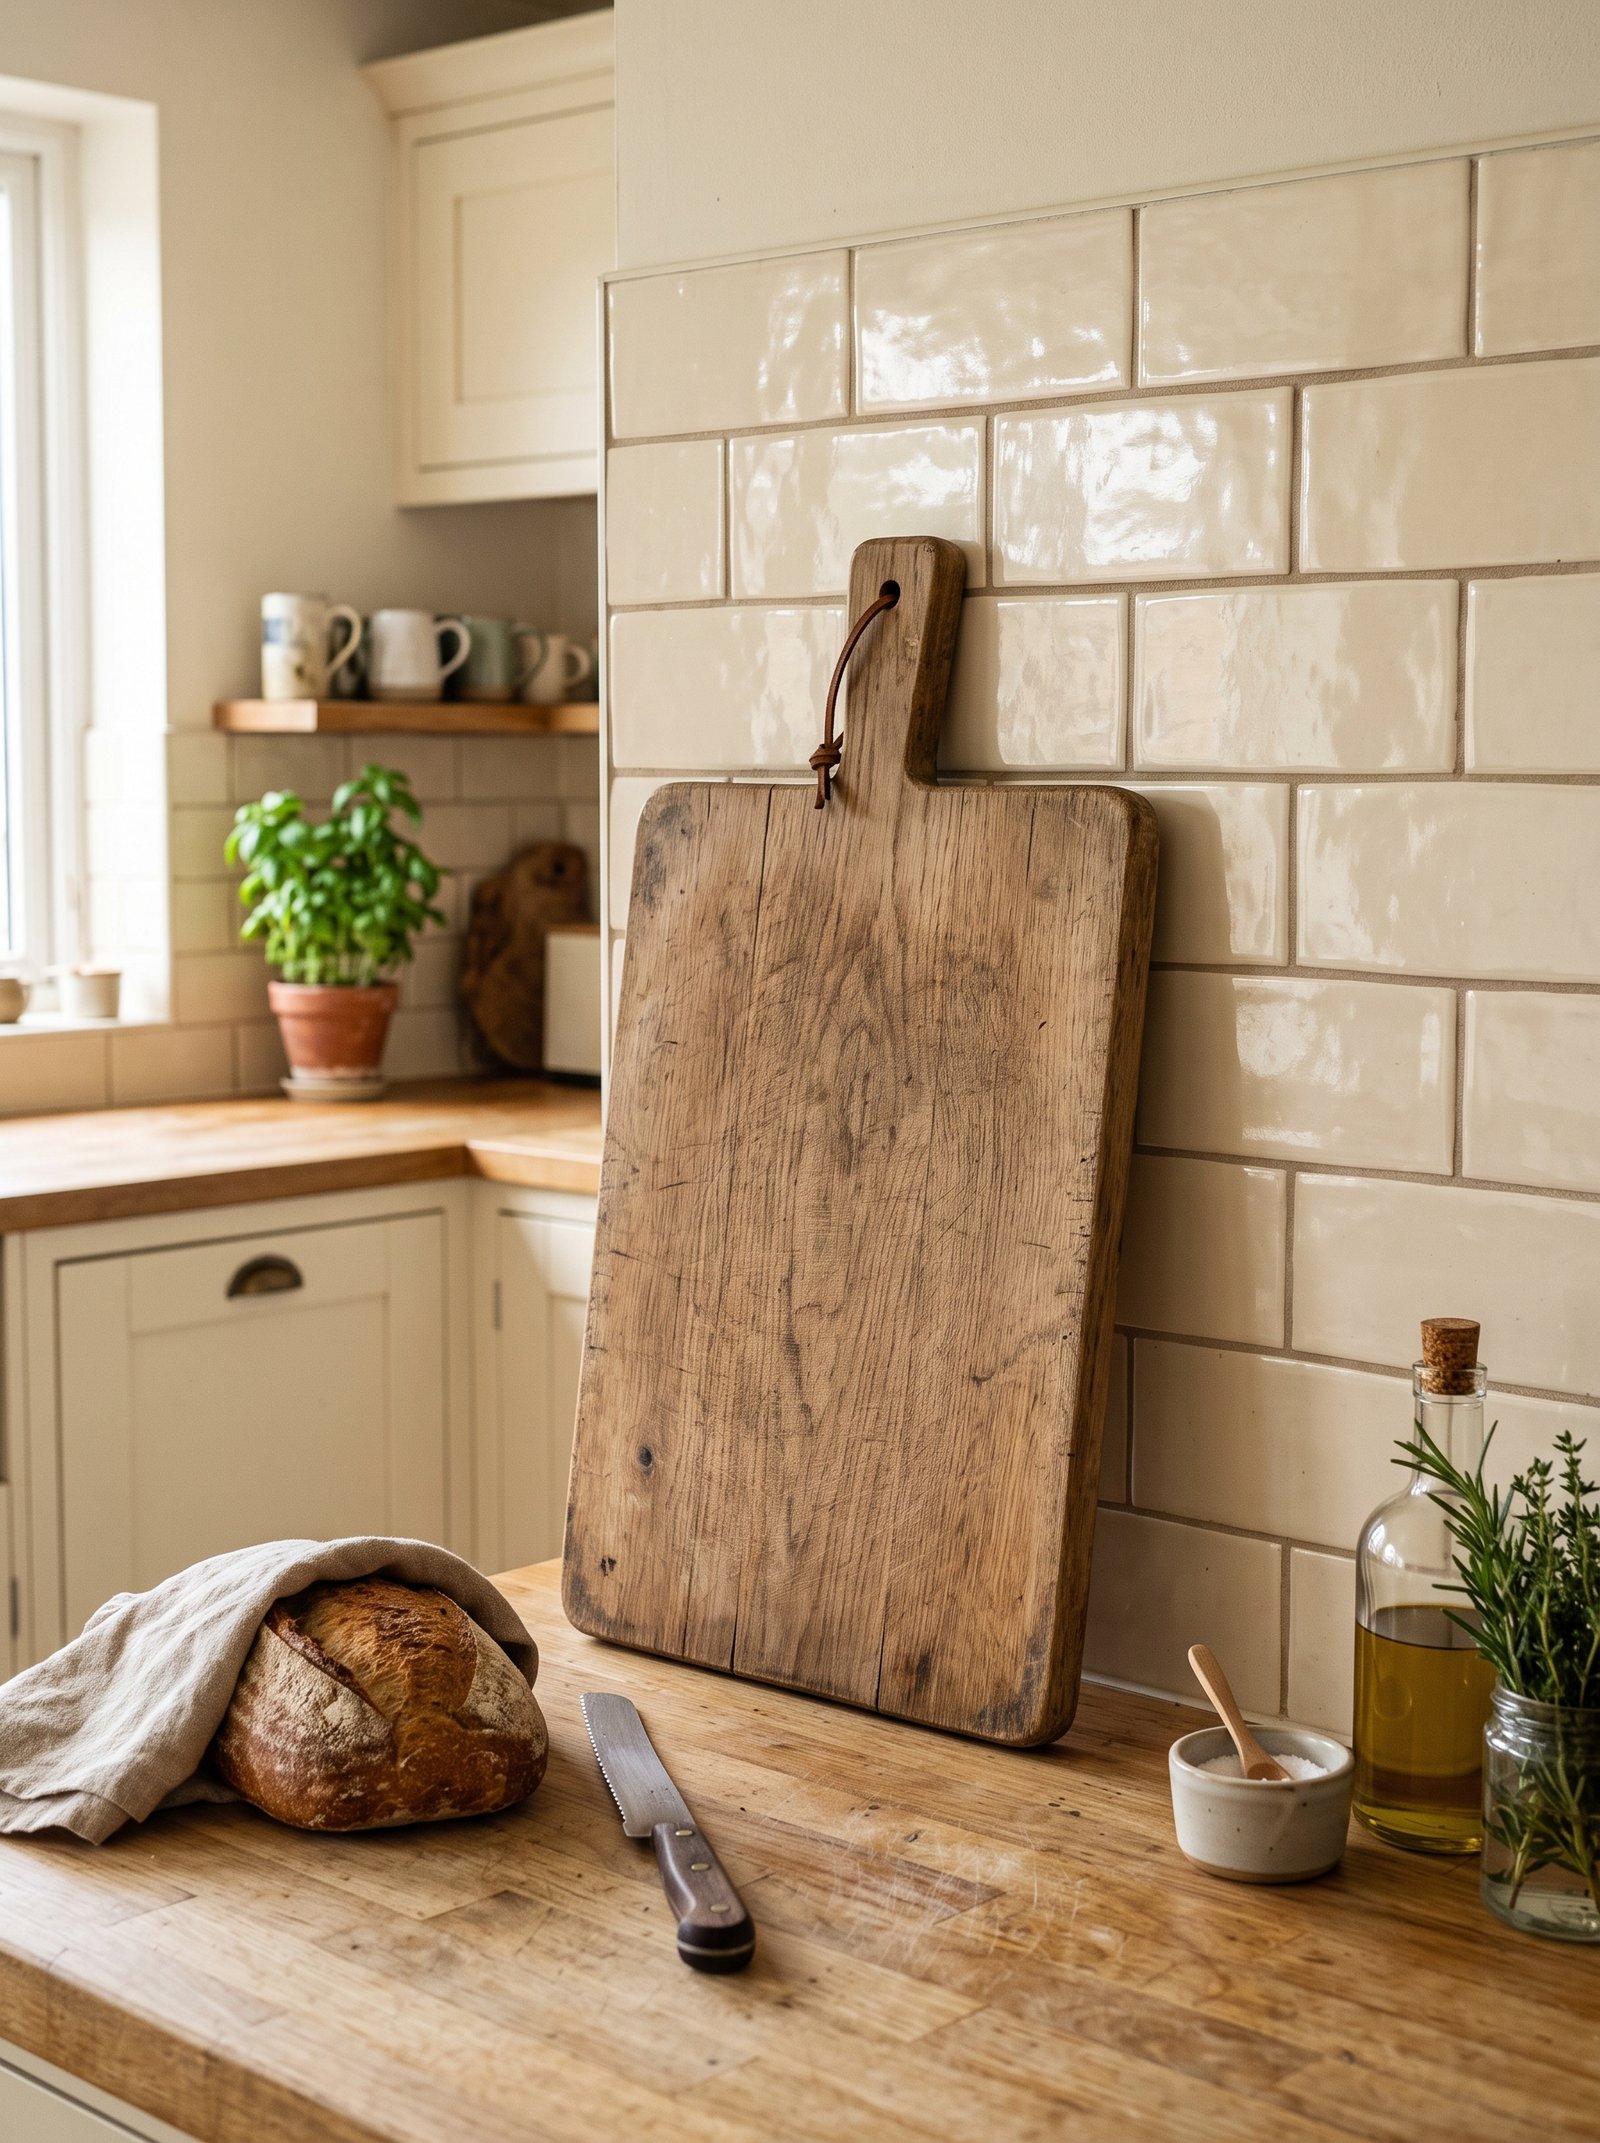
Beyond the small cutting boards from idea 14, a single oversized bread or serving board — 18 inches or larger — leaned against the backsplash is a single-object styling move that anchors the entire counter.
Look for a solid slab of olive wood, walnut, or acacia. Etsy, Food52, and vintage shops all sell them in the $40–$120 range. A live-edge slab (with the natural curve of the tree still visible) reads even more artisanal than a rectangular one.
Lean it in one specific spot — the corner between the sink and the range, or centered behind the coffee station — where it catches morning light. That one big warm object does more visually than five small styling pieces trying to fill the same space.
Oil it regularly with mineral or beeswax oil, the same as your other boards. A well-cared-for large board actually improves with use and darkens beautifully over time.
It functions, too — pull it down for cheese boards, bread baking, weekend brunch platters, or as a runner in the center of a small dining table. The best styling objects are the ones that earn their spot by being useful.
24. Use a ceramic pitcher for wooden spoons
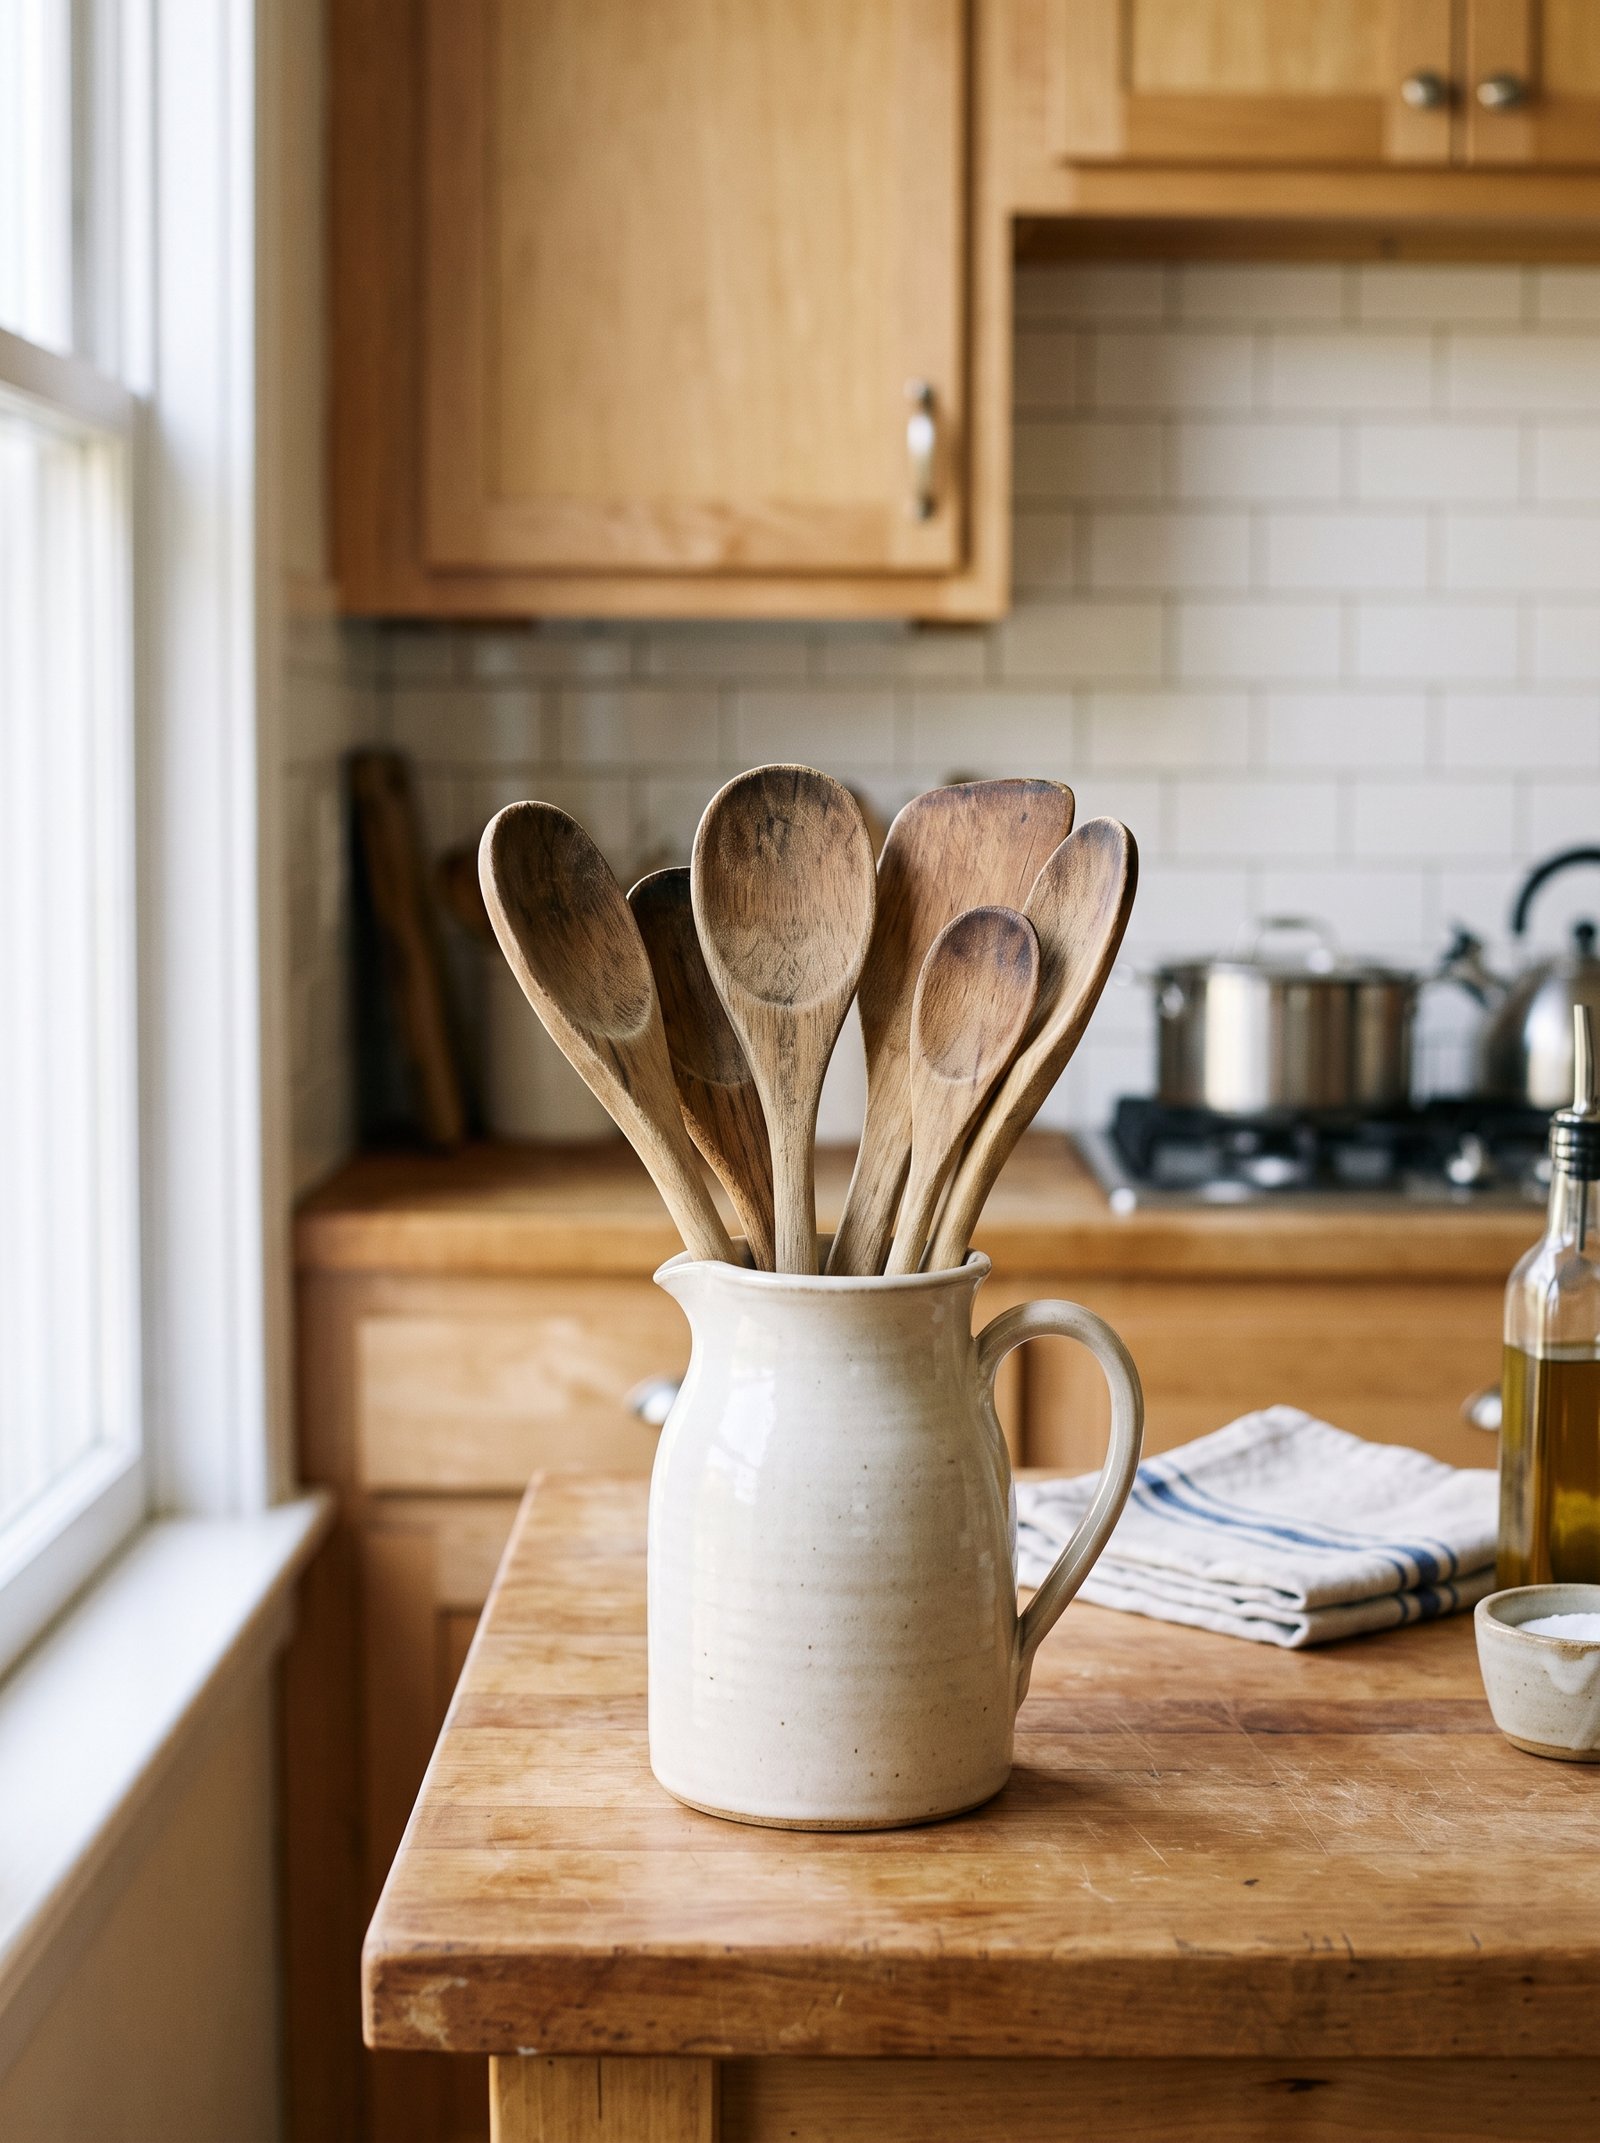
The utensil crock is a small object with an outsized visual impact. The plastic one from the housewares aisle undoes half of everything else you have done. A single warm ceramic pitcher, on the other hand, is a piece of styling that anchors the counter next to the stove.
Look for a pitcher between 8 and 12 inches tall in cream, sand, or warm terracotta glaze. Big Sur ceramics, Farmhouse Pottery, East Fork, Etsy potters, and thrift-store finds all work. Cost range: $20 (thrift) to $150 (independent potter).
Fill it with wooden spoons, a wooden spatula or two, one whisk, one pair of tongs. Not more. Six utensils tops. If your pitcher is full to bursting it looks like a junk drawer; if it holds five carefully chosen wooden objects it looks like decor.
Store the metal utensils, plastic scoops, and specialty tools in a drawer. The stove-side crock is exclusively for the daily-use wooden utensils that also happen to be beautiful.
Wooden utensils develop their own patina over years of use. A twenty-dollar set from a farmer’s market lasts a decade and only gets more beautiful. The crock and utensils together become a permanent styling anchor that never needs replacing.
25. Put it all together — the full rental kitchen
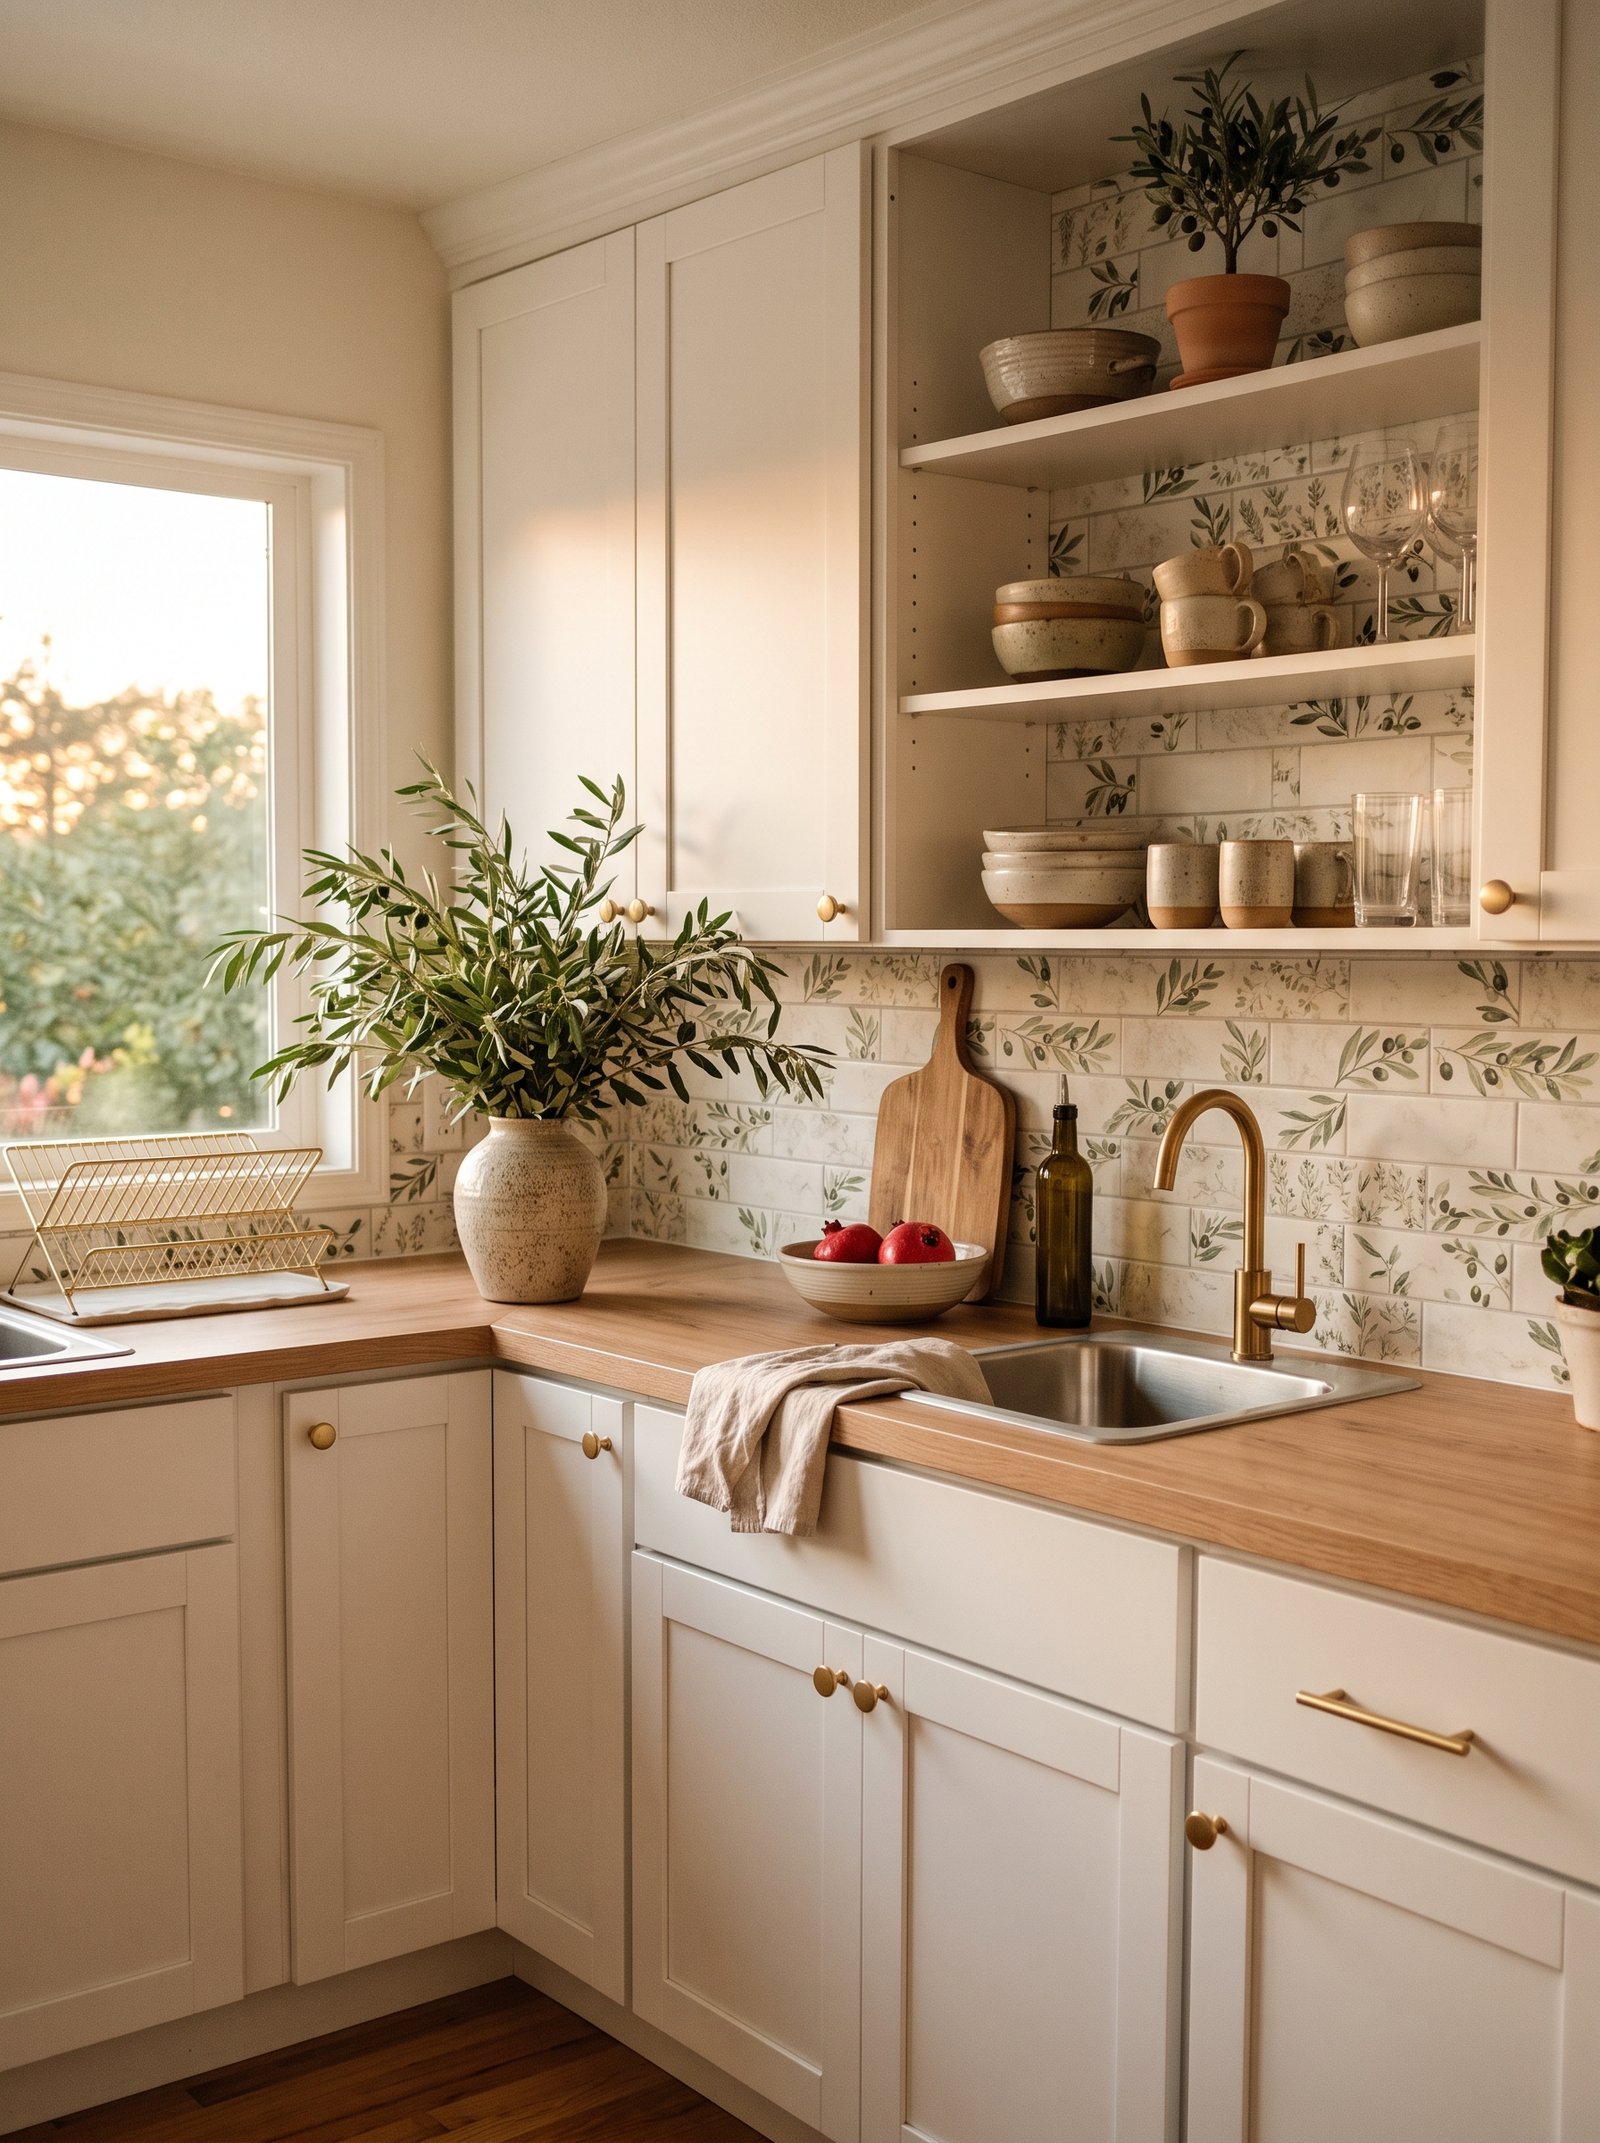
You do not have to do all twenty-five of these at once. In fact, doing them all in a weekend is how you end up with a kitchen that feels styled rather than lived-in. The best rental kitchens are the ones that got there gradually — one small change every couple of weeks over six months.
If you are just starting: swap the bulbs to 2700K first (idea 18). Do it tonight. It is the single change with the biggest emotional payoff for the least amount of money and effort. Live with that for a week and see how differently the room feels.
Then in the next month, add the linen dish towels (13), the olive branch in a stoneware vase (12), and the wicker basket to replace one plastic bin (15). Total spend: under $60. Total visible change: enormous.
From there, pick one bigger project per month. Peel-and-stick zellige backsplash one weekend. Oak contact paper on the cabinets the next. Brass adhesive pulls, then the tension shelf, then the marble contact paper on the counters — one at a time, with time to live between each so you notice what actually matters and what does not.
The photograph at the top of this idea is what six months of small, deliberate rental fixes look like all put together — no landlord conversations, no drilling, nothing that costs you a deposit. A warm, editorial kitchen that also happens to work for real cooking, real life, real dinner parties. The whole point of this list is that “rental” and “beautiful” were never actually opposites; they just needed the right tools.
One last thing — the mindset shift
The most important thing about renovating a rental is realizing that you are allowed to. So many of us live in places for years thinking “well, it is not really mine, so why bother” — and then move out having never made the kitchen actually work for us. That is years of your one life spent in a room that fought you every morning at the coffee machine.
Every idea on this list comes off. Every one. On move-out day you spend a couple of hours with a hair dryer peeling everything back and the landlord walks in and sees exactly what they gave you. In between, though, you get to live in a kitchen that feels like yours. That trade is always worth making.
If you loved this, save it to your Pinterest kitchen board and share with a friend who is renting. New home-decor guide every day at Abodenest.
Keep reading — related decor guides
- → 30 Small Living Room Ideas
- → 25 Studio Apartment Layout Ideas
- → 30 Small Bedroom Ideas
- → 25 Tiny Kitchen Ideas
- → 30 Small Bathroom Ideas Under $100
Take our 2-minute Decor Style Quiz
Answer 10 quick questions and discover whether you’re Modern Boho, Scandinavian Minimalist, Modern Farmhouse, Mediterranean, Japandi, or Classic Traditional — plus your color palette and 3 articles made for you.
Our interactive tools can help
Take the style quiz, generate a beige wall color palette, or calculate the perfect pillow stack for your bed — all free, all in under 2 minutes.