25 Tiny Kitchen Ideas for Apartments That Actually Work
Twenty-five real, tested ideas for tiny apartment kitchens — under 60 square feet, galley-style, or that awkward L-shape most rentals give you. Open oak shelves that make the room read twice as large, warm brass hardware, magnetic knife strips, olive branches on the counter, and the ten-minute styling moves that turn a builder-grade kitchen into a warm editorial space you actually want to cook in.
Small kitchens are not a design problem — they are a design opportunity. Every French country kitchen, every Japanese tea-room kitchen, every editorial Brooklyn brownstone kitchen you love on Pinterest is small. The reason they photograph well is not that they have more space; it is that they use less stuff, more intentionally.
This list assumes rental or owned — some ideas require paint or permanent installation and some are entirely reversible. Start with idea 21 (swap all cabinet hardware to aged brass) and idea 22 (olive branch in a pitcher) this weekend. That is under $150 and it will change how you feel about the whole room.
1. Install open oak shelves above the counter

Upper cabinets in a tiny kitchen visually swallow the entire room. Replacing one bank of them with two floating oak shelves (or building shelves in the space where uppers used to be) opens the room dramatically and forces you to keep only the beautiful stuff.
Look for solid oak or walnut shelves 8-10 inches deep and 24-48 inches wide, mounted 16 inches above the counter and 12 inches above each other. Etsy and hardware stores sell them pre-cut in the $30-80 range per shelf.
Mount into studs with steel L-brackets rated for at least 40 pounds each. Two brackets per shelf minimum, three if the shelf is wider than 36 inches. Ceramics and glassware are heavier than they look.
Style with only what you use daily — a stack of eight matching cream plates, six mugs, a set of glasses, one wooden bowl. Never a knick-knack. In a tiny kitchen, open storage must be functional or it becomes visual clutter.
This one change makes a small kitchen photograph like a magazine spread. It also forces the habit of buying fewer, better-looking daily-use items — which is really what “tiny kitchen design” is about.
2. Mount a magnetic knife strip on the backsplash
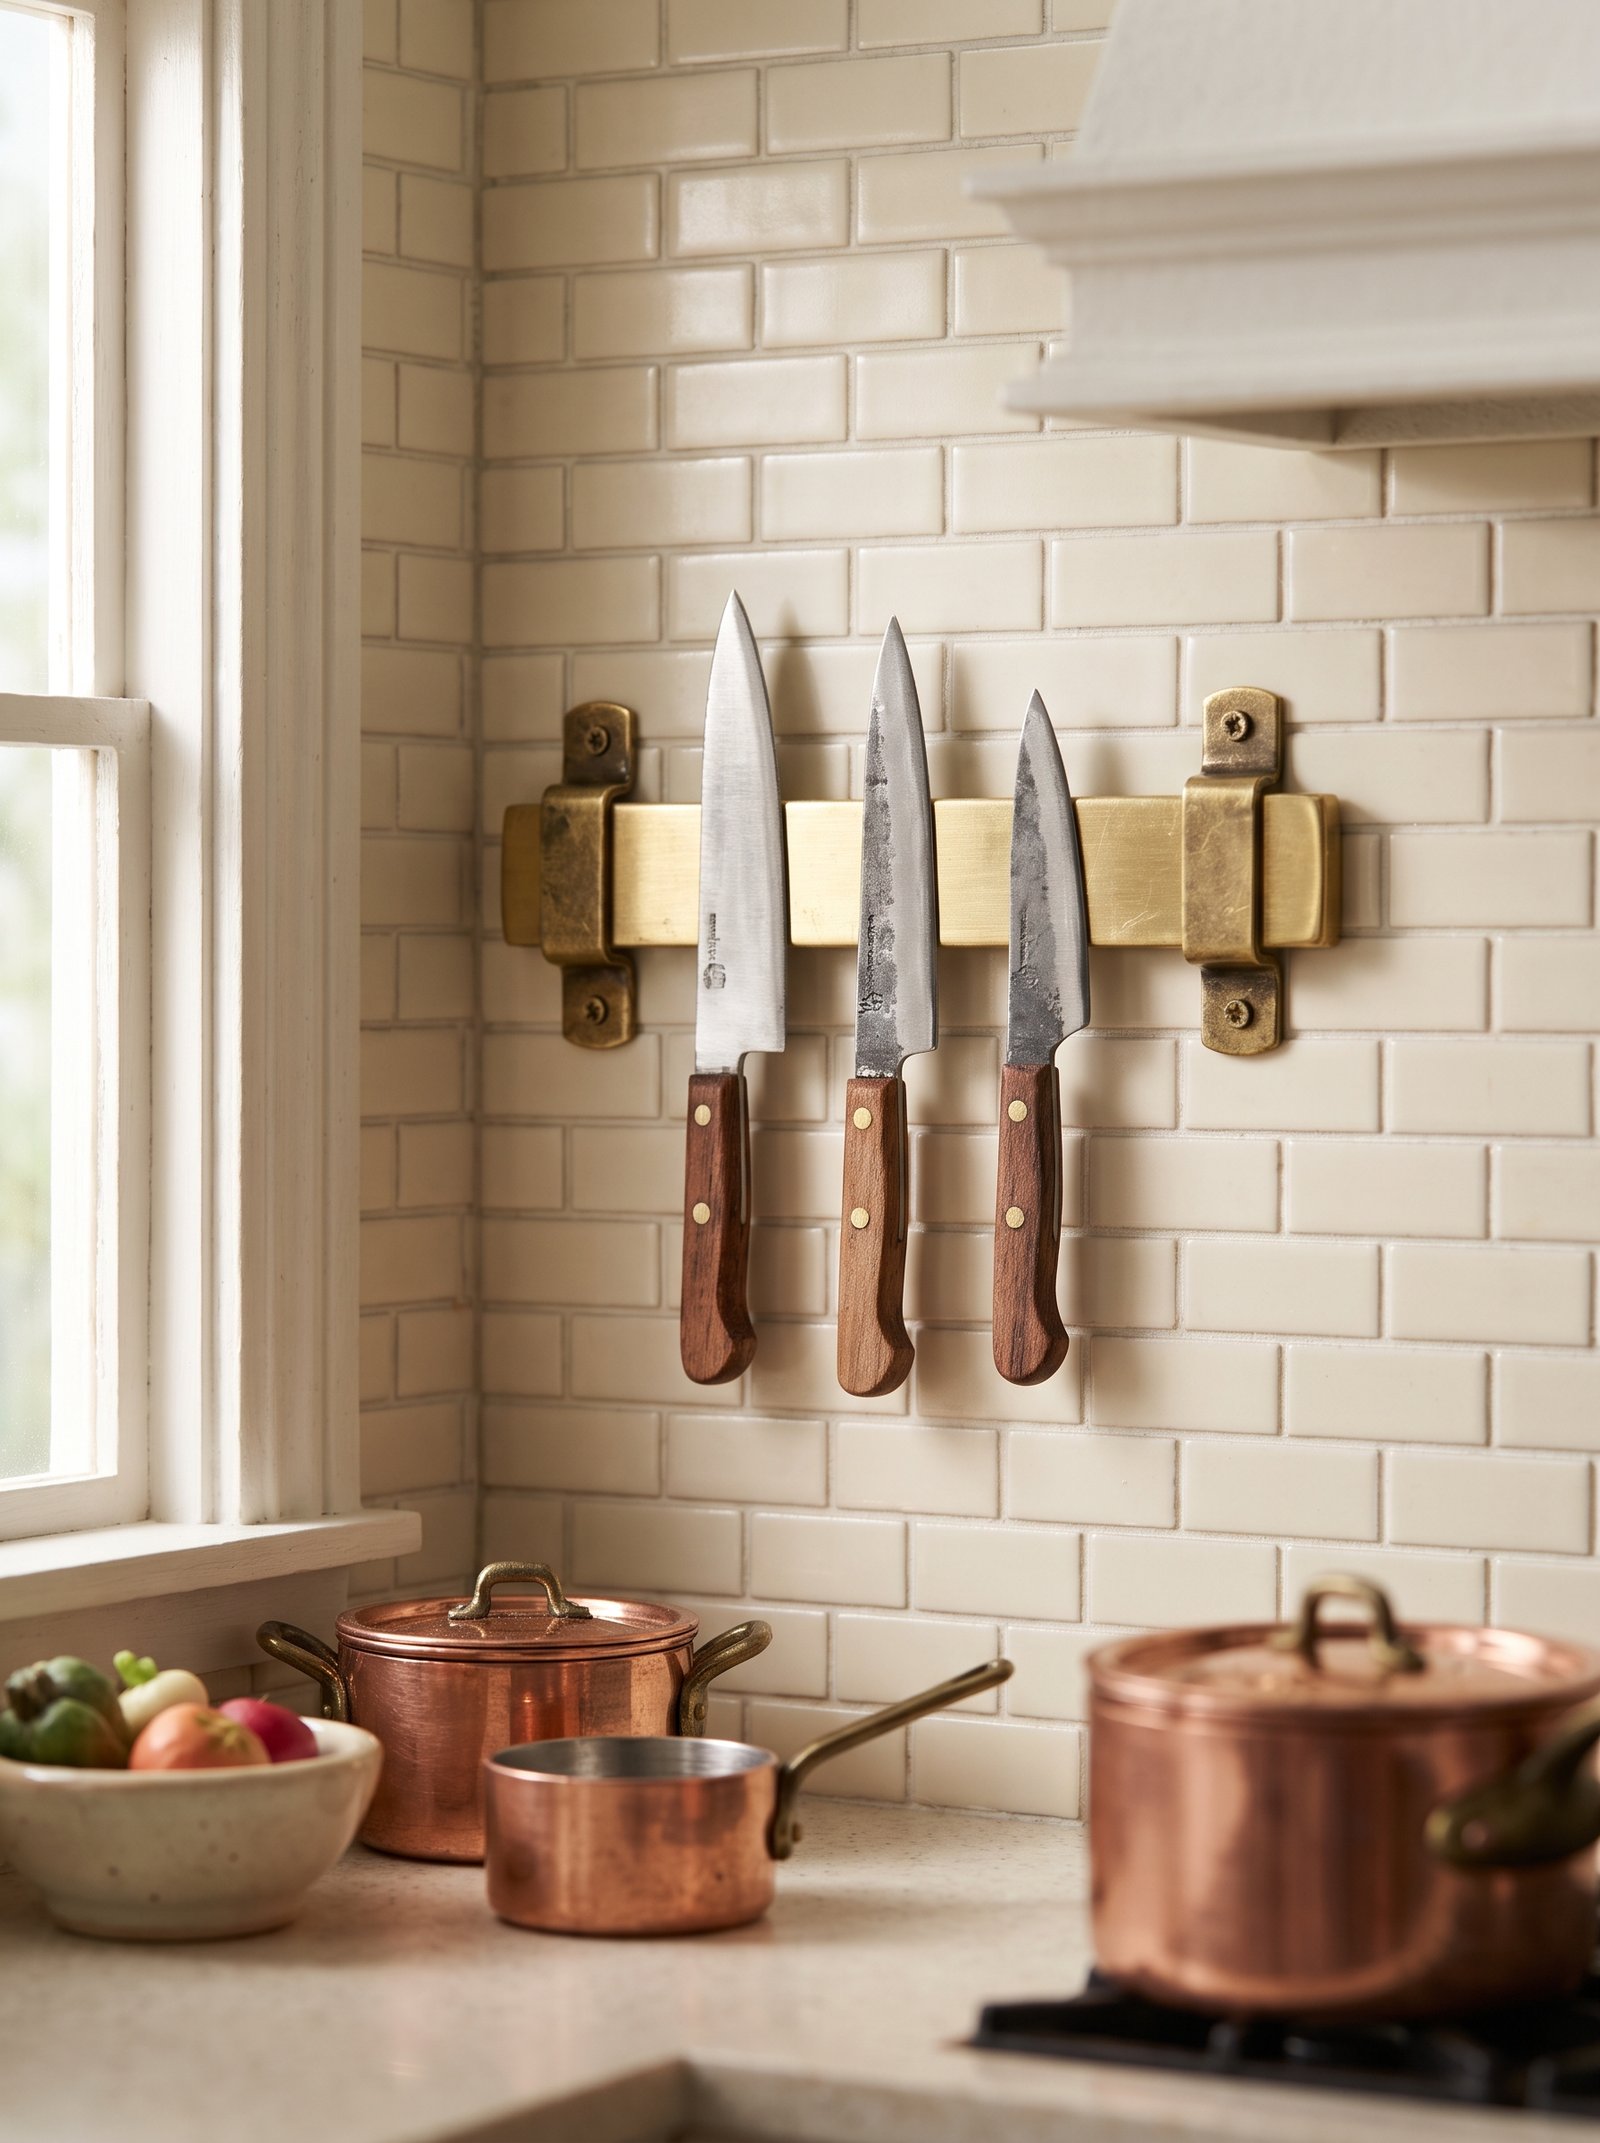
The plastic knife block eats prime counter real estate and looks industrial. A brass or oak magnetic knife strip on the wall replaces it, saves counter, and turns your knives into styling.
Look for a 12-18 inch magnetic strip in aged brass, walnut, or matte black. Modern Ambition, BergHoff, and Wüsthof all make them. Adhesive-backed versions exist for rental installs (see rental guide).
Mount at chest height, next to the stove but not directly beside the sink (splash zone rusts blades over time). Cabin-height 55-60 inches from the floor works for most.
Load with only four to five knives that you actually use: chef, paring, bread, utility, and shears. Any more than five looks like a hardware display, not a chef’s tool wall.
A magnetic strip also makes the knives dry faster, keeps them sharp longer (no bumping other blades in a drawer), and reads like a professional kitchen. That is a lot of upgrade for $25.
3. Use a rolling wood cart as portable extra counter
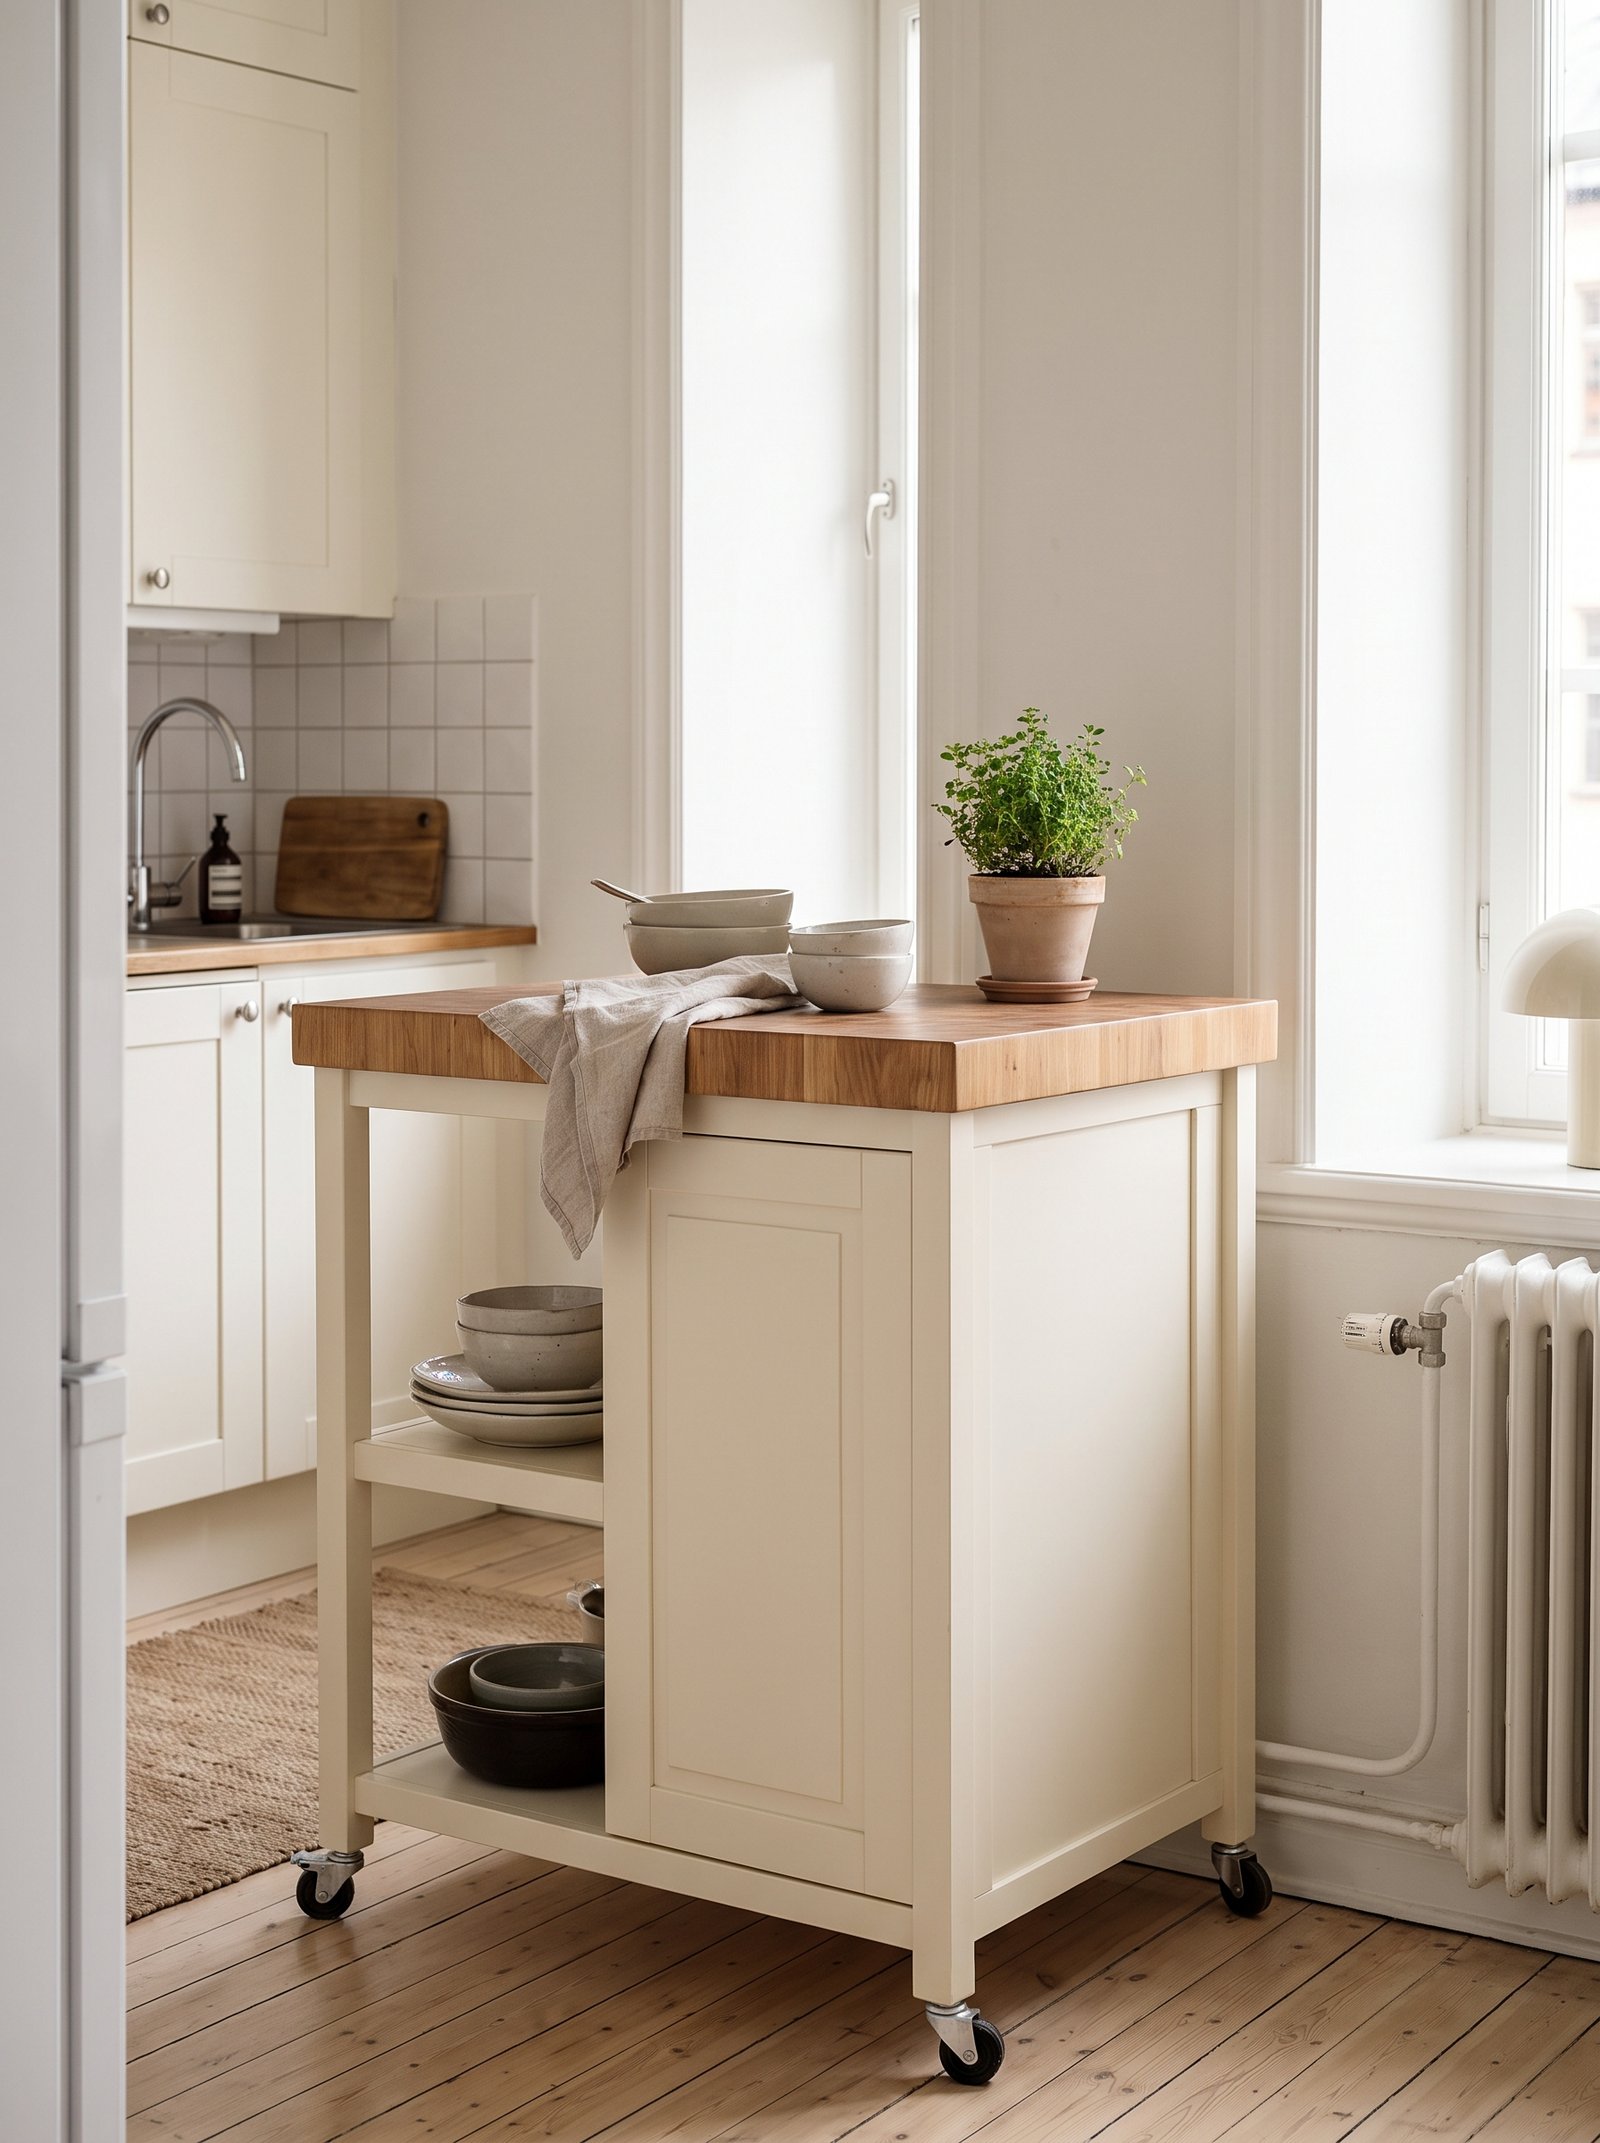
A tiny kitchen has no room for a real island — but a rolling wood cart on locking casters gives you the same functionality on demand. Roll it next to the stove for prep, roll it to the dining room for a bar cart, park it against the wall when done.
Look for a butcher-block or solid-wood top with a lower storage shelf. IKEA’s FÖRHÖJA ($99), Crate & Barrel’s Belmont ($299), and vintage carts from Facebook Marketplace all work.
The cart doubles as a coffee station in the mornings and a prep surface for cooking. It essentially triples the useful workspace of a galley kitchen.
Style the top like it is furniture — a wooden cutting board leaning against the wall, a small ceramic pitcher with wooden spoons, a stone salt cellar. Below, pots and pans or cookbooks.
On lockers, roll it into the closet when guests need floor space. It is the single most versatile piece of furniture you can add to a small apartment.
4. Add a slim wall pegboard for utensils
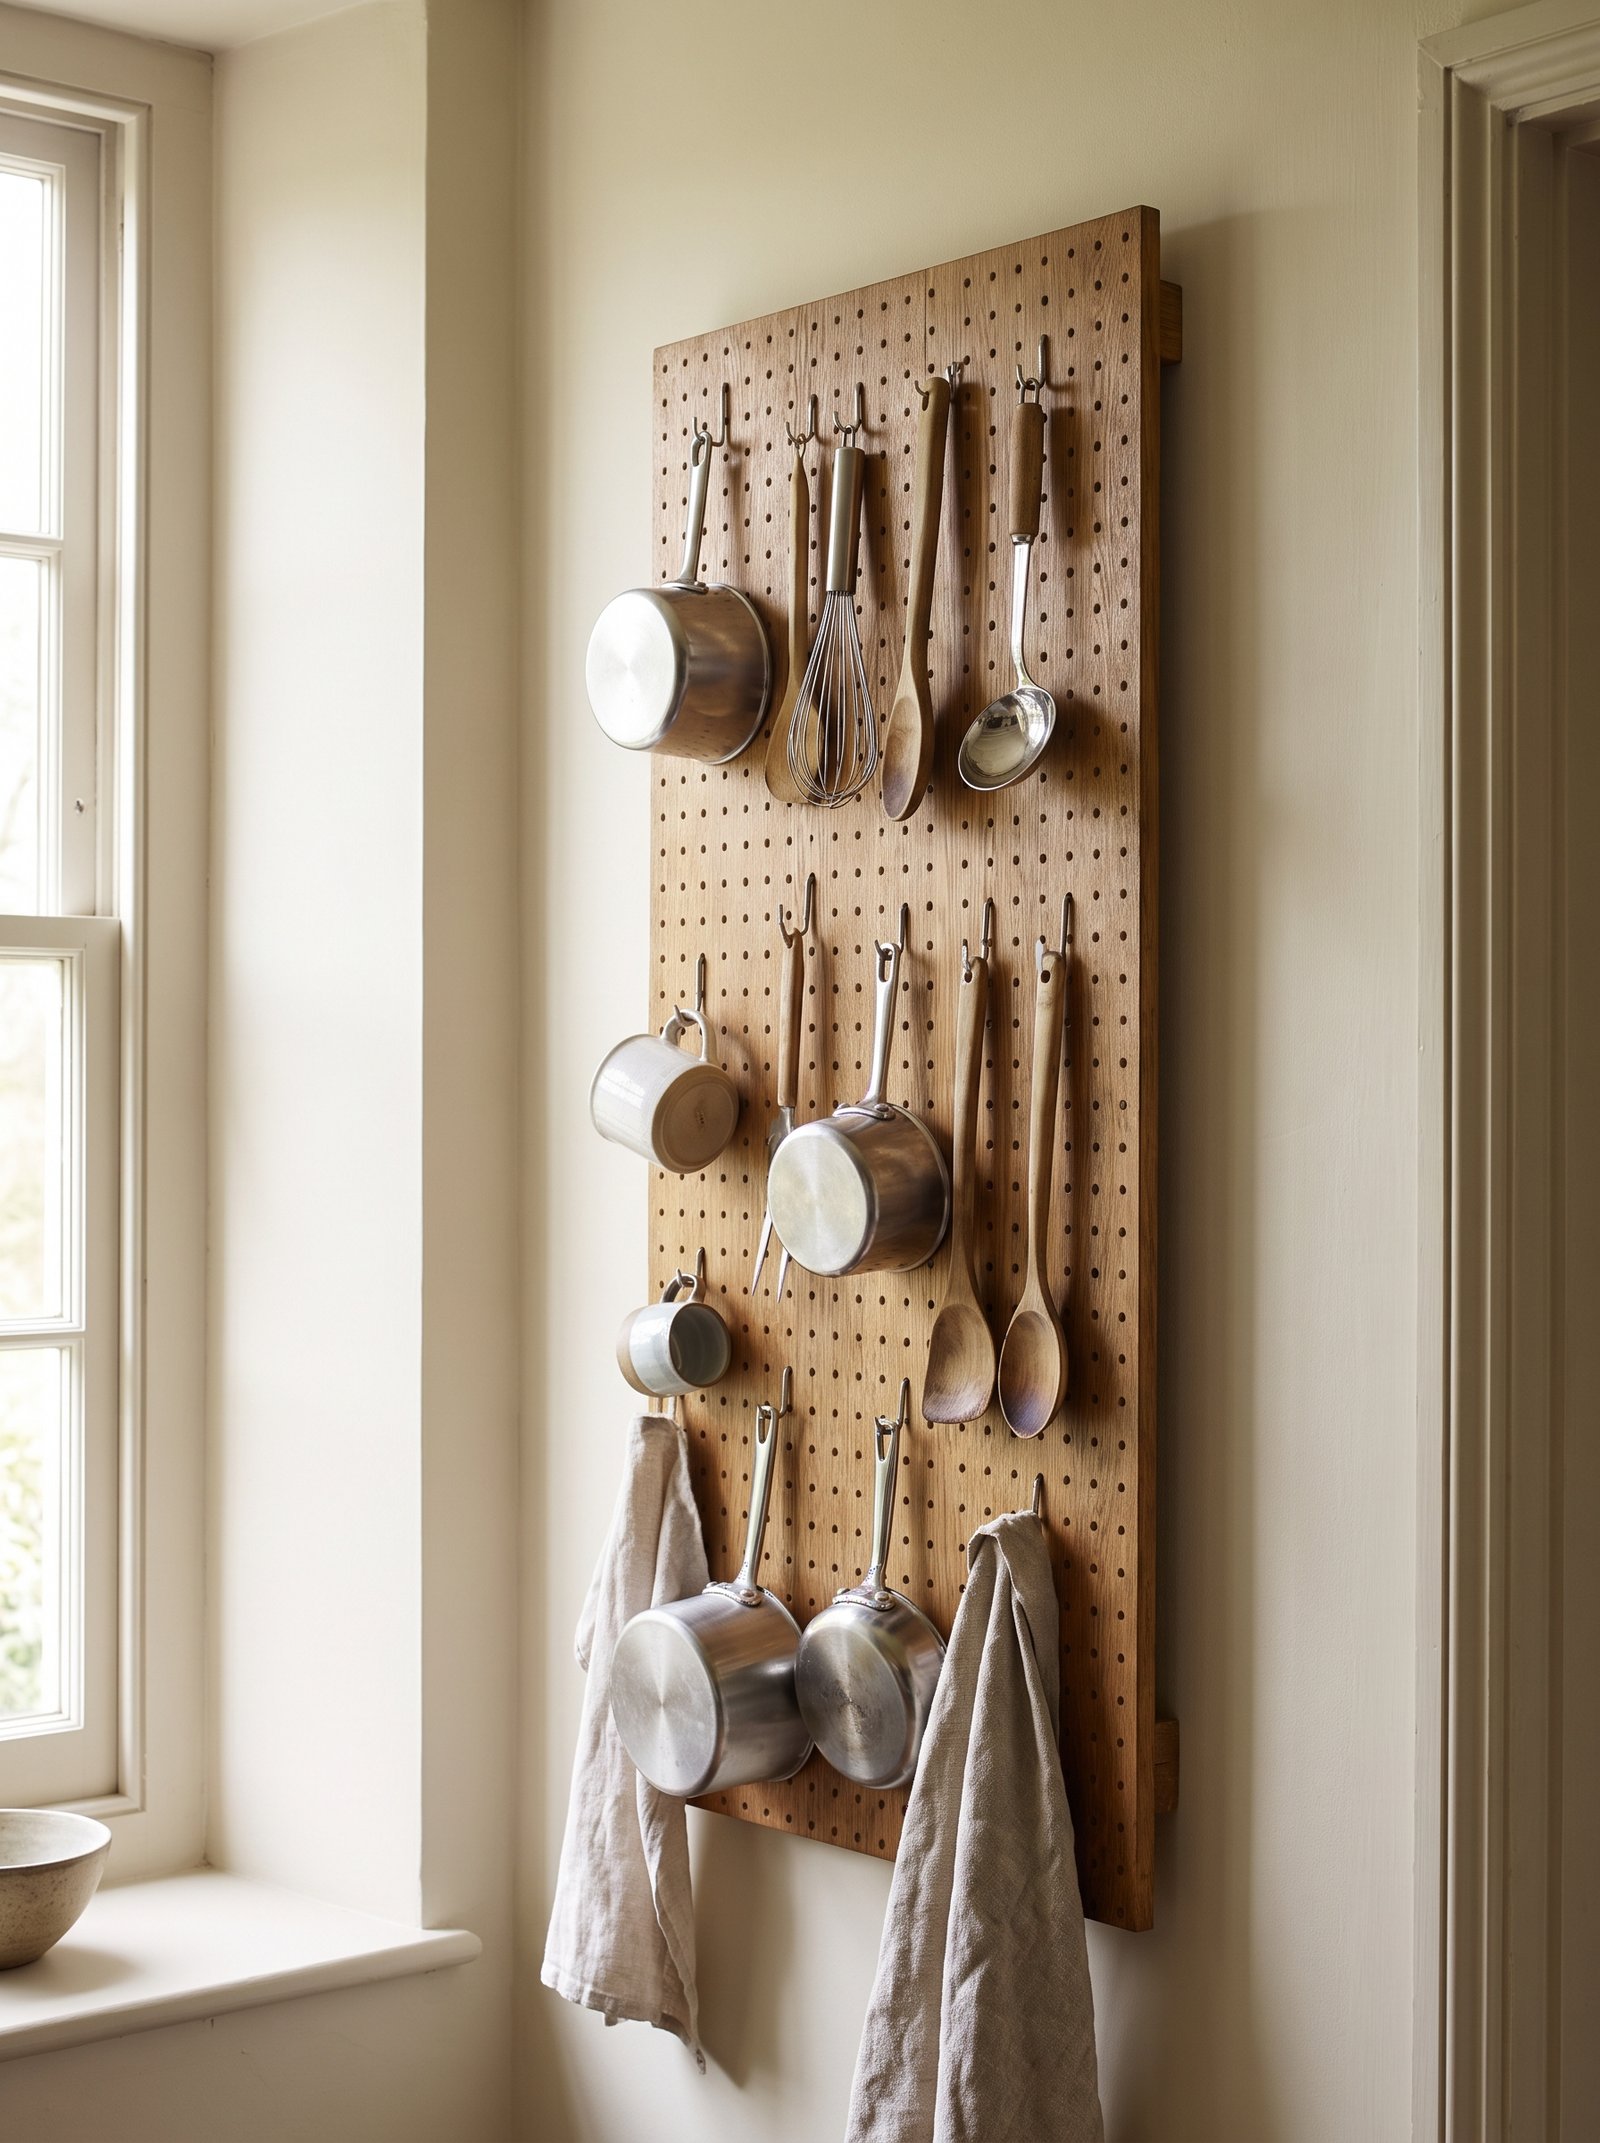
A wall pegboard — in oak, birch, or matte black — turns dead wall space into flexible tool storage. Pots, pans, cutting boards, and utensils all hang; the layout changes as your cooking style evolves.
IKEA’s SKÅDIS pegboard series is the workhorse, but Etsy sells solid-oak versions in the $50-150 range that read much more editorial. A 24×36 inch panel handles most tiny kitchens.
Mount into studs with two brackets. Add S-hooks, small shelves, and pegs to build your custom layout. Move things around monthly until you find the arrangement that matches how you actually cook.
Style intentionally. A pegboard with 25 items looks like a hardware store; a pegboard with 8 well-chosen items looks like a chef’s wall. Fewer is always better.
This one wall becomes both storage and decor. The mixed textures of wood, metal, and cast iron read warm and lived-in in every photograph.
5. Add warm LED strip lights under the upper cabinets

Ceiling light in a tiny kitchen is almost always harsh, direct, and cool-toned. Warm under-cabinet LED strips ($25) transform the counter from “kitchen surface” to “styled vignette” every time you flip them on.
Look for 2700K–3000K warm-white LEDs with an adhesive backing. Litom, Vansky, and Amazon Basics all sell battery-powered or USB-rechargeable versions. Motion-activated is a bonus.
Peel-and-stick along the front bottom edge of each upper cabinet. Route the wire toward the corner and hide with a strip of contact paper.
With the ceiling off and only the under-cabinet strips on, the whole room becomes intimate and hotel-like in the evening. Cook by warm light and dinner tastes better.
This is the single biggest atmosphere upgrade in a tiny kitchen. Costs less than a takeout meal, lasts three years, and works even in rentals.
6. Add a tension rod under the sink for spray bottles
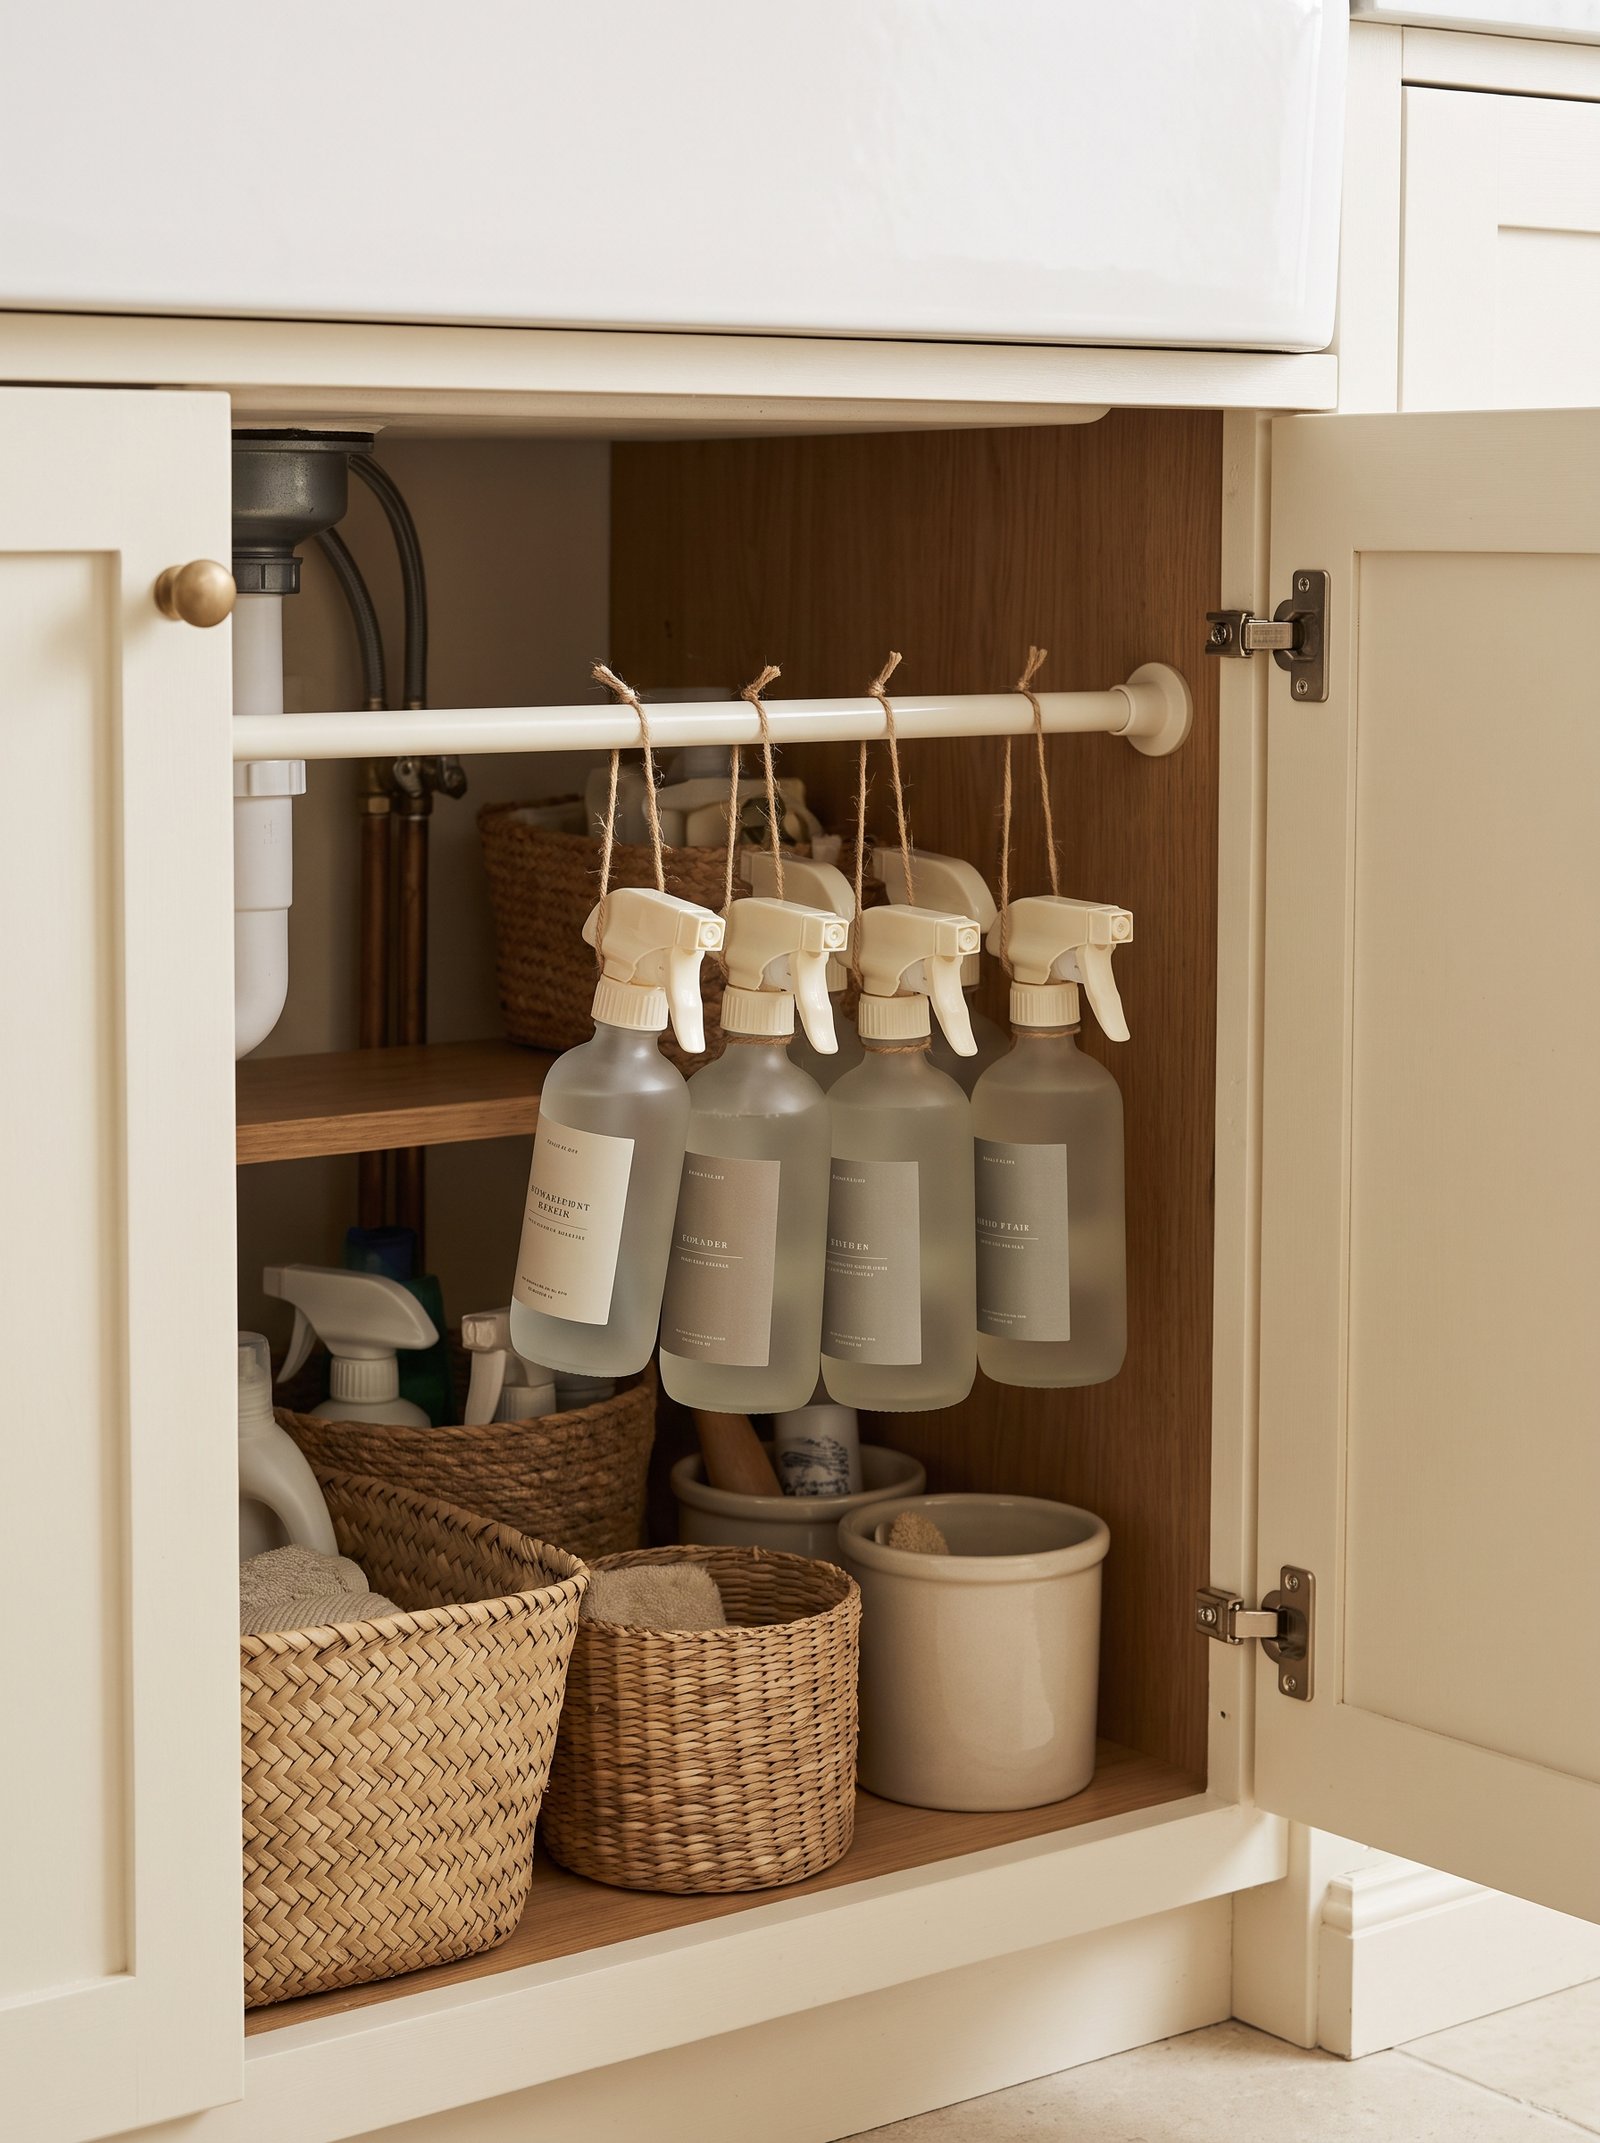
The cabinet under the sink is universally chaotic — bottles knocking each other over, cleaning supplies falling out every time you open the door. A single tension rod solves half of that in five minutes.
Buy a 12-16 inch adjustable spring tension rod from Amazon or IKEA ($6). Install it horizontally across the top of the under-sink cabinet.
Hang spray bottles by their trigger heads on the rod. Cleaning bottles, kitchen spray, glass cleaner, and hand soap all live suspended — the floor of the cabinet is now free for a small basket of sponges and rags.
This lifts the entire lower cabinet volume off the floor and doubles the usable space. You suddenly see everything you own instead of digging through a graveyard of bottles.
No tools, no holes, five dollars. Small change, disproportionate quality-of-life improvement every single time you clean the counter.
7. Replace solid cabinet doors with glass fronts
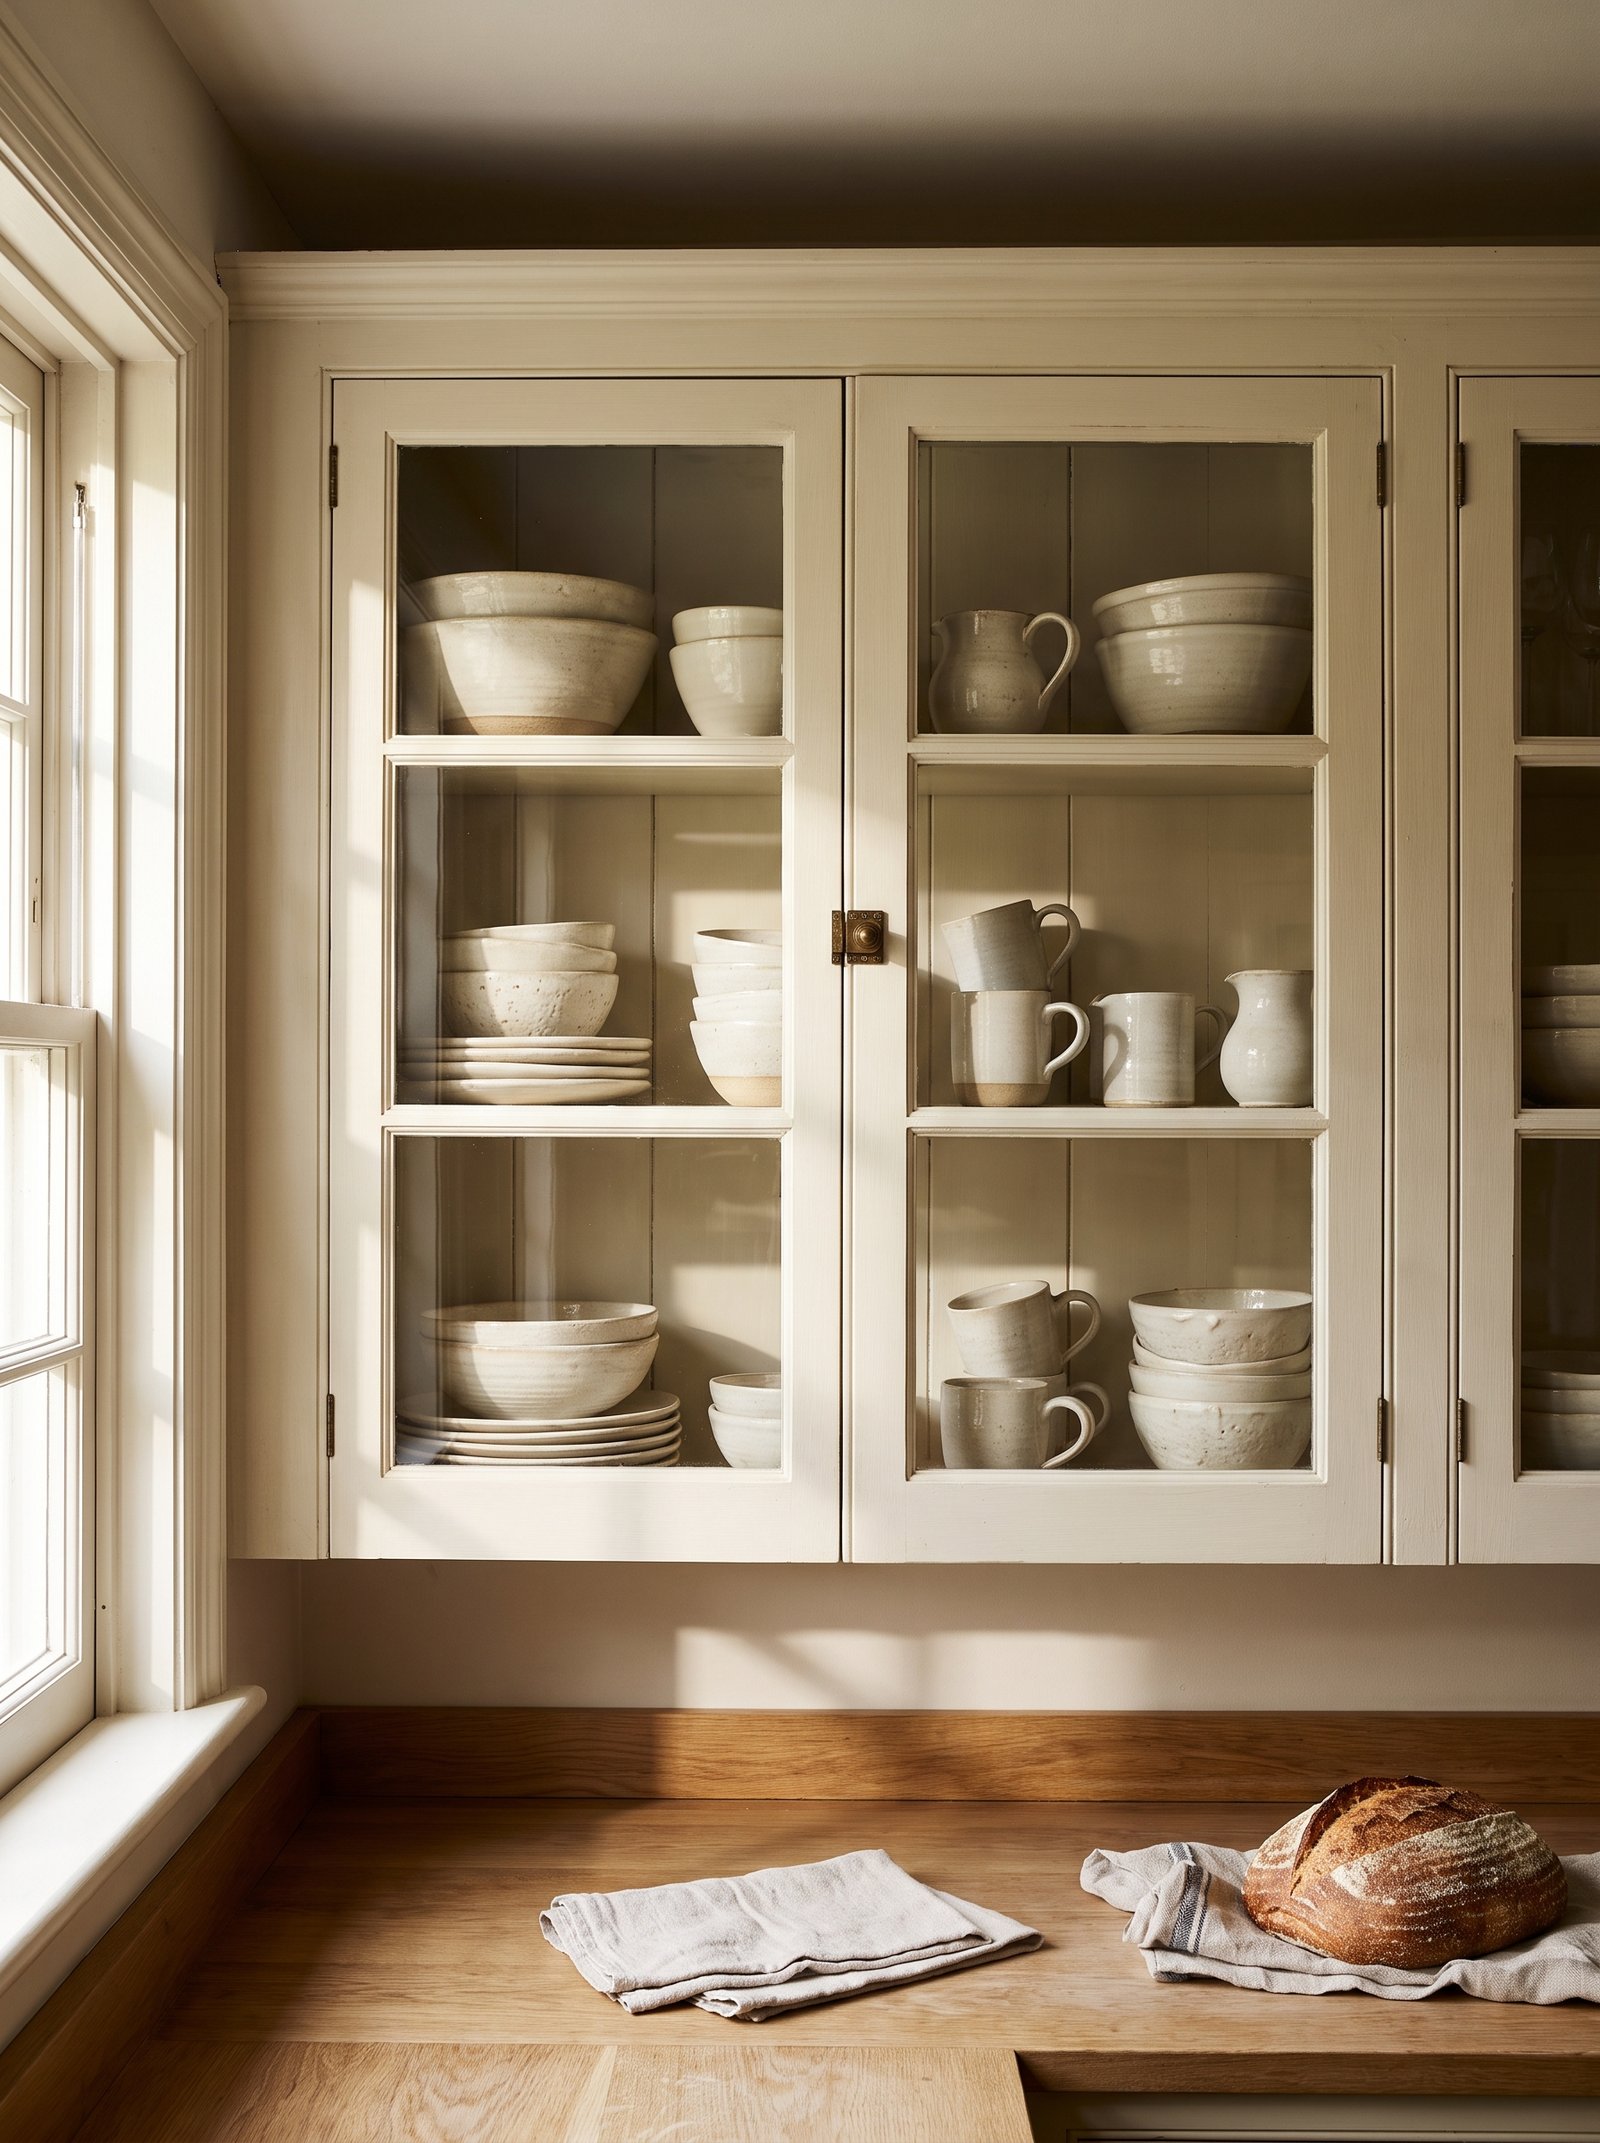
If your uppers must stay (renters, landlords) but you want the “open kitchen” feel, replace or add glass to one or two of the cabinet door fronts. It cheats the eye into thinking the room is larger.
Buy replacement glass insert doors or apply a peel-and-stick frosted vinyl to existing door panels. Home Depot and Etsy both sell replacement fronts in oak, cream, or matte black frames with clear or fluted glass.
Style the visible shelf inside with matching cream ceramics, small stacks of glasses, and one or two ceramic pieces. Never leave the inside looking cluttered — the whole point is that it now becomes decor.
Frosted or fluted (rain-glass) fronts are more forgiving than clear glass — they show the shape of what is inside without demanding perfect organization.
This is one of those “quiet upgrade” moves that photographs disproportionately well and permanently opens a tiny kitchen visually.
8. Install a fold-down wall table for eating

If you have no room for a real kitchen table, a wall-mounted fold-down table for one or two solves the problem in a footprint of six inches deep when folded up.
IKEA’s NORBERG ($40) is the classic. West Elm and Etsy sell more editorial versions in oak and walnut in the $150-300 range.
Mount at 29-30 inches from the floor. When folded up, it looks like a small wall panel or a floating shelf. When folded down, it seats one or two comfortably for meals.
Pair with two folding chairs (bentwood, oak, or matte black) that live against the wall when not in use. Total footprint: essentially zero when not eating.
This solves the “where do I eat breakfast” problem in a tiny kitchen without stealing floor. Coffee and toast at a proper table changes your morning.
9. Add a vertical spice rack inside a cabinet door
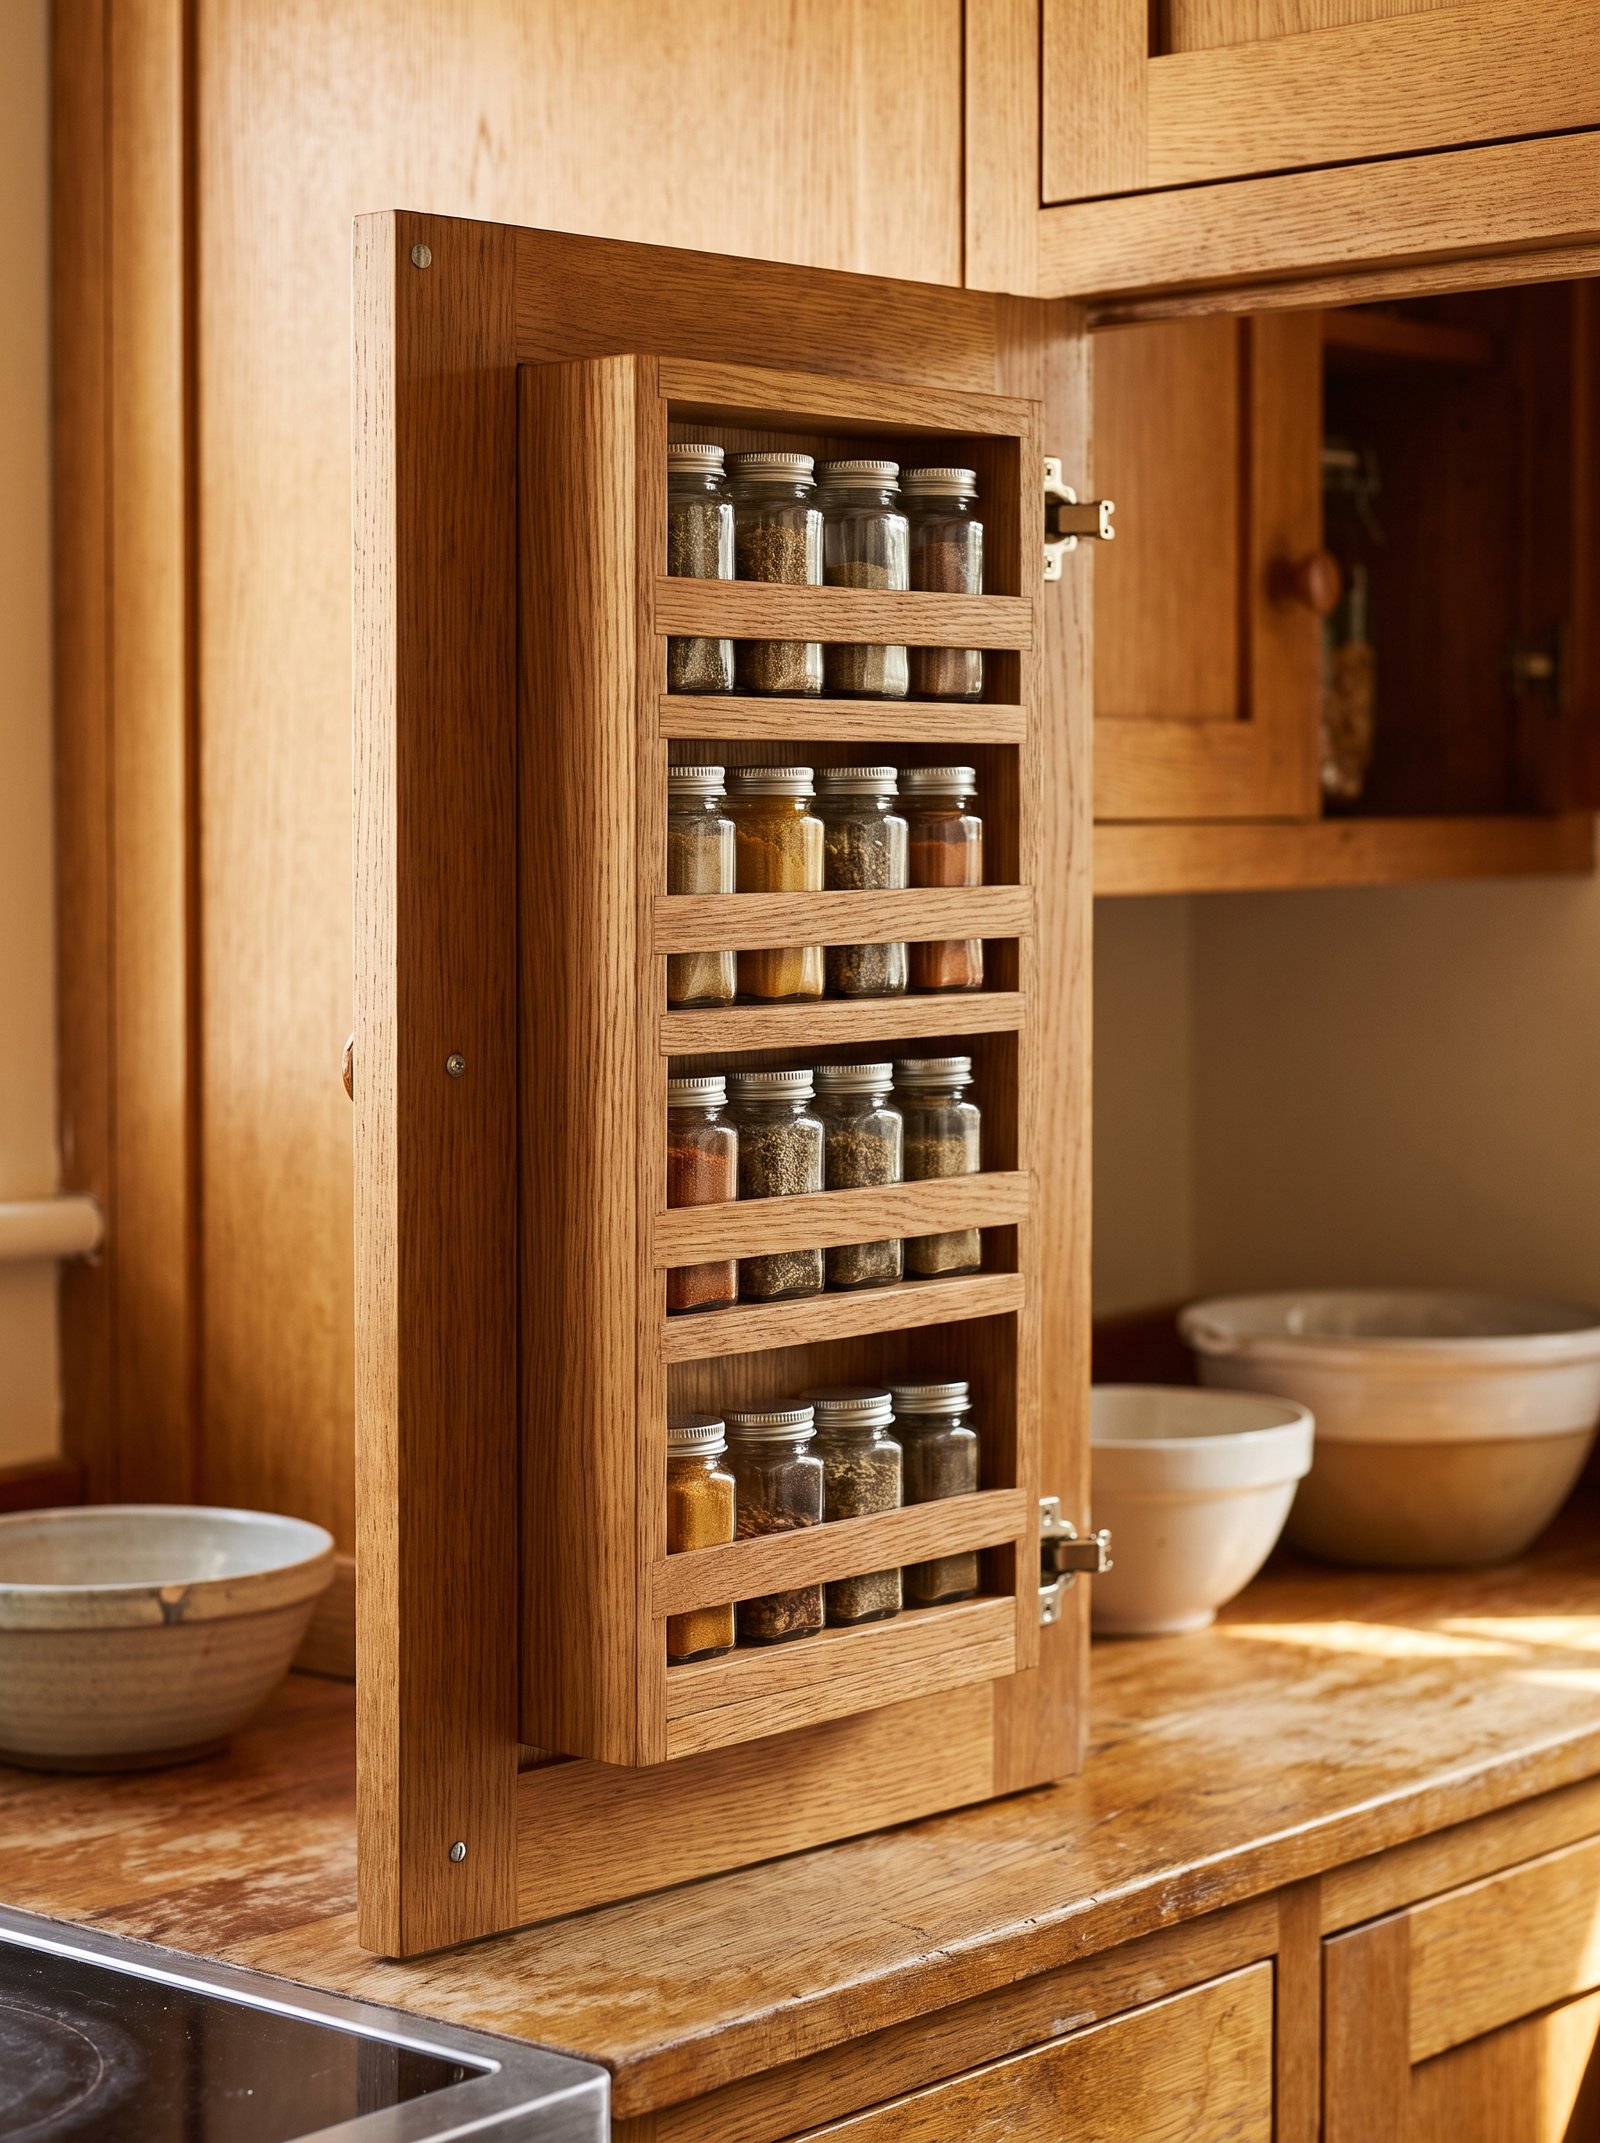
Spices in a drawer become invisible in three months. Spices on a wall-mount rack next to the stove become the styling. A door-mount spice rack (screwed inside a cabinet door) hides them while making them accessible.
Look for a stainless or brass rack with two or three tiers that mounts to the inside of a cabinet door with screws. Amazon and Container Store both sell them in the $20-40 range.
Decant spices into matching small jars — glass with brass or wood lids from Amazon ($30 for 20). Label with a small label maker (Dymo makes a black-on-clear tape that reads intentional).
Inside the door: spice jars sorted by frequency of use. On the counter: nothing. That is what a tiny kitchen with intentional storage looks like.
You will start to actually see what you have and use it. Cooking gets easier when your spices are visible and organized. Small change, huge daily payoff.
10. Replace lower cabinets with deep drawers
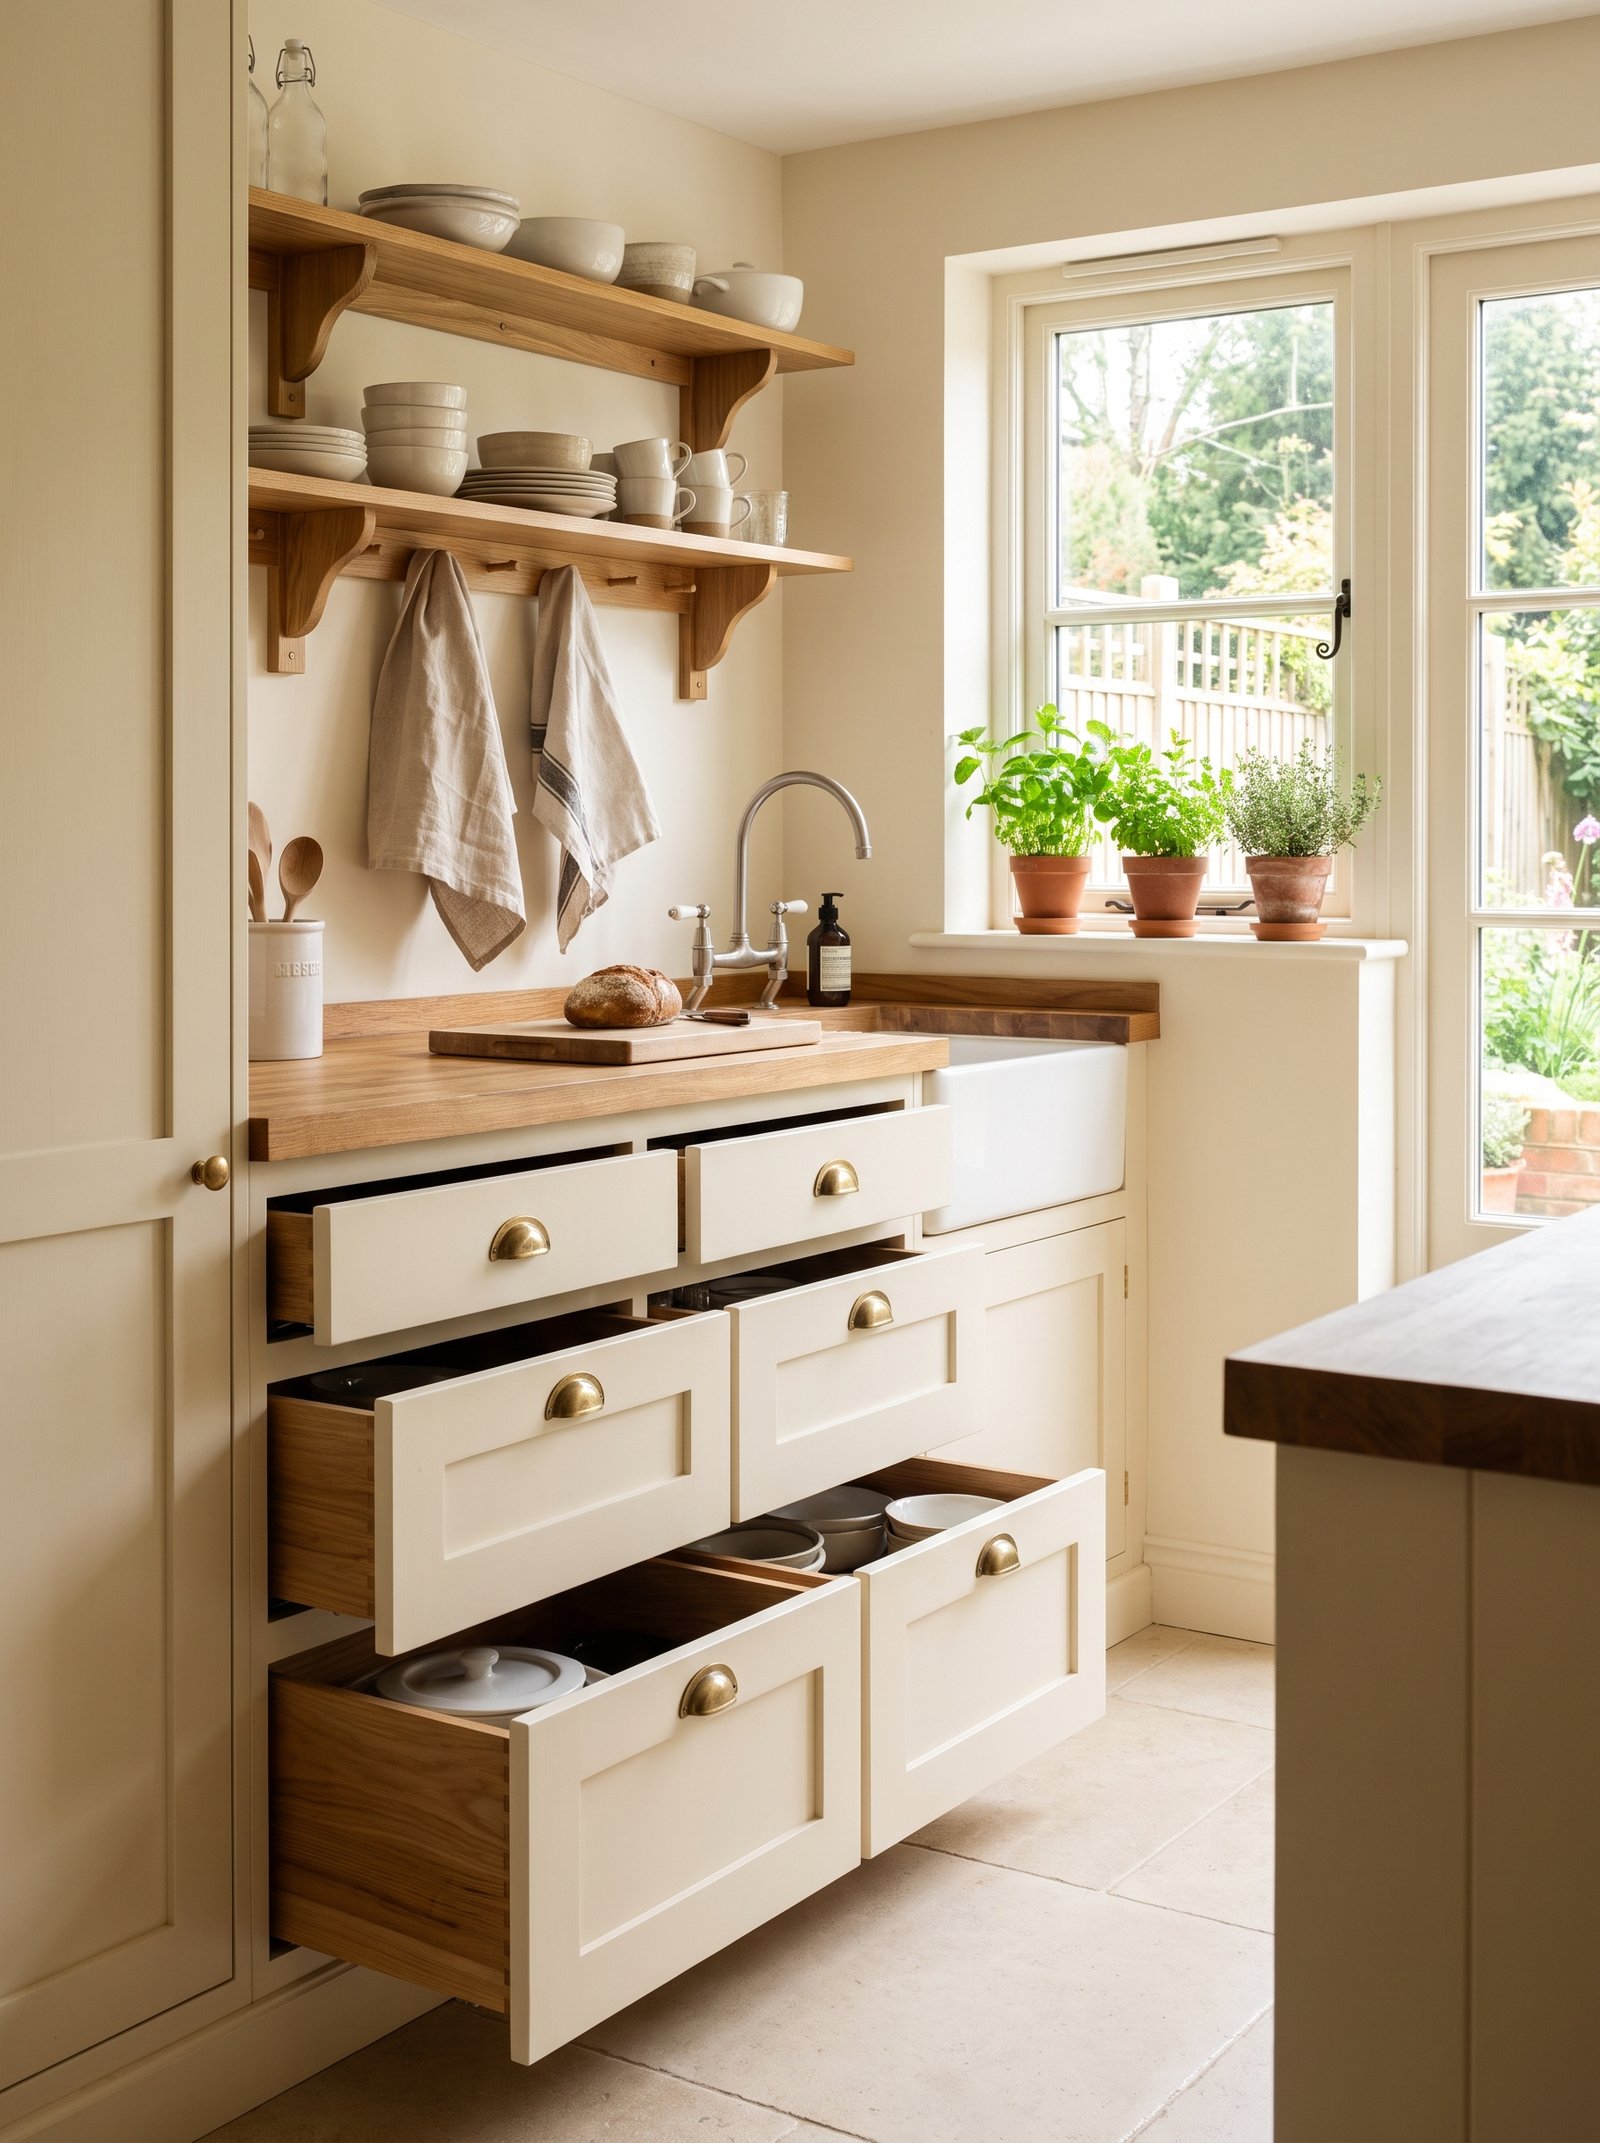
If you can, replace lower cabinet doors with deep pull-out drawers. You gain access to 90% of the cabinet volume instead of the 40% you can reach through a door.
IKEA’s METOD and SEKTION systems both offer drawer conversions for existing cabinet frames. Cost: $80-200 per drawer depending on width and depth. Retrofit kits exist for other brands.
Store pots and pans in one drawer, mixing bowls in another, small appliances in a third. Everything visible from above, no more digging into a dark hole.
Deep drawers change how you cook: you reach for things easily instead of dreading opening a cabinet. The pain-in-the-back of a lower cabinet disappears.
If you own the space and can renovate, this is the single best small-kitchen investment. Pays back every time you cook.
11. Build a tall pantry cabinet next to the fridge
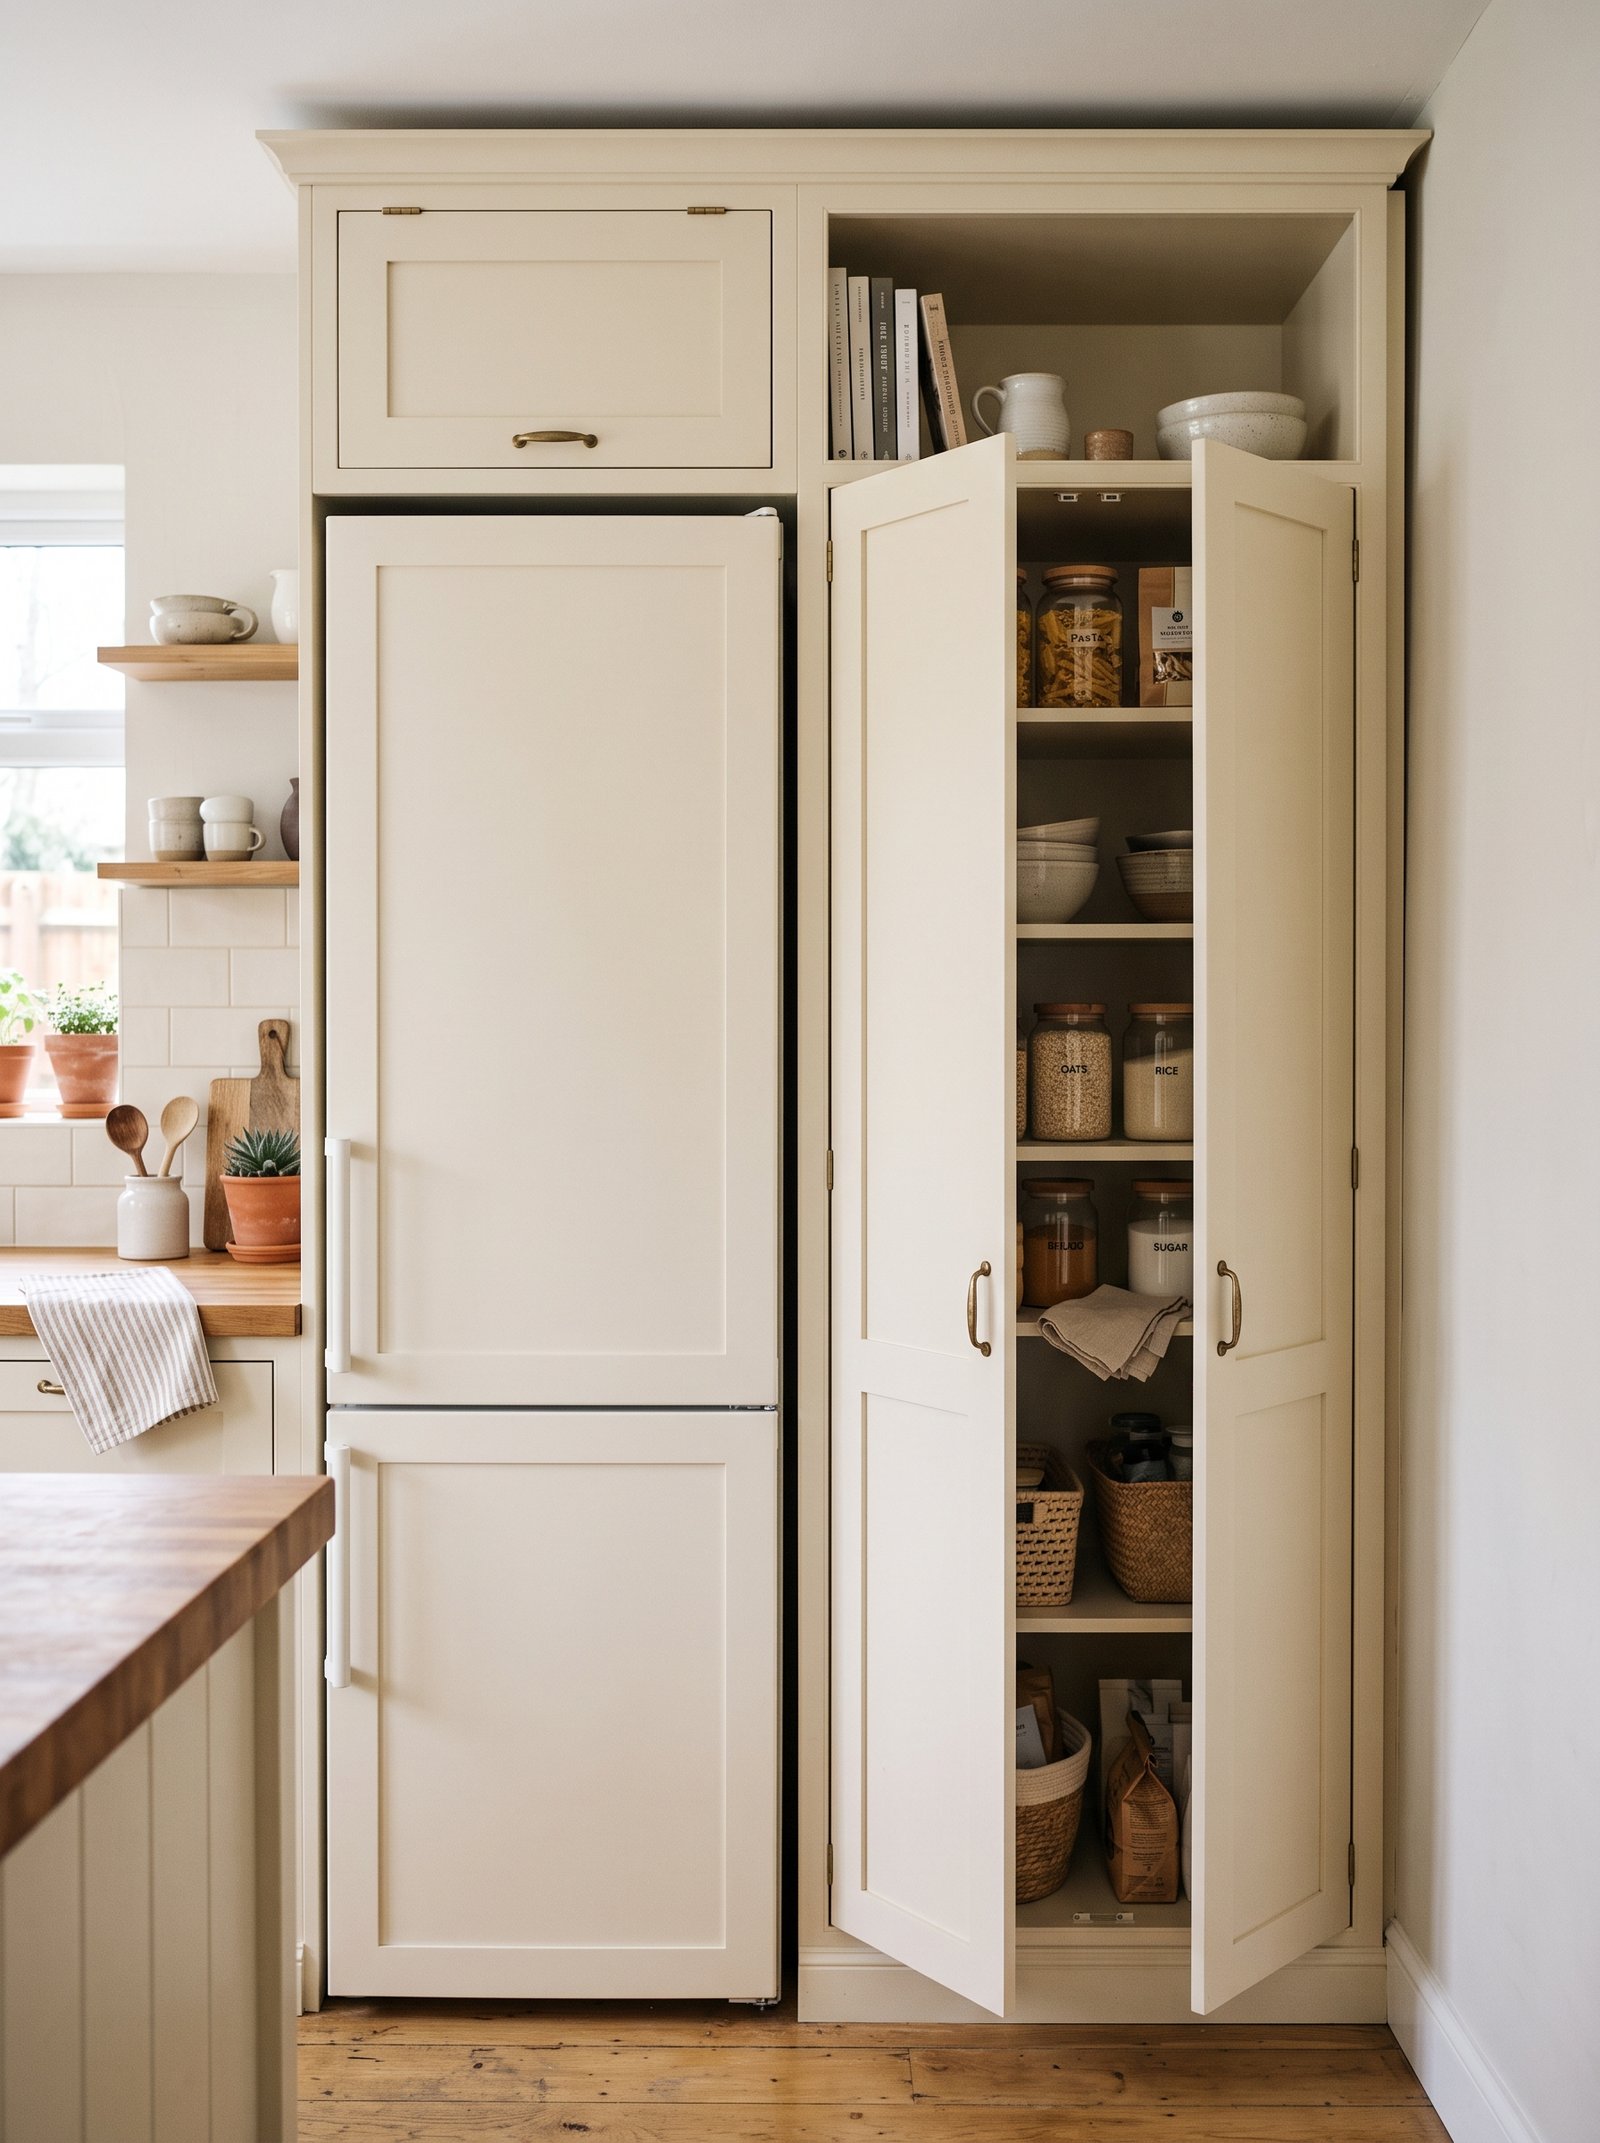
That awkward 12-inch gap between the fridge and the wall or the counter — most tiny kitchens have one — turns into full-height pantry storage with a slim roll-out pantry cabinet.
Sunhood, IKEA (BRIMNES/PLATSA), and Wayfair sell slim vertical pantries in 12-inch widths. Or DIY with a birch plywood box on locking casters.
Fits dry goods, canned goods, coffee, tea — everything a normal pantry holds — in a footprint smaller than a small trash can.
Add pull-out wire baskets or shallow shelves inside so nothing gets buried in the back. Everything visible = everything usable.
A slim rolling pantry is the trick that lets a tiny kitchen store a normal amount of food. Landlord-friendly (no wall mounting), moves with you.
12. Install a brass rail with hanging cups
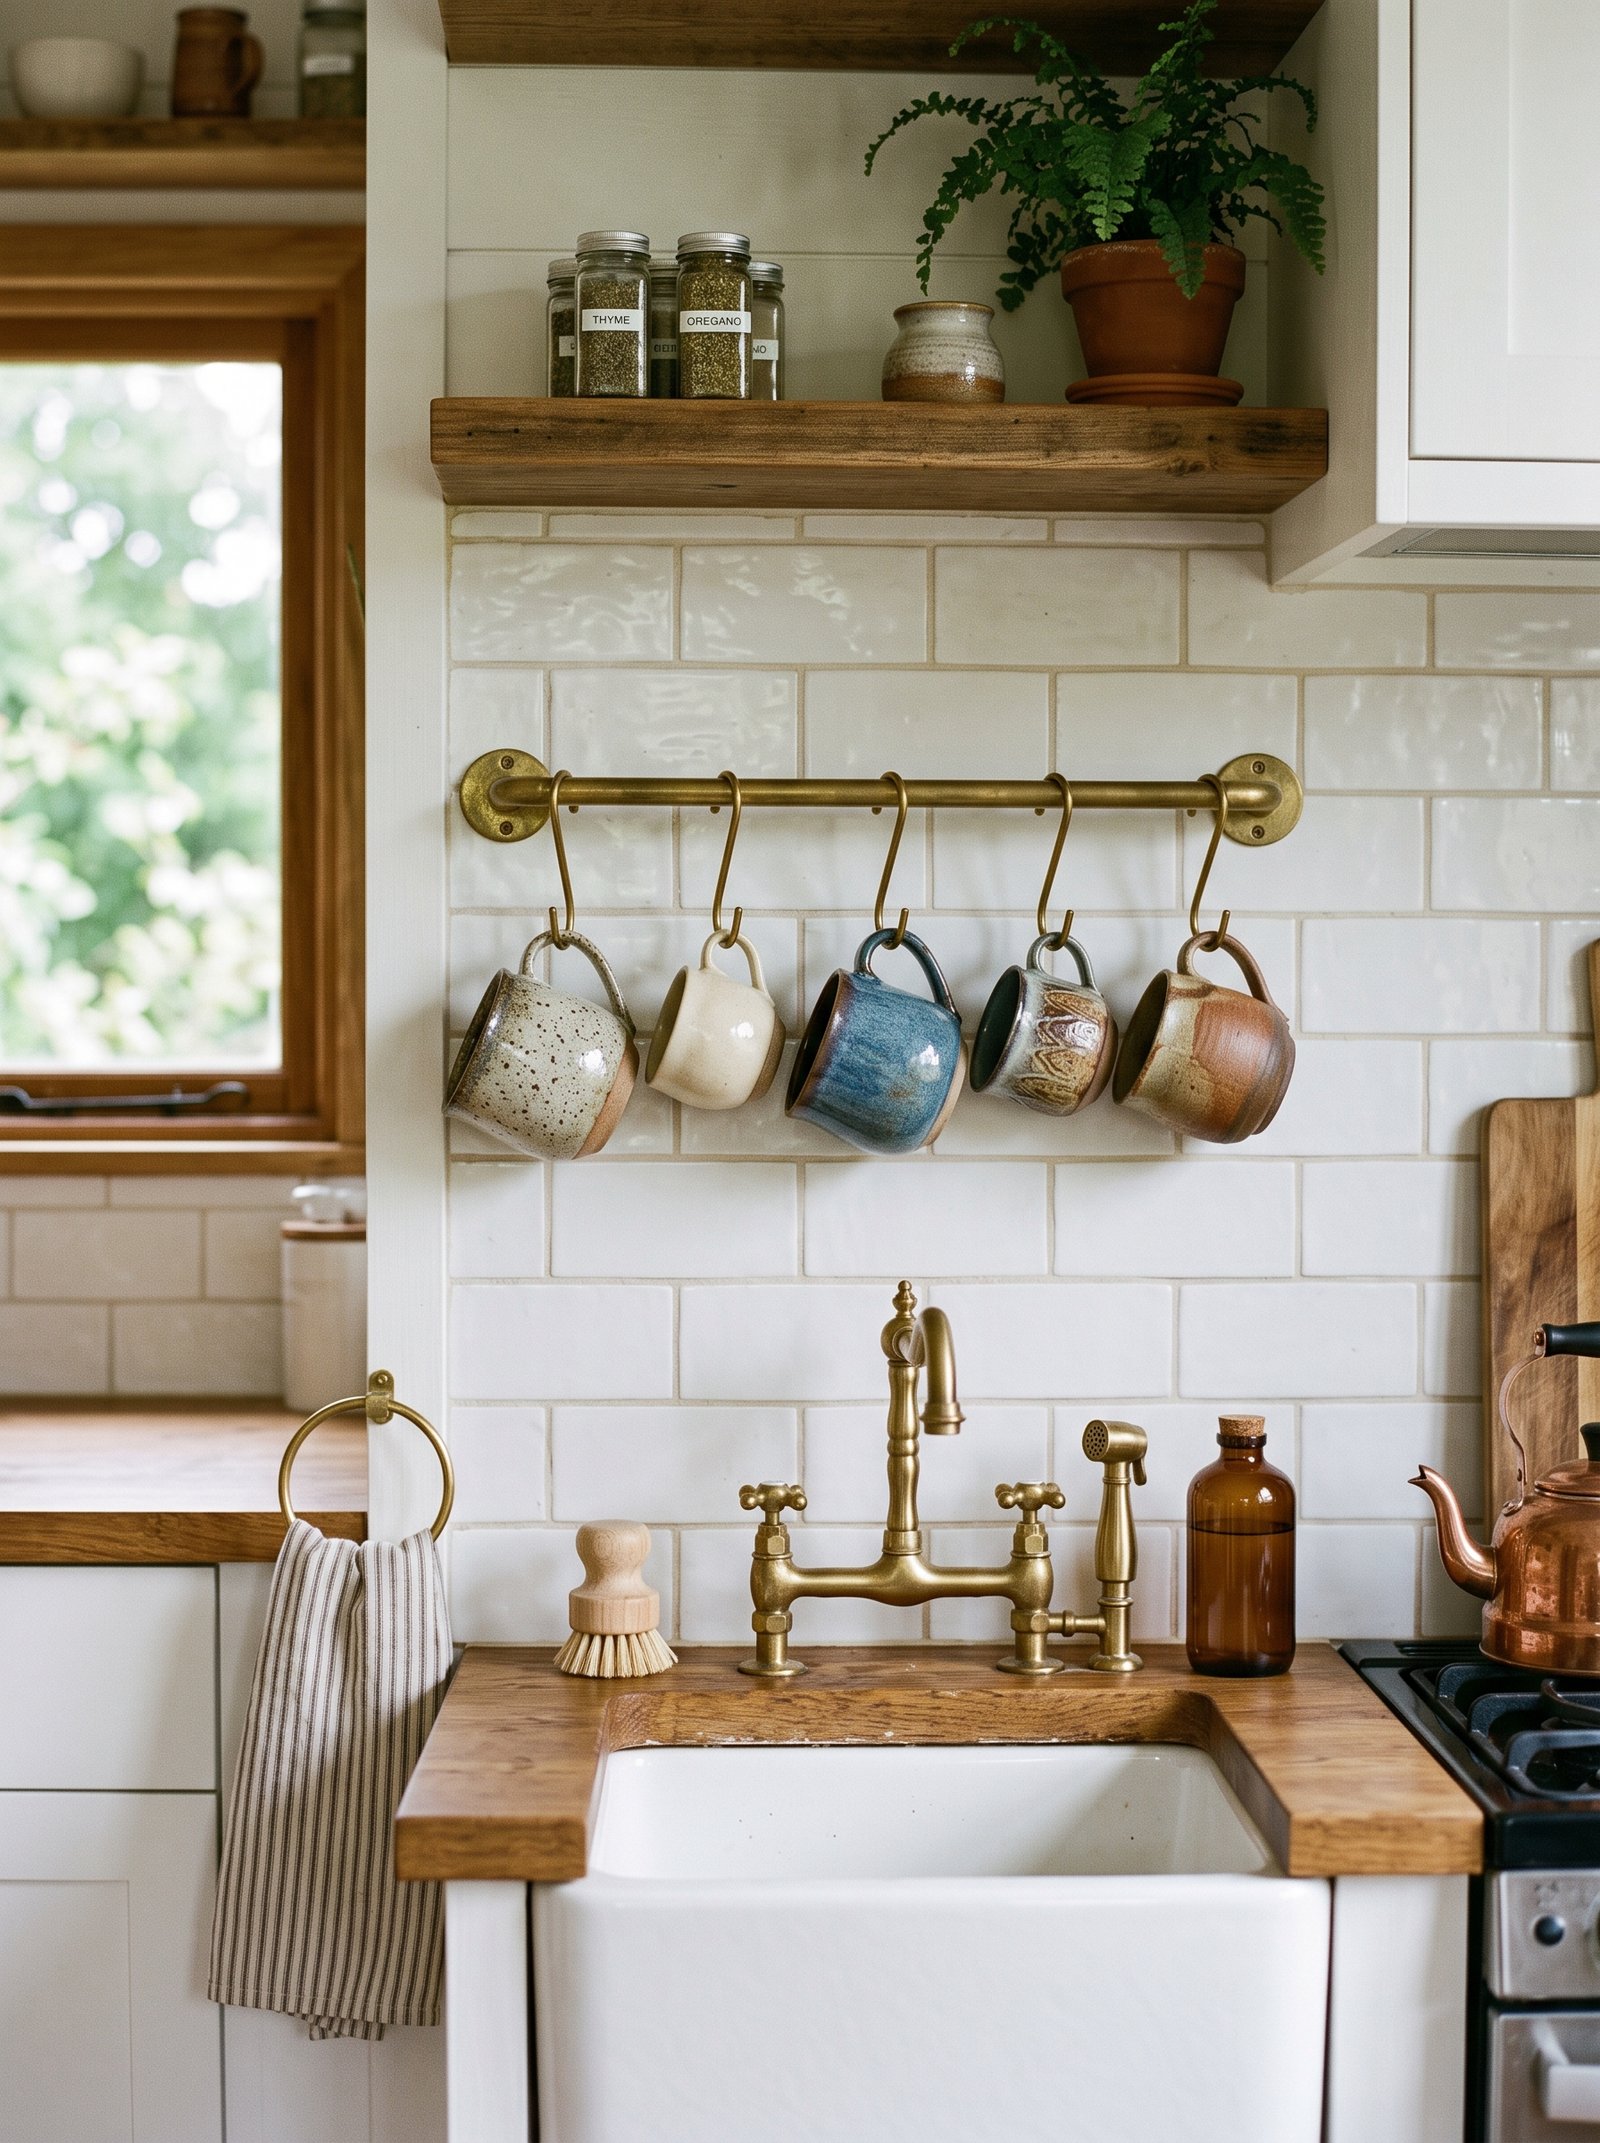
A brass or oak rail with S-hooks mounted above the sink or along the wall is the classic French-country trick for hanging cups, small pots, or measuring tools. It looks styled and saves an entire cabinet shelf.
IKEA’s FINTORP rail ($15) plus five S-hooks ($8) is the cheap version. Rejuvenation and Anthropologie sell more editorial brass versions in the $60-150 range.
Mount 18-24 inches above the counter, with the S-hooks 3-4 inches apart. Hang mugs, small pans, measuring cups, or a favorite tea towel.
This turns everyday utility into styling. The rail becomes the visual center of the wall it lives on.
On move-out (rental version), unscrew and patch two small holes. Zero landlord issues, huge visual upgrade.
13. Store potatoes and onions in a woven basket

A small woven wicker or seagrass basket on the counter holding onions, garlic, and potatoes replaces both plastic bags and dark drawer storage. Ventilated, visible, and beautiful.
Look for a low, wide basket with a flat base — Amazon, Target, and IKEA all sell them in the $10-30 range. Match to other baskets in the kitchen for cohesion.
Store only what you use in a week or two — potatoes, onions, garlic, sometimes lemons. Anything longer-term goes in a cool dark drawer.
Ventilation prevents sprouting and rot; visibility means you use them before they go bad. Function and beauty in one.
Place near where you prep, ideally next to the cutting board. Small daily-use styling that also works as decor.
14. Add an extendable pull-out dining table
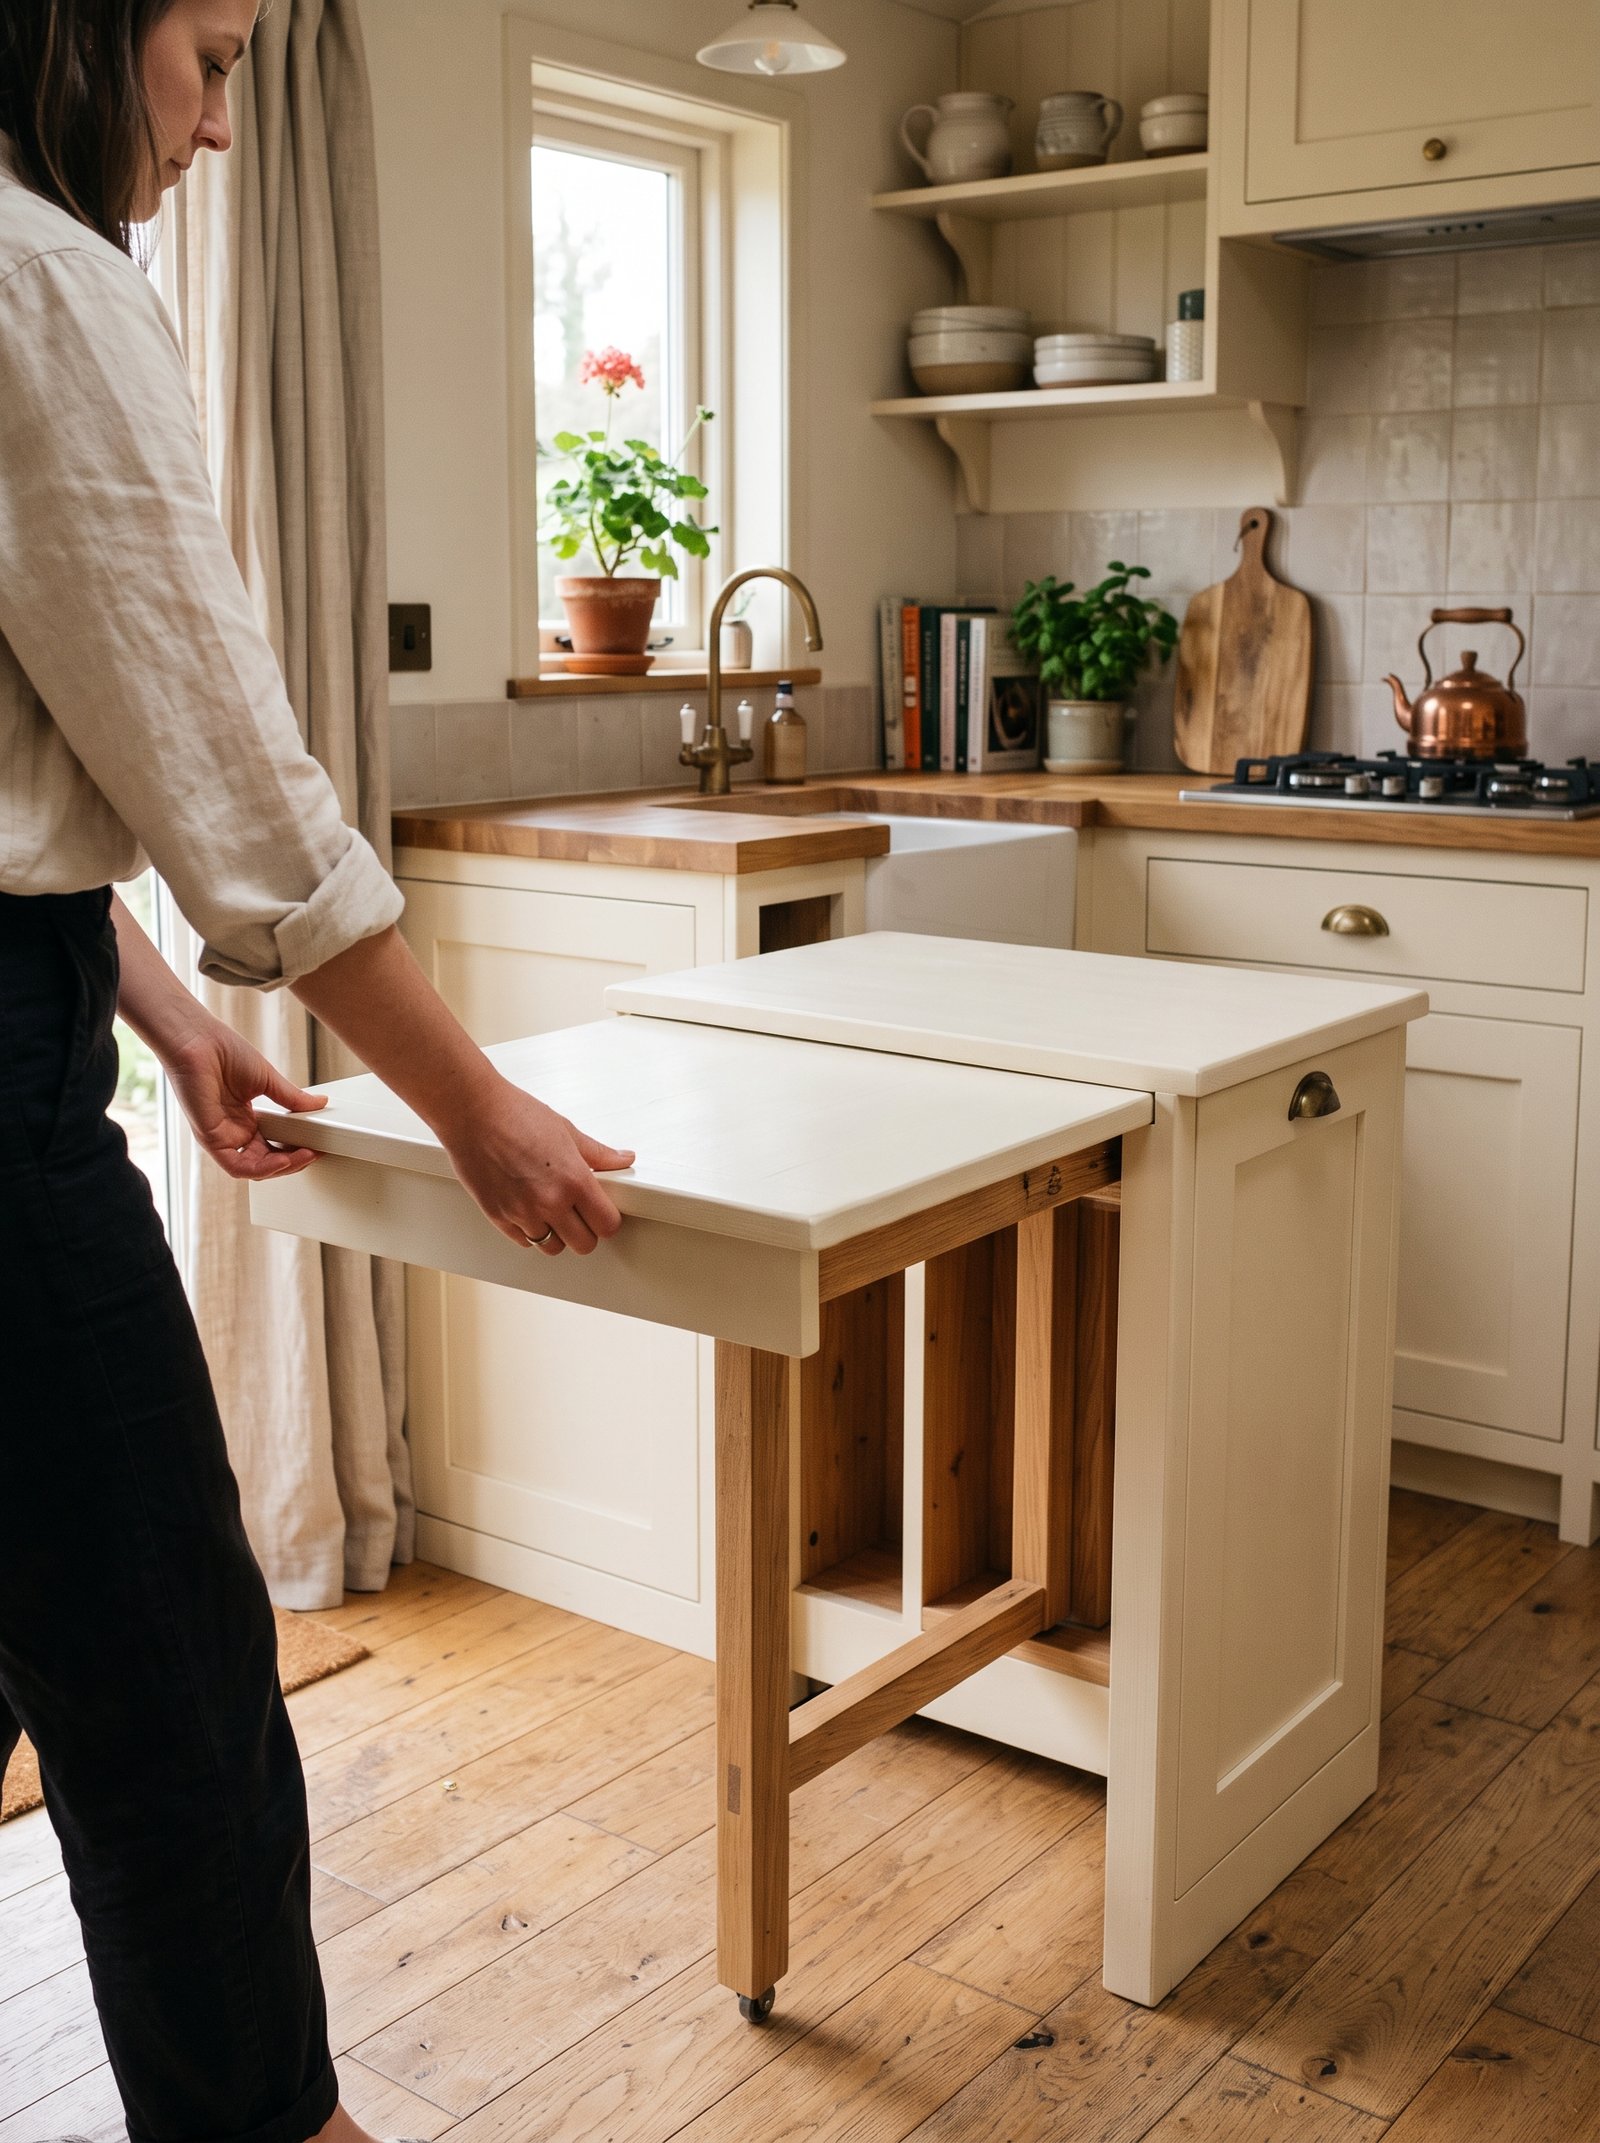
If a fold-down wall table (idea 8) is not enough, an extendable table that pulls out from under a cabinet is the tiny-kitchen “big-move” for dining. Some IKEA and custom-build kitchens include this.
IKEA’s NORDVIKEN, MÖRBYLÅNGA, and custom pull-out solutions from cabinet installers can add a hidden 3-foot table that pulls out for meals and slides back for cooking.
Cost: $150-500 depending on solution. Installation: moderate DIY or a cabinetmaker.
When pulled out, seats two to four for a full meal. When retracted, invisible and floor is clear.
This is the “dream” tiny kitchen upgrade. If you are renovating, budget for it — game-changing for how the space feels.
15. Add a zellige tile backsplash
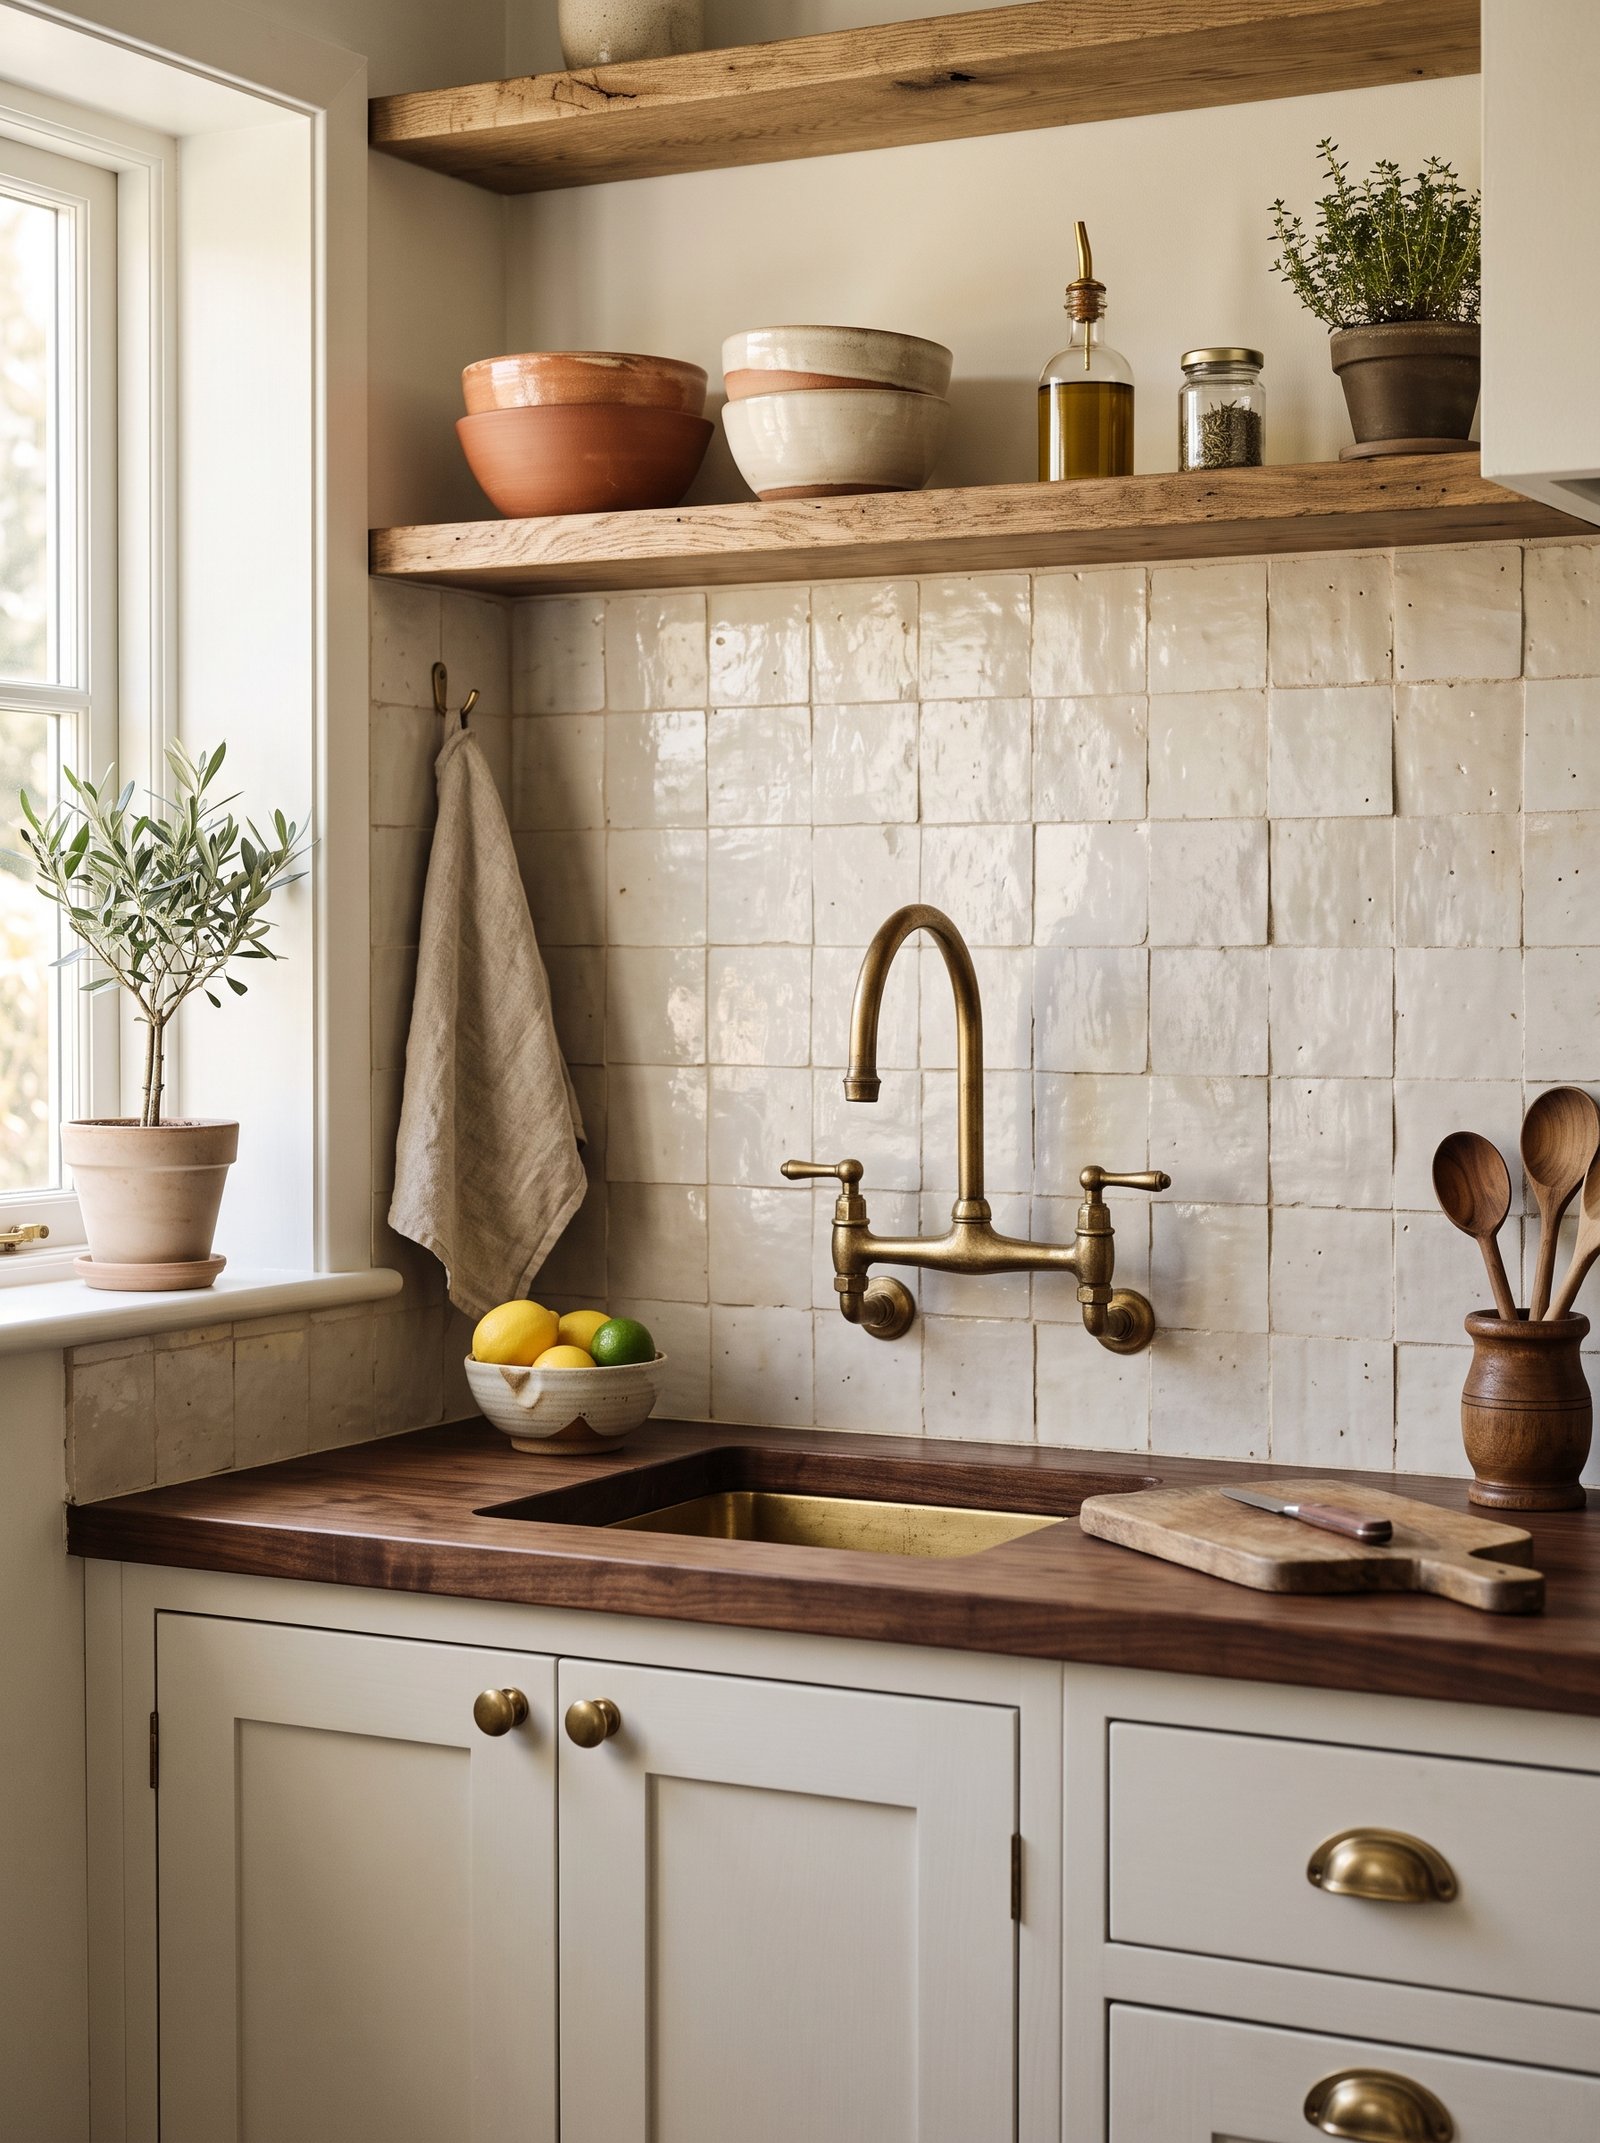
A handmade Moroccan zellige tile backsplash in warm cream, terracotta, or sage instantly transforms a builder-grade tiny kitchen into an editorial space. It catches light like nothing else.
Real zellige runs $40-80/sq ft; peel-and-stick zellige-look versions from Smart Tiles run $8-14 per 12-inch square (see rental guide).
Only the backsplash — the wall between counter and upper cabinets. Two square feet total for most tiny kitchens.
The uneven surface and matte glaze of zellige (or good peel-and-stick versions) means the wall catches morning light differently every hour. It is decor that changes throughout the day.
Even a small run of tile — behind the range only, for example — adds enormous character. Do not underestimate this upgrade.
16. Display cookbooks on one open shelf

A single open shelf holding six to eight cookbooks (spines out, standing) plus one plant is one of the most photographable moves in a tiny kitchen.
Mount the shelf 14-18 inches above the counter, or use one existing open shelf. Stand the cookbooks vertically with a heavy brass bookend on one side.
Curate — only the cookbooks you actually cook from, plus one or two that are visually beautiful. Do not stack; stand upright, spines showing.
Add one small trailing plant (pothos, philodendron) at one end. That is it. Do not add ceramics, jars, or random objects to a cookbook shelf.
Reading spines is part of what makes a kitchen feel personal. This one shelf tells your guests what you cook and love, without any words.
17. Install an apron-front (farmhouse) sink
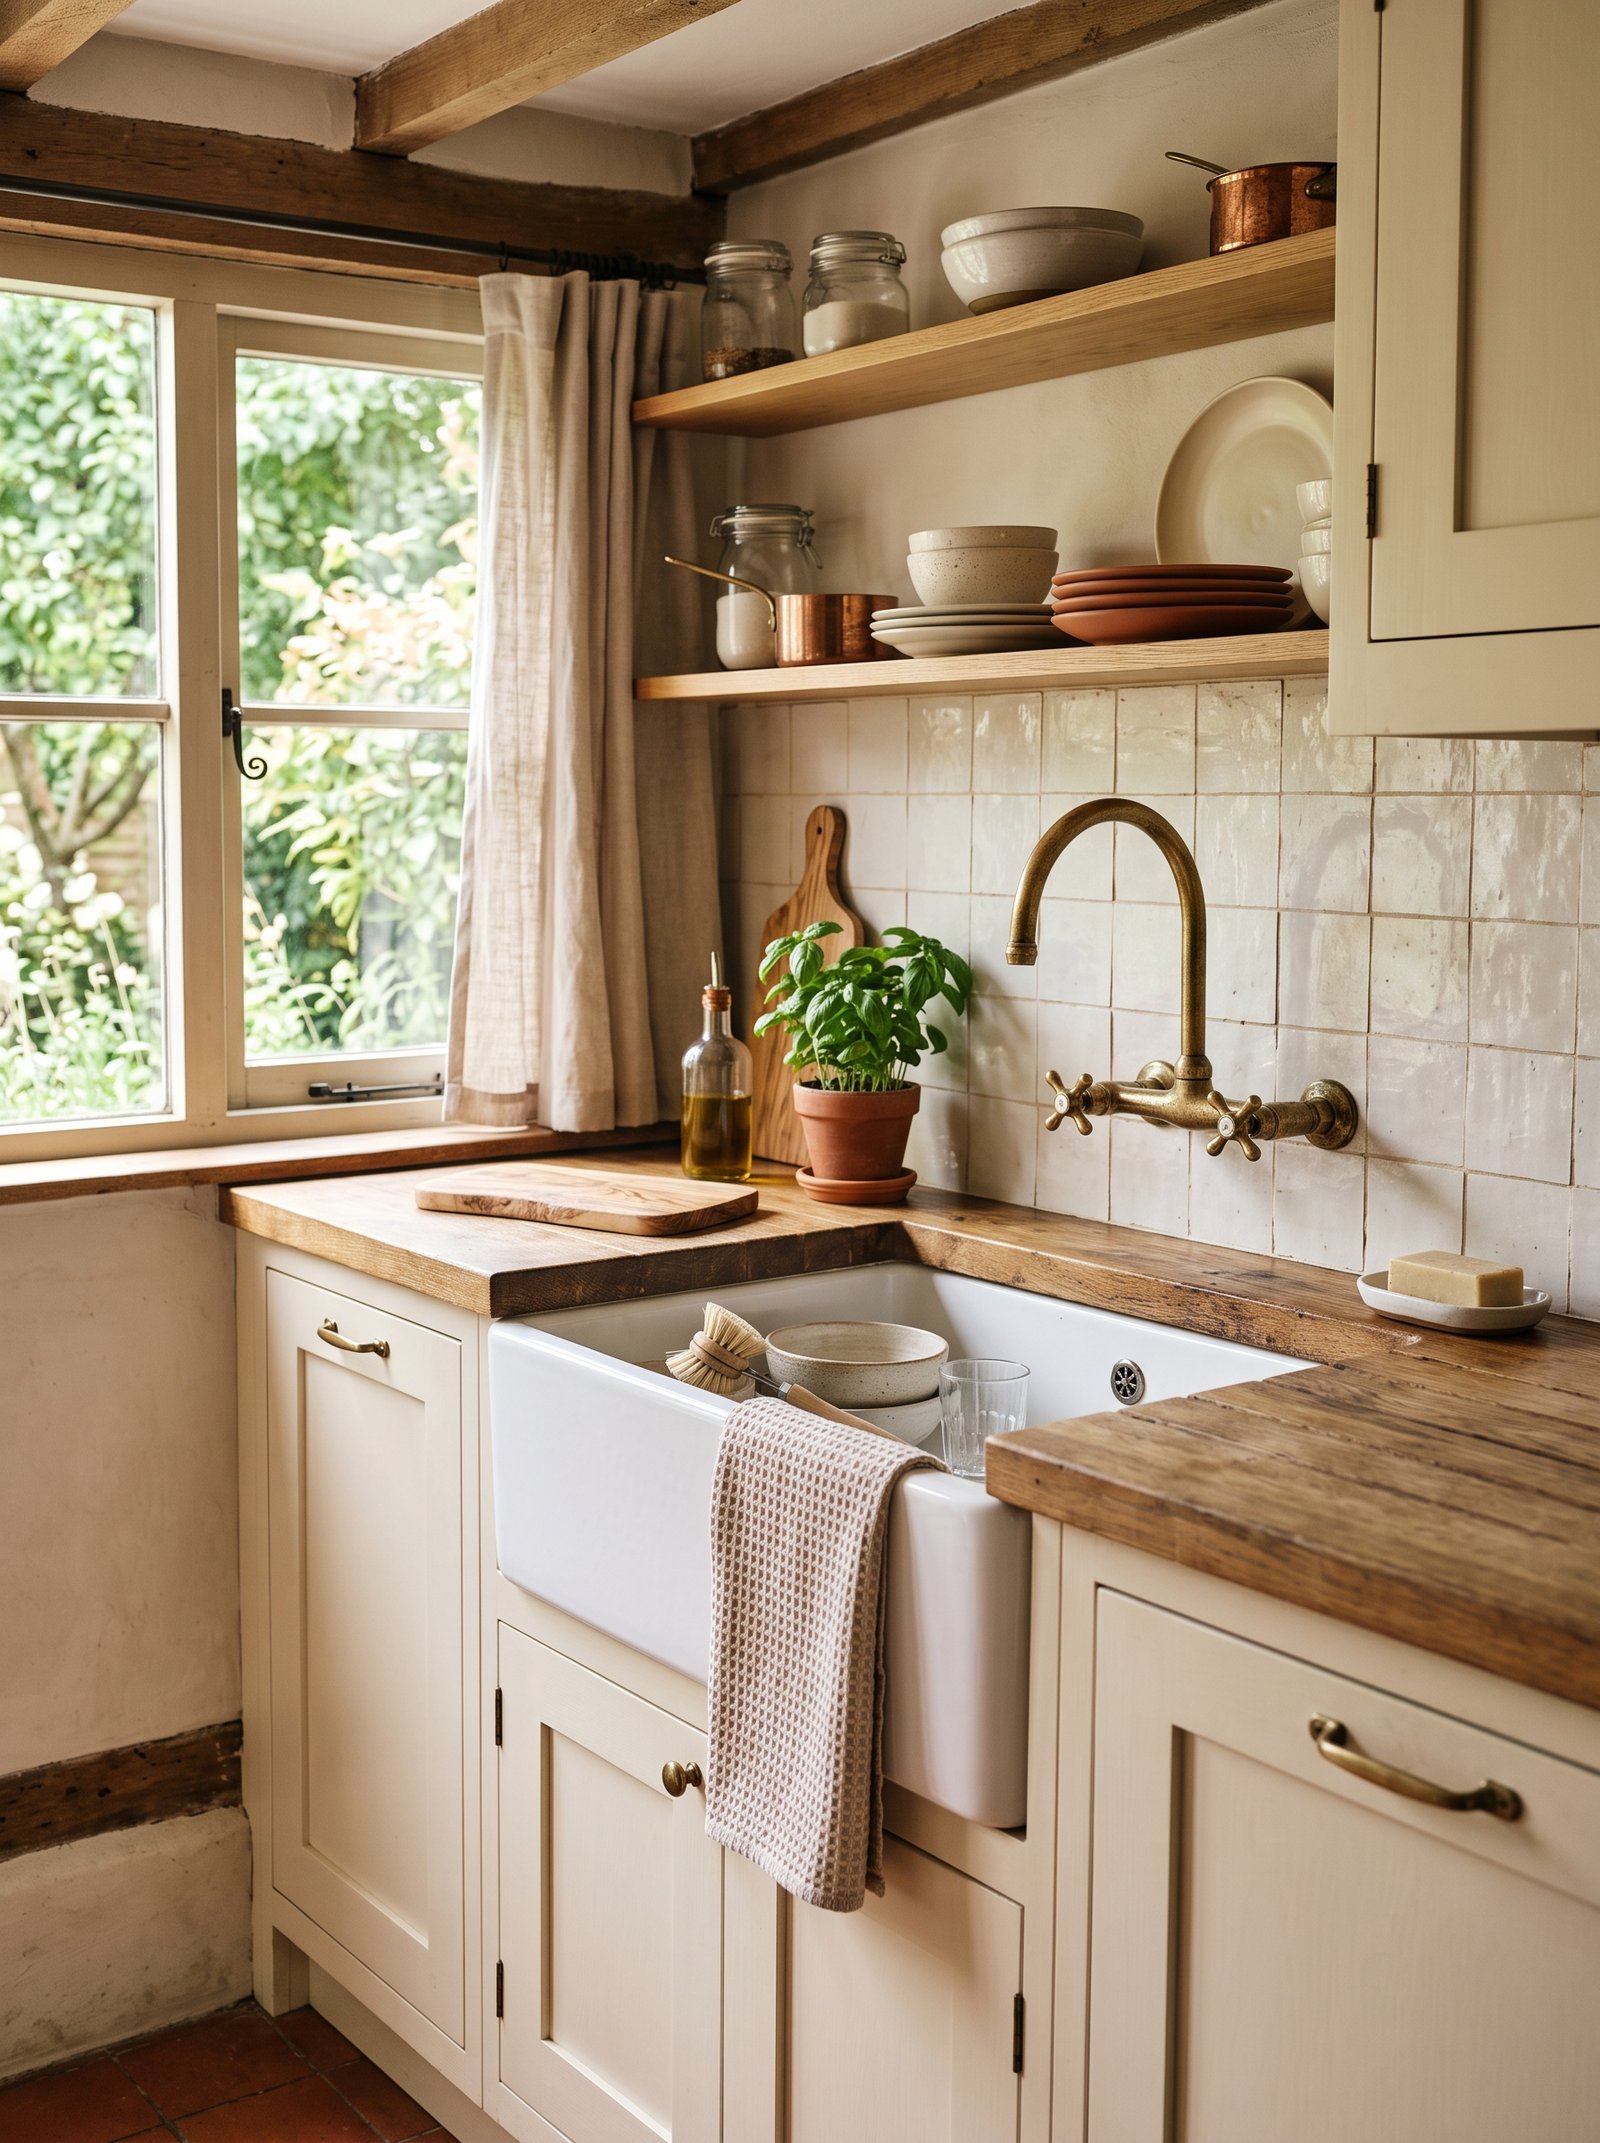
If you can renovate, an apron-front sink is the single most character-defining upgrade for a tiny kitchen. Fireclay in white or cream reads timeless.
Kohler, IKEA (HAVSEN), and Signature Hardware all sell apron sinks in 24-30 inch widths that fit most tiny kitchens. Cost: $200-700.
Installation requires modifying the cabinet frame — moderate for a cabinetmaker, harder for DIY. Plan for professional install unless you are experienced.
The larger single basin fits sheet pans and large pots that no divided sink handles. Daily function improves alongside aesthetics.
If you can only spend on one thing in the kitchen renovation, this is it. It transforms the entire visual weight of the room.
18. Add a brass pot rail above the stove
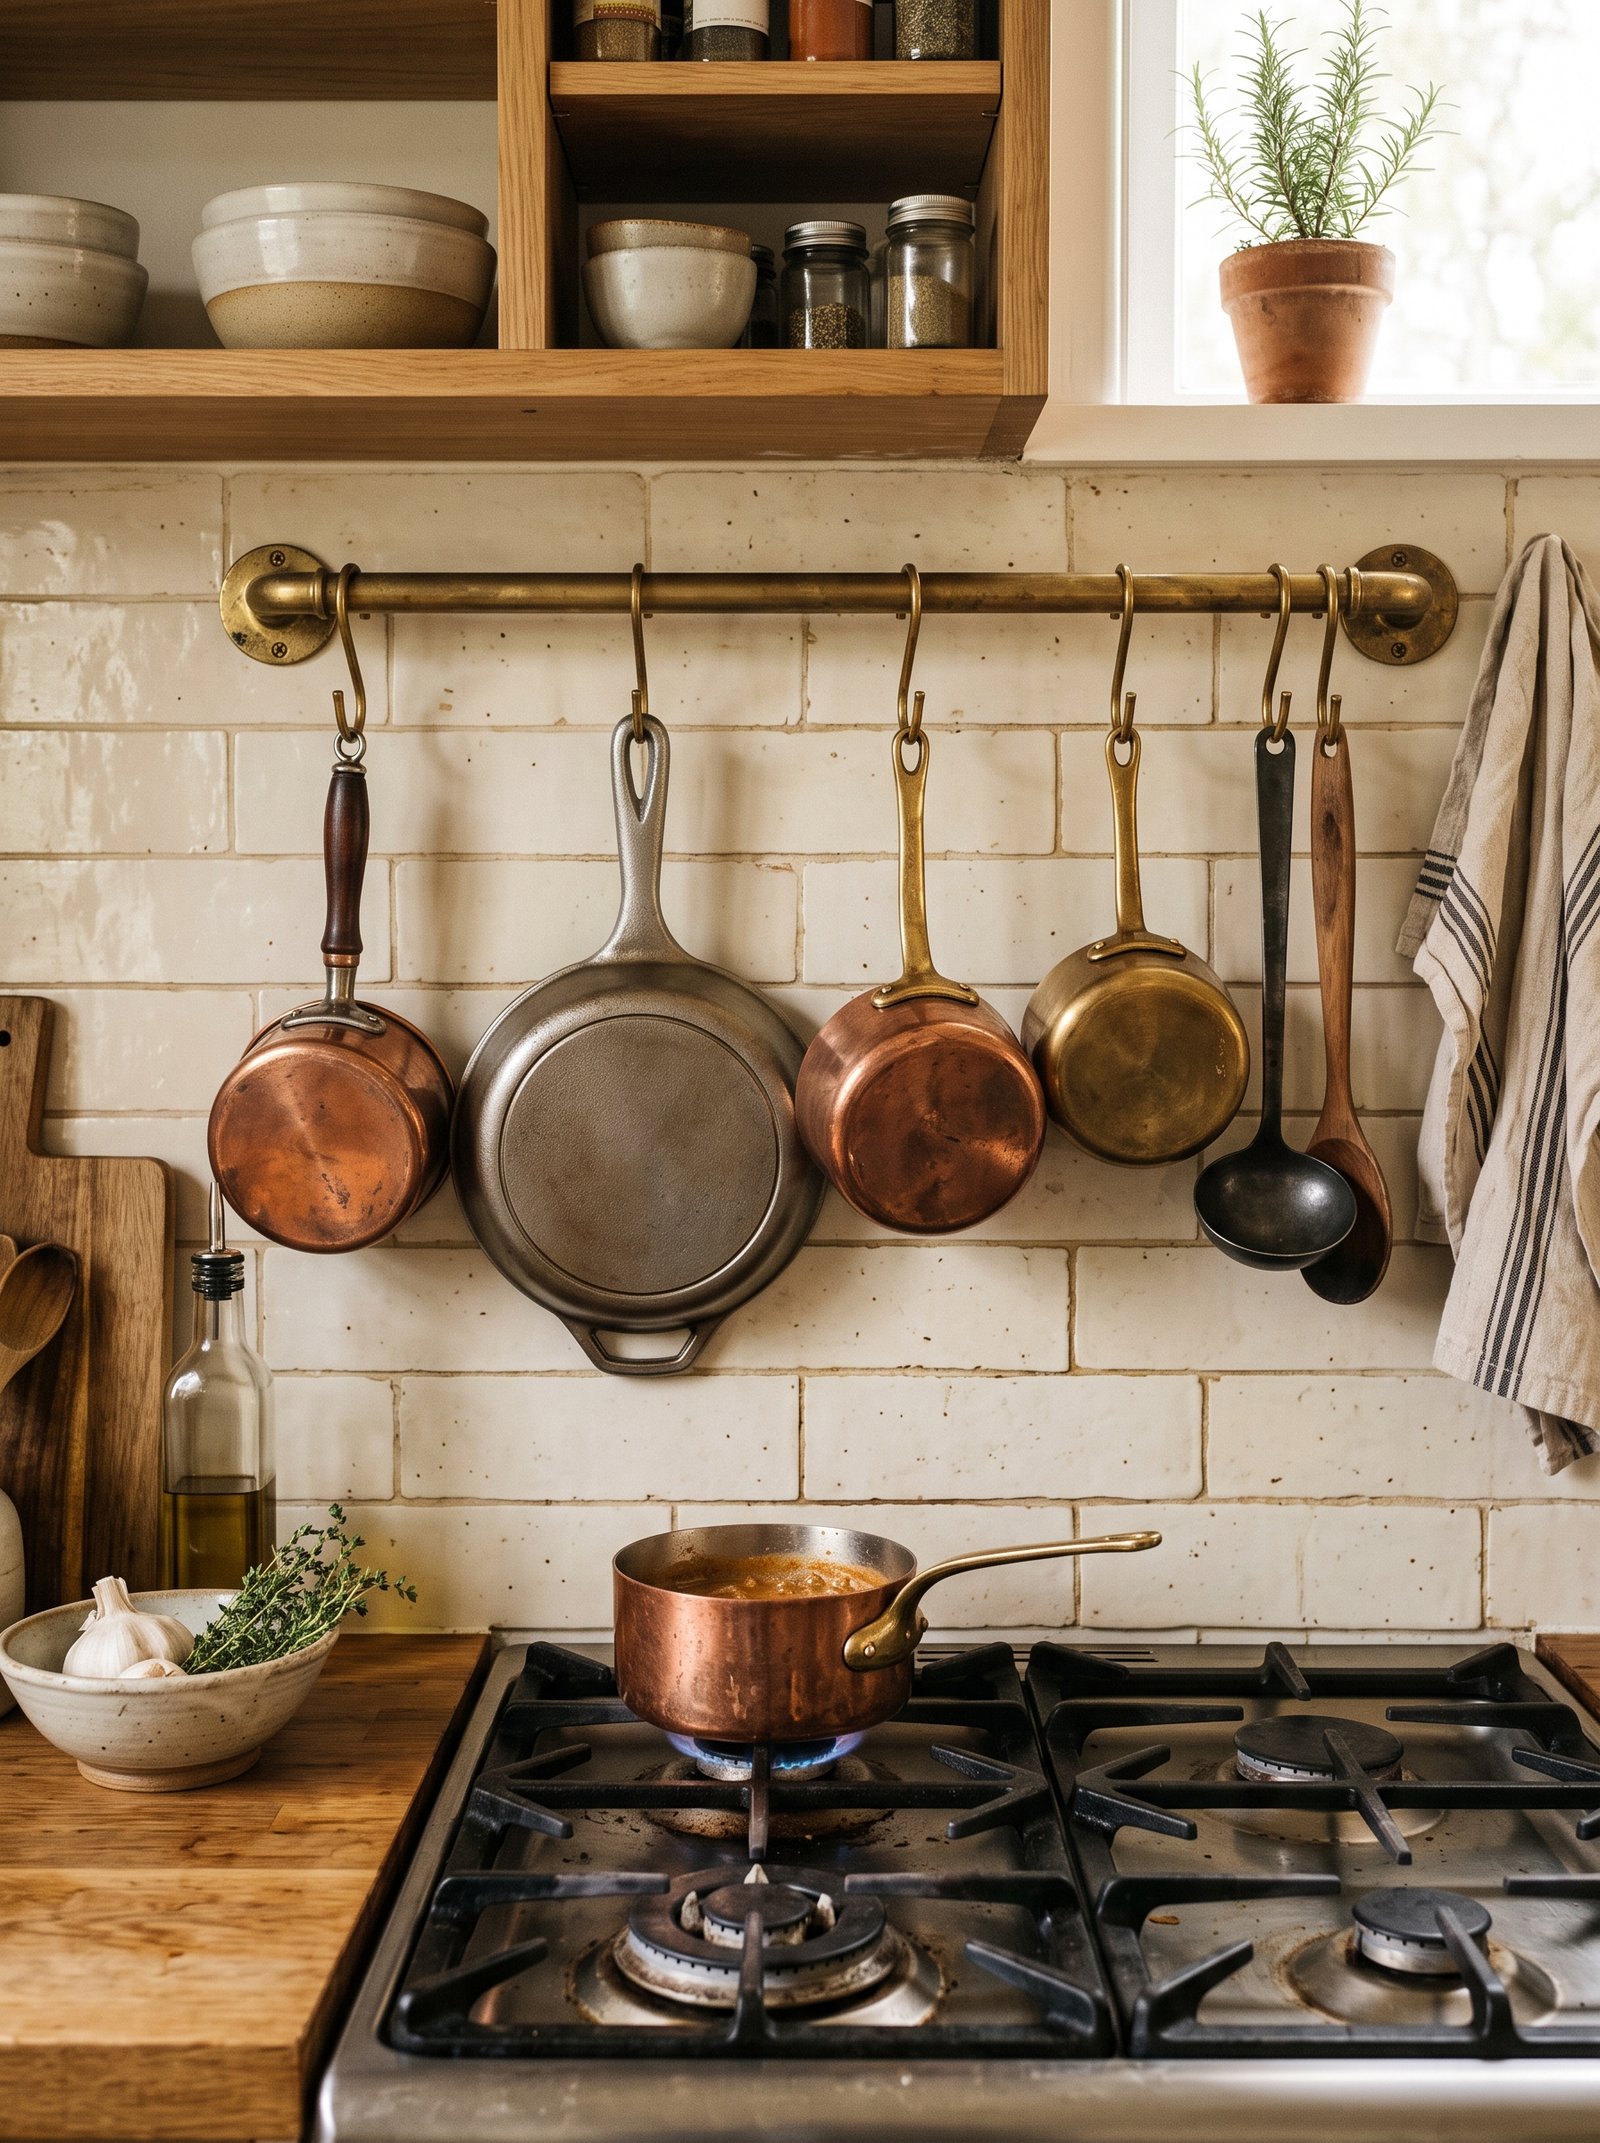
A wall-mount brass pot rail above the stove holds two or three pans on hooks, freeing an entire cabinet.
Rejuvenation, Anthropologie, and Etsy sell aged-brass rails in the $80-200 range. IKEA’s HULTARP is the cheap version at $30.
Mount 18-22 inches above the stove, into studs. Load with two or three pans max — a copper skillet, a cast-iron pan, one saucepan.
Pots become part of the styling. The visible copper or dark cast-iron on brass hooks reads chef-kitchen.
Landlord-friendly variants exist with adhesive mounts, but this one is worth the two holes if you can commit.
19. Replace kitchen curtains with a linen roman shade
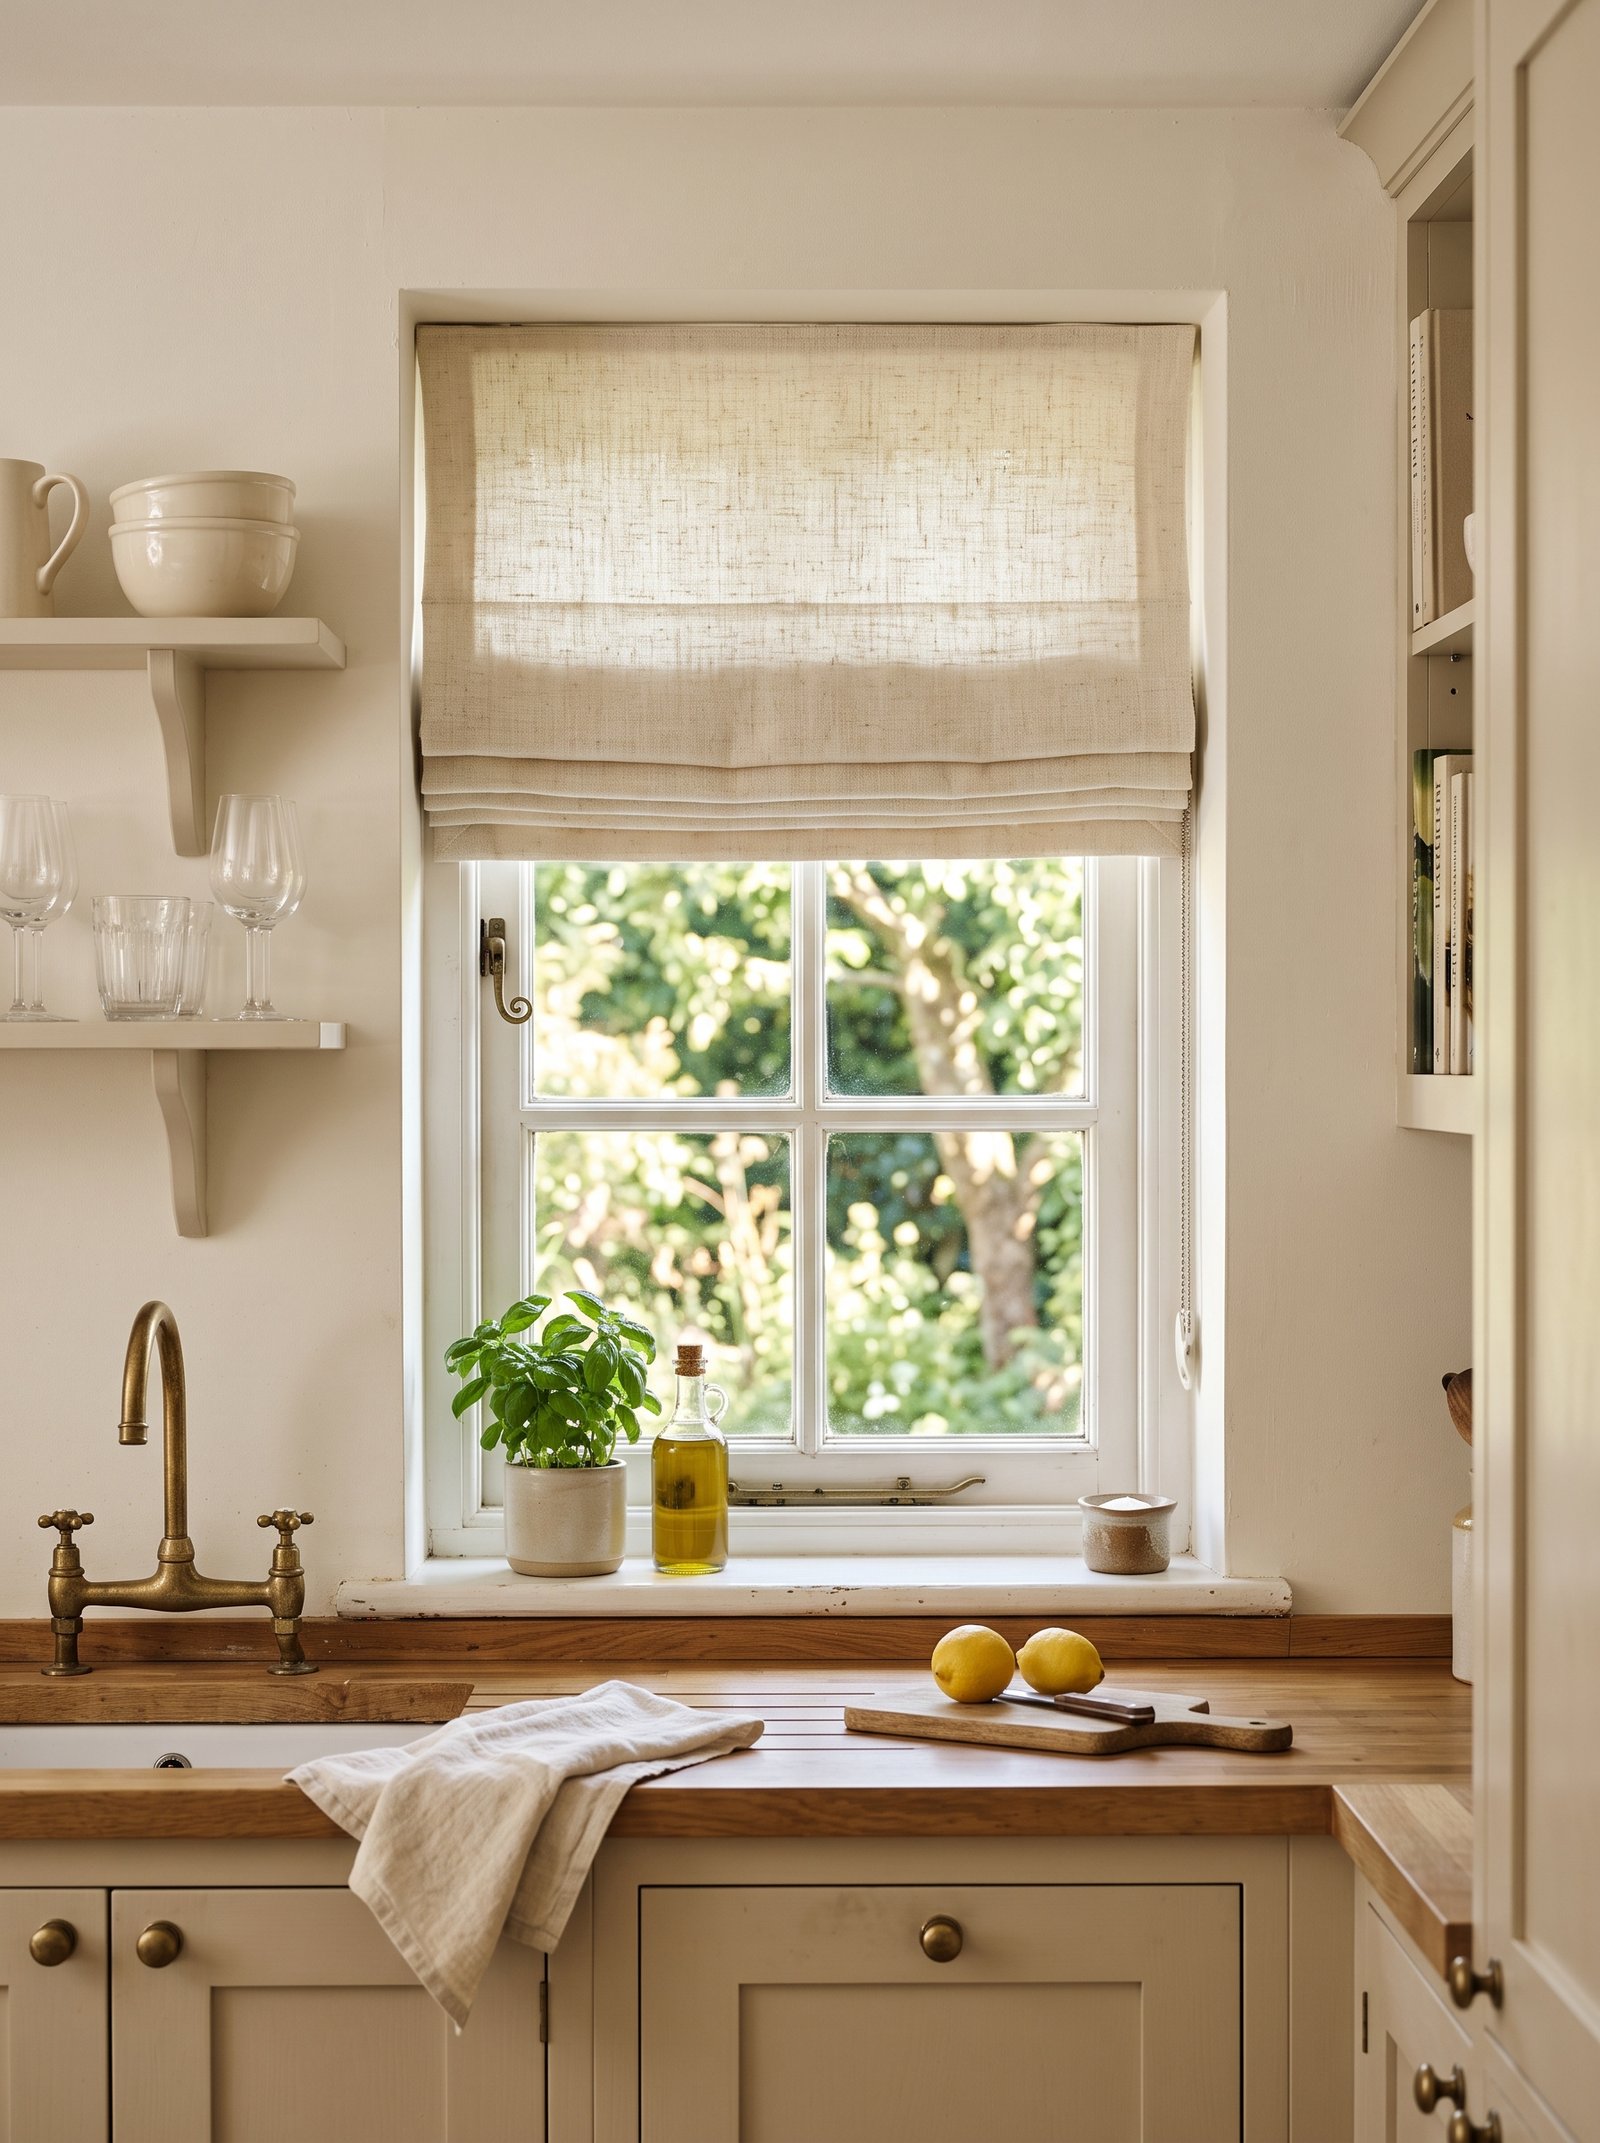
A single-panel linen roman shade over the window replaces frilly kitchen curtains (or plastic mini-blinds) and reads instantly more editorial.
Look for a natural flax or cream linen roman shade — Blindster, Levolor, and Everhem all sell custom-cut versions in the $80-250 range.
Mount inside the frame (cleaner) or outside the frame (fuller light control). Cordless is safer around cooking areas.
The shade filters daylight softly and reads architectural. The window stops competing with the rest of the kitchen for attention.
Match the linen tone to your dish towels and any curtain rods elsewhere in the space for a cohesive palette.
20. Add a bistro table for two in the corner

If the tiny kitchen has a corner (even 30 inches square), a small round bistro table with two chairs turns it into a real eating spot — the difference between “cooking-only room” and “kitchen you live in.”
Look for a 28-32 inch round table with two matching bentwood, oak, or metal chairs. IKEA’s DOCKSTA and TÄRENDÖ, Anthropologie’s Aitona, and vintage cafe sets all work.
Place in the corner, angled slightly toward the kitchen. Add one small vase with a fresh herb or dried stem.
A bistro corner turns coffee, quick lunches, and small dinners into a proper sit-down experience — vastly better than eating standing at the counter.
Even in a truly tiny kitchen, this footprint fits. If you can carve out 30 inches, do it. The mornings become better instantly.
21. Upgrade the cabinet hardware to aged brass
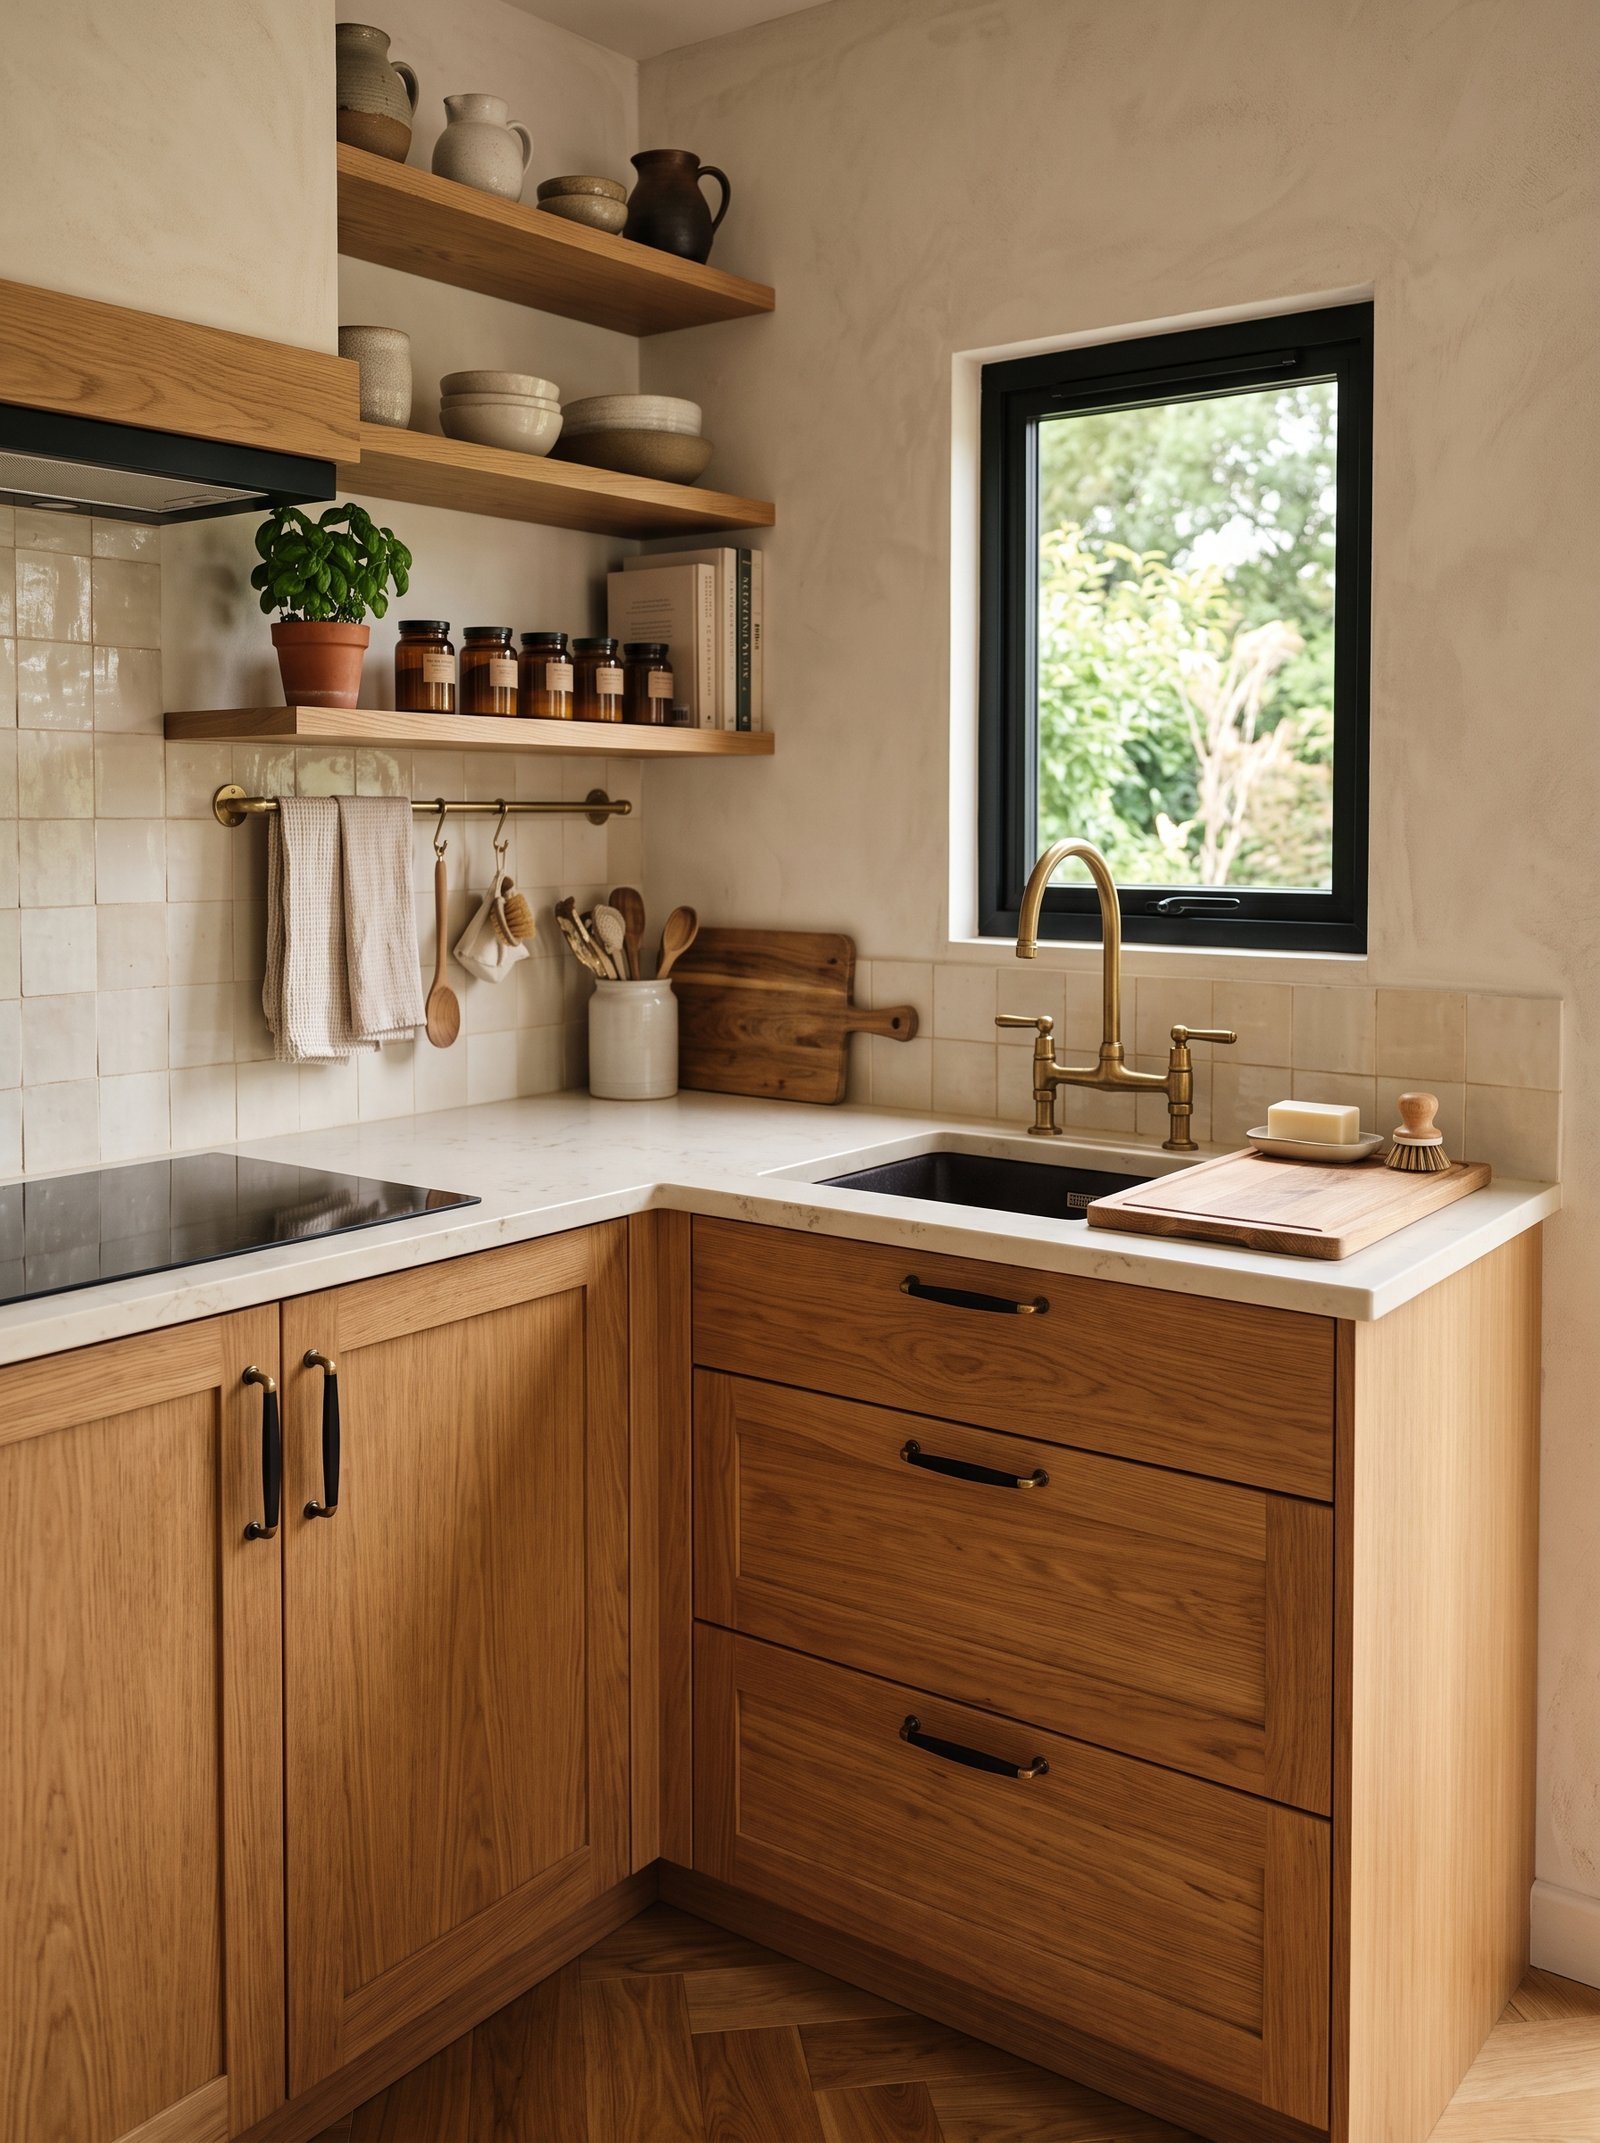
If you do only one thing in your kitchen, swap every cabinet knob and pull to aged brass. It transforms the read of the whole space in an afternoon for under $100.
Aged brass (not shiny/polished) hardware from Rejuvenation, House of Antique Hardware, or CB2 runs $8-25 per piece. Buy in bulk to match everything.
Measure existing screw holes on your cabinets — most are standard 3-inch or 3.75-inch centers. Match those measurements so you do not need to drill new holes.
Aged brass warms warm wood and softens cream cabinets. It reads timeless and only looks better with age. Chrome, brushed nickel, and plastic all read dated.
This is the highest-impact-per-dollar upgrade in the whole kitchen. Every hour of effort pays back in years of visual pleasure.
22. Style with olive branches in a stoneware pitcher

A single stoneware pitcher or vase with a fresh olive branch (or dried) on the counter is the single most transformative styling object in a small kitchen.
Cost: $6-12 for fresh olive branch (Trader Joe’s, farmers markets), $20-60 for the pitcher. Total under $80.
Change seasonally — olive branch spring/summer, eucalyptus fall, dried wheat winter. One item, four looks per year.
Place next to the coffee station, on the open shelf, or in the corner farthest from the stove. It becomes the visual anchor of the counter.
Nothing else you buy for the kitchen will do more visual work per dollar. This one styling object equals the impact of half a renovation.
23. Paint upper cabinets one shade lighter than lowers

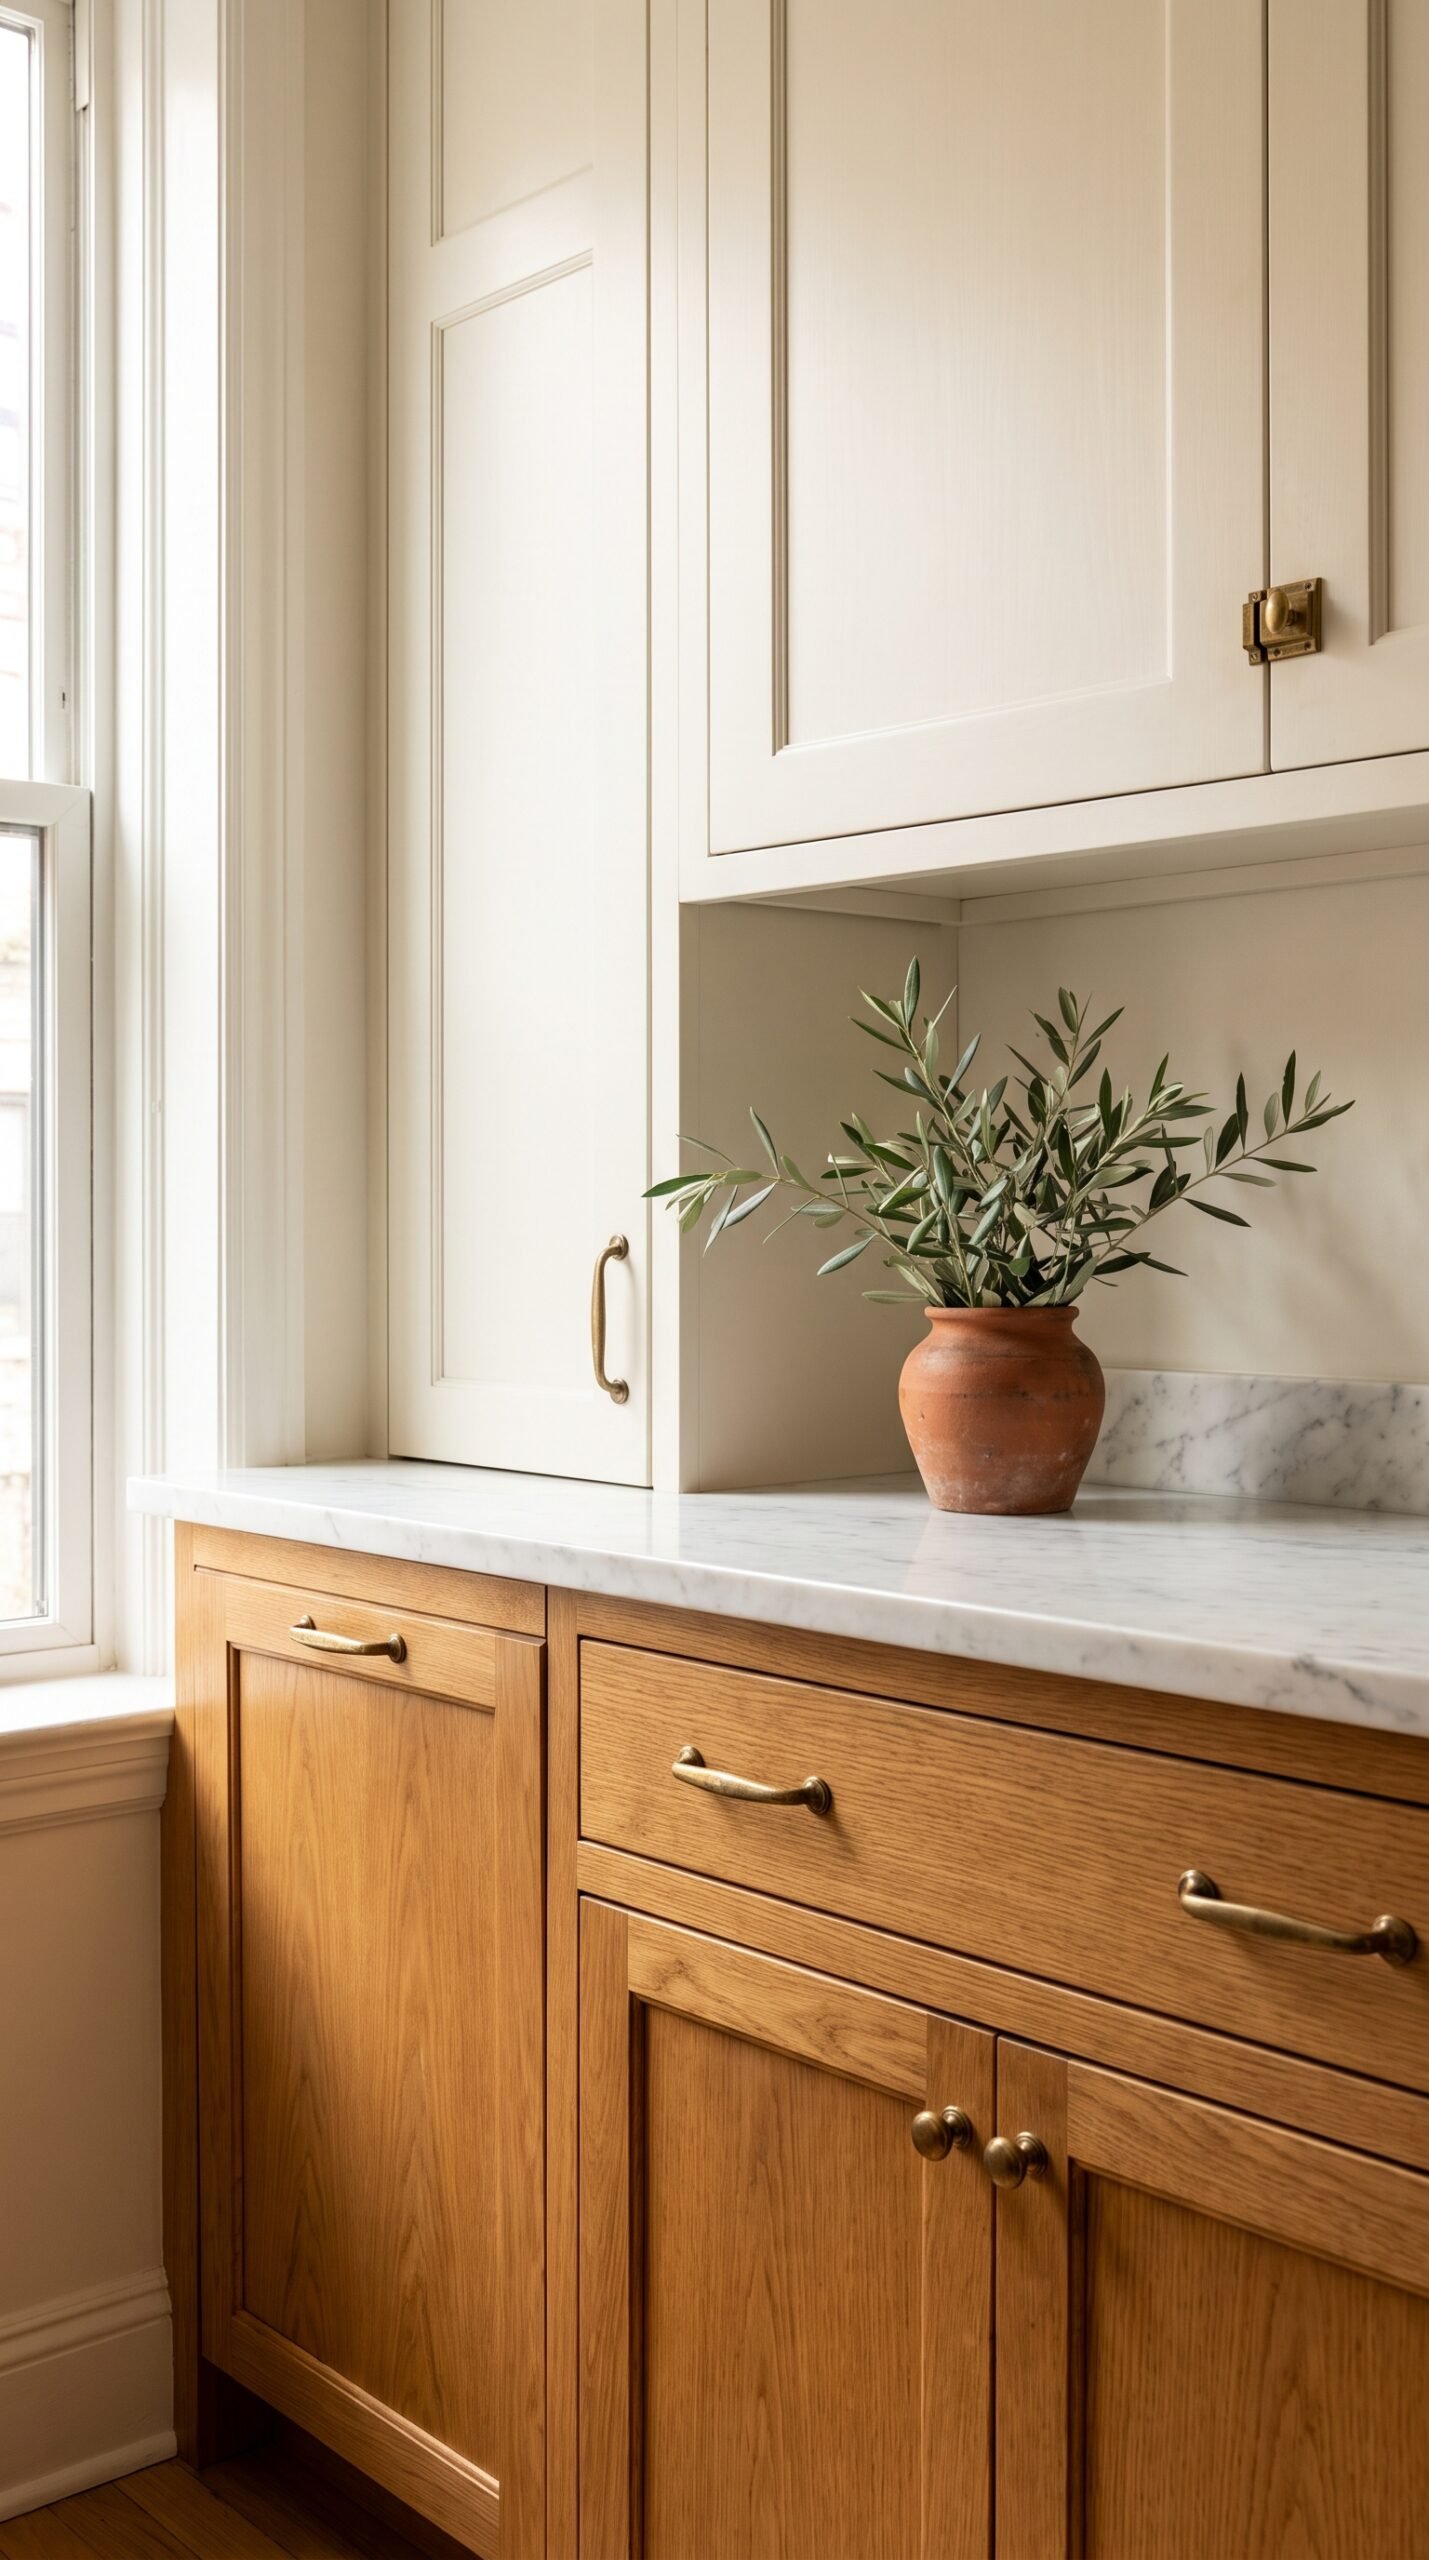
Two-tone cabinets — darker on the bottom, lighter on top — make a tiny kitchen feel taller and calmer. Warm oak or terracotta lowers with cream uppers is the classic pairing.
If you can paint, Sherwin-Williams Alabaster (uppers) and warm oak stain (lowers) reads timeless. If not, use peel-and-stick vinyl on uppers in cream matte finish.
Two-tone visually breaks up the wall of cabinets and adds interest. A single-tone tiny kitchen reads flat; two-tone reads designed.
The eye moves up the wall following the tonal shift, which visually lengthens the room. This is a proven small-space designer trick.
Even if you cannot paint permanently, a run of contact paper on just the uppers (cream matte) achieves 80% of the effect for $30 and comes off cleanly.
24. Install honed marble slab counters

If you renovate, honed (matte-finish) marble slab counters are the single most character-defining upgrade for a tiny kitchen. Warmer than polished, more forgiving of stains, and photograph beautifully.
Carrara or Cambria in honed finish runs $60-120/sq ft installed. In a tiny kitchen with 20 sq ft of counter, budget $1,200-2,400 total.
If you cannot renovate, marble contact paper (see rental guide, idea 8) is the peel-and-stick alternative that survives a year of daily use.
Honed marble develops a natural patina with use — small etch marks and stains that read “lived in” rather than “damaged.” Embrace the aging.
This is one of the biggest visual upgrades a kitchen can get. Even a small counter reads magazine-quality with real honed marble.
25. Put it all together — the fully styled tiny kitchen

You do not need to do all 25 ideas at once. Best tiny kitchens are built one change per weekend over three to six months.
Start with the free/cheap changes: swap all bulbs to 2700K, upgrade all hardware to aged brass (21), style with an olive branch pitcher (22), and add a magnetic knife strip (2). Total under $200. Visual change: enormous.
Next month, add the wall storage: open shelves (1), pot rail (18), pegboard (4), and door-mount spice rack (9). Total $150-300 depending on finishes.
From there, the bigger projects one at a time: zellige backsplash (15), rolling cart for extra counter (3), pantry cabinet (11), and if renovating, apron sink (17) and honed marble (24).
The photograph at the top of this idea is what six months of small, deliberate tiny-kitchen moves look like — a room that reads warm, editorial, and completely personal. “Tiny” and “beautiful” have never been opposites; they just needed the right moves.
The tiny kitchen mindset
The best tiny kitchens have less on the counter, more on the wall, and beautiful lighting after dark. Style is a byproduct of editing, not decoration. A kitchen with three items on the counter — an olive branch, a wooden cutting board, and a stoneware pitcher of spoons — reads magazine-perfect. The same kitchen with 20 items on the counter reads chaotic no matter what those items cost.
Own less. Style less. Light warmer. Cook more. The tiny kitchen becomes the room where you actually want to spend time.
Save this to your Pinterest tiny-kitchen board and share with anyone in a small apartment. New home-decor guide every day at Abodenest.
Keep reading — related decor guides
- → 30 Small Living Room Ideas
- → 25 Studio Apartment Layout Ideas
- → 30 Small Bedroom Ideas
- → 30 Small Bathroom Ideas Under $100
- → 25 Rental Kitchen Makeover Ideas
Take our 2-minute Decor Style Quiz
Answer 10 quick questions and discover whether you’re Modern Boho, Scandinavian Minimalist, Modern Farmhouse, Mediterranean, Japandi, or Classic Traditional — plus your color palette and 3 articles made for you.
Our interactive tools can help
Take the style quiz, generate a beige wall color palette, or calculate the perfect pillow stack for your bed — all free, all in under 2 minutes.